
“Hello World!” – This is likely the output of the first program you ever wrote when learning how to code. Setting up a device to stream temperature data is quickly becoming the de facto Internet of Things (IoT) “Hello World!” project. If printing “Hello World!” the first time was a long, frustrating task, you might have never written another program. Your first IoT project should only put a big ol’ smile on your face. This fun, easy project will introduce you to the wonderful world of IoT data streaming.
A video tutorial of this entire project can be found at:
Here are the supplies you will need:
- An internet connected Raspberry Pi or your single-board computer of choice.
- A DS18B20 temperature sensor (https://www.adafruit.com/product/381).
- A breadboard for wiring up a simple circuit (in the Adafruit Pi starter kit).
- A 4.7K to 10K resistor (also in the Adafruit Pi starter kit).

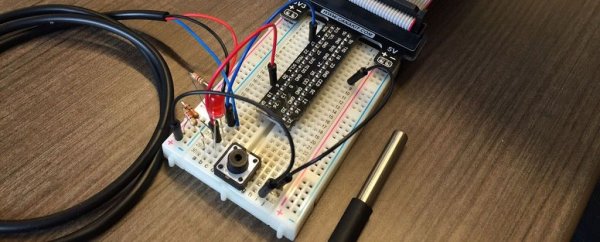
Step 1: Hardware Setup
The DS18B20 temperature sensor works well with the Raspberry Pi because it has a digital output, and the Pi has no on-board analog to digital convertors (ADC). Raspbian includes an interface to read the output of the sensor. We just have to write a little code to grab and parse out the temperature. Adafruit has a great tutorial here for using the DS18B20 that we are simply going to follow and modify to stream the temperature instead of just outputting it to the screen.
The hardware setup is simple. DS18B20 red wire to 3.3V. Black wire to GND. Blue wire to a pull-up resistor and to GPIO pin 4 of your Pi.
Step 2: Read the Temperature
To start the temperature sensor read interface we need to run two commands. Go to a command prompt on your Pi or SSH into your Pi. Type the following commands:
sudo modprobe w1-gpio
sudo modprobe w1-therm
The output of your temperature sensor is now being written to a file on your Pi. To find that file,
cd /sys/bus/w1/devices
In this directory, there will be a sub-directory that starts with “28-“. What comes after the “28-” is the serial number of your sensor. cd into that directory. Inside this directory, a file named w1_slave contains the output of your sensor. The contents of this file will look something like this:
a2 01 4b 46 7f ff 0e 10 d8 : crc=d8 YES
a2 01 4b 46 7f ff 0e 10 d8 t=26125
The number after “t=” is the number we want. This is the temperature in 1/1000 degrees Celsius (in the example above, the temperature is 26.125 C). We just need a simple program that reads this file and parses out that number. Lucky for us, Adafruit already created a Python script for us that does just this and outputs the temperature to the screen. Create a new file on your Pi (e.g. temperature.py) and copy-paste the following code in:
Run this script (“sudo python temperature.py”) to see the output of your temperature sensor on the screen.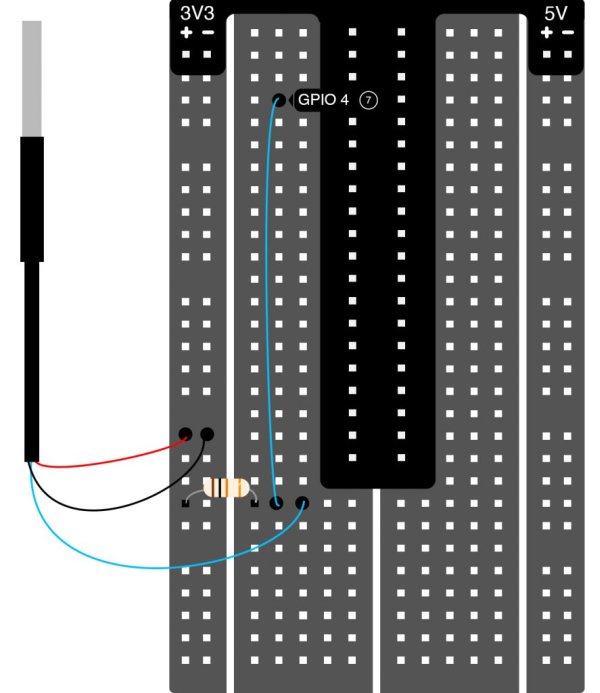
Step 3: Stream the Temperature
This is the point where we deviate from the Adafruit tutorial. Sending temperature to the screen is boring. We want to stream this data to somewhere we can see not only the current temperature but a history of captured temperature data (plus, who wants to “read” a bunch of temperatures as text; we want a pretty data visualization). First install the Initial State streamer to give our temperature measurements a destination to go to (go here for instructions on setting up the Initial State streamer; it is super easy and takes less than two minutes). We are going to modify the script above to stream the temperature to our Initial State account instead of outputting it to the screen. Here are the modifications:
You will need to copy+paste the client key associated with your Initial State account in between the quotes on line 6 where it says client_key = “”. You can find your client key under your account settings or on the landing page once you log into your account.
These are the modifications we just made:
- On line 4, we imported the Initial State data streamer module.
- On line 6, we created a new bucket called “Temperature Stream” and associated it with our account via our client key.
- On line 30, we modified the read_temp() function to only return the temperature in Celsius.
- On line 34, we converted the output of read_temp() to fahrenheit.
- On lines 35 and 36, we streamed the two temperatures.
For more detail: IoT 101 Project: Stream Temperature from your Raspberry Pi