Step 1: Materials
- iPhone
- Mac with xcode
- RFduino
- RFduino Battery Shield
- RFduino USB Shield
- Batteries
- Wires
- TIP120
- 2.2kOhm resistor
- Diode
- DC Motor
- Fan blade for DC Motor
Step 2: Circuitry
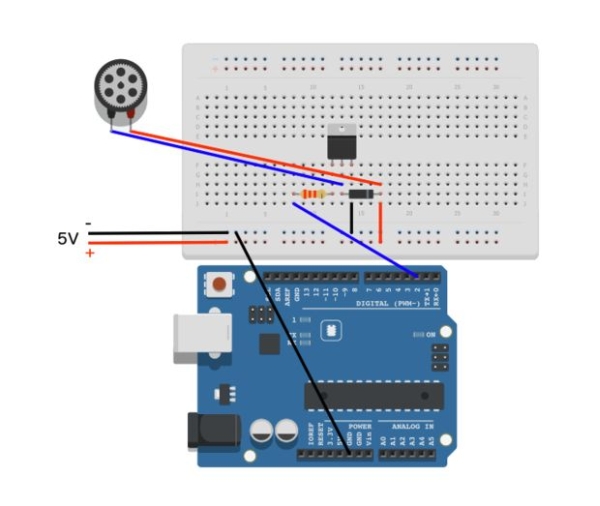
Setup the circuitry as shown in the diagram.
(If the servo is small enough, we could draw power from the RFduino instead.)
Step 3: RFduino DC Motor Code
https://github.com/nineten/RFduinoBLEDCMotor
The code itself is pretty simple. It listens to a connection via BLE and toggles the DC Motor speed based on the data it receives from that connection.
Biggest thing to note about the sample code is that it is set to output to pin 2.
Download the code and upload it onto the RFduino via the USB Shield.
Step 4: IOS App
https://github.com/nineten/RFduinoBLEControl
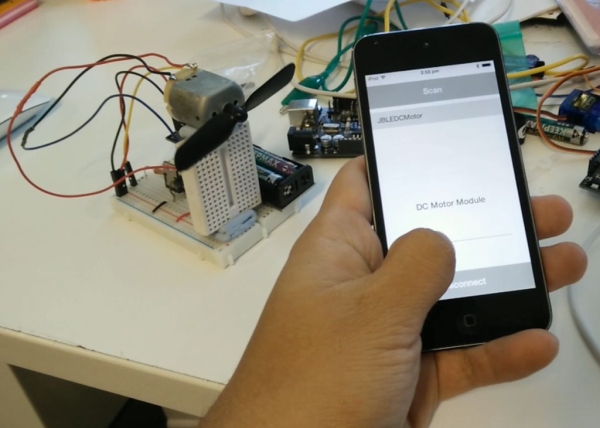
The iOS app connects to the RFduino via BLE and sends commands to control the fan speed.
Download the code and upload to your iPhone via xcode.
Run the App and scan for device. Ensure the RFduino is connected to the battery shield and turned on.
Connect to the device and now you can toggle the fan speed remotely!
For more detail: IOT iPhone Controlled Mini Fan


