
The aim of this tutorial is to use the ROS Noetic on a Raspberry Pi to test the performance of the low‐cost RPLiDAR A1M8 by Slamtec.
The Robot Operating System (ROS) is a set of software libraries and tools used to build robotic systems and applications. The current long term service version of ROS is ROS Noetic. It is the 13th and latest distribution release of Robot Operating System (ROS1). It was released on May 23, 2020 by Open Robotics, the developer of ROS. It will be supported for 5 years until May 2025. In the future, all the official effort will be put into developing ROS 2, which is a major rewrite of the ROS framework.
ROS Noetic is mainly developed for Ubuntu 20.04, so Ubuntu is the recommended Linux OS for installation. This tutorial explains how to install ROS Noetic from source on the Raspberry Pi OS and how to connect your LiDAR to Raspberry Pi 4 Model B using ROS Noetic middleware. It's not hard, but it will take a long time to compile everything.
What’s new in ROS Noetic?
- Noetic is the only ROS 1 release officially supporting Python 3.
- The ROS Melodic and Kinetic were shipped with OpenCV 3.x, but in Noetic we are getting 4.x version.
- ROS Noetic is using Gazebo 11 now, compared to Gazebo 9 in ROS Melodic.
- The CMake version has bumped to 3.16.3 from 3.10.2 in Ubuntu 18.04.
If you want to compare the version upgrades of each ROS package, please check the following link.
RPLidar A1M8
As you maybe know, Light Detection and Ranging (LiDAR) operates in the same way as ultrasonic rangefinders with laser pulse is used instead of sound waves. The most critical drawback of LiDAR sensors is their high-cost. However, there are an increasing number of low‐cost options that are already on the market. An example of such is the RPLiDAR A1M8 developed by Slamtec with its 360 degree 2D laser scanner (LIDAR) solution.
RPLIDAR is a low-cost LIDAR sensor suitable for indoor robotic SLAM(Simultaneous localization and mapping) application. It can be used in the other applications such as:
- General robot navigation and localization
- Obstacle avoidance
- Environment scanning and 3D modeling
RPLIDAR A1 Development Kit contains:
- RPLIDAR A1
- USB Adapter with communication cable
- Documentation
The Micro-USB cable does not included.
So, let's get started.
Prerequisites
Before you get started with this tutorial, you will need the following:
- Raspberry Pi 4 Model B
- RPLidar A1M8.
- Laptop or standalone PC
- High-performance microSD card: 32GB minimum
- MicroSD to SD adapter
Step 1 – Preparation of Raspberry Pi
Make sure you have the latest version of the Raspbian operating system You can download the latest version from the official Raspberry website.
After installing the OS, we will check whether the latest drivers are installed with the following commands.
sudo apt-get updateThis command updates the list of available packages and their versions.
sudo apt-get upgradeOnce complete, you can reboot your PI by typing the following command.
sudo rebootAfter the initial setup, we need to do two things — add swap memory and run in headless mode.
Step 2 – Increasing Raspberry Pi Swap memory
If you own a Raspberry Pi you know that the RAM is limited. This should be no problem, because the SWAP is easy to enlarge with Raspbian. This means that when all of the Raspberry Pi’s RAM is exhausted, it can start using the swap file as memory instead. Raspbian ships with a default swap file with a size of 100 MB and in this case we are simply increasing that to 2048 MB.
To stop the operating system from using the current swap file, run the following command.
sudo dphys-swapfile swapoffNext, we need to modify the swap file configuration file. We can open this file using nano by using the command below.
sudo nano /etc/dphys-swapfileWithin this config file, find the following line of text.
CONF_SWAPSIZE=100To enable the Raspberry Pi swap file and set it to a size of 2 GB (2044 MB), change the following command:
CONF_SWAPSIZE=2048Whatever size you set, you must have that space available on your SD card. We can now re-initialize the Raspberry Pi’s swap file by running the command below.
sudo dphys-swapfile setupYou will see the below output:
want /var/swap=2048MByte, checking existing: deleting wrong size file (1073741824), generating swapfile ... of 2048MBytesTo start the operating systems with new swap file, run the following command.
sudo dphys-swapfile swaponYou now have enough SWAP so that it should be no problem if one day the RAM may be overloaded.
Step 3 – Run heedlessly using VNC server
By headless mode, it means that the Raspberry Pi is running without a monitor keyboard and a mouse.
Enable the VNC server on your Raspberry Pi using raspi-config command. Enter sudo raspi–config in a terminal window.
sudo raspi-config- Select Interfacing Options.
- Navigate to and select SSH.
- Choose Yes.
- Select Ok.
- Choose Finish.
To restart your Raspberry Pi, all you need to do is run the command below.
sudo reboot nowAfter reboot run connect to your pi via VNC Viewer. You can then verify the amount of memory + swap by issuing the following command:
free -hThe output should look like:
total        used        free      shared  buff/cache   available
Mem:          3.8Gi       192Mi       3.4Gi        60Mi       250Mi      3.5Gi
Swap:         2.0Gi          0B       2.0Gi
Step 4 – Set up ROS Noetic repo on Raspberry Pi 4
Setup your computer to accept software from packages.ros.org.
sudo sh -c 'echo "deb http://packages.ros.org/ros/ubuntu $(lsb_release -sc) main" > /etc/apt/sources.list.d/ros-latest.list'If the command succeeds, you won’t see any output. However, you can double check if the repo is added using the cat command:
cat /etc/apt/sources.list.d/ros-latest.listYou will see the following output:
deb http://packages.ros.org/ros/ubuntu buster mainStep 5 – Set up official ROS keys
Next, we will add the official ROS key to download authentic ROS Noetic packages to your Debian Buster. Adding the key in important to avoid man-in-middle attack.
By running the following command, we will download the key from Ubuntu’s keyserver into the trusted set of keys:
sudo apt-key adv --keyserver 'hkp://keyserver.ubuntu.com:80' --recv-key C1CF6E31E6BADE8868B172B4F42ED6FBAB17C654The key is successfully added if you will see output like below, starting with Executing.
Executing: /tmp/apt-key-gpghome.kCZSaT5Kyw/gpg.1.sh --keyserver hkp://keyserver.ubuntu.com:80 --recv-key C1CF6E31E6BADE8868B172B4F42ED6FBAB17C654

gpg: key F42ED6FBAB17C654: public key "Open Robotics <[email protected]>" imported
gpg: Total number processed: 1
gpg:               imported: 1
Step 6 – Install build dependencies on Raspberry Pi 4
Now we are finally ready to install Noetic on your Raspberry Pi 4. First, make sure your Debian package index is up-to-date:
sudo apt updateNow pick how much of ROS you would like to install.
- Desktop-Full Install: : Everything in Desktop plus 2D/3D simulators and 2D/3D perception packages
- Desktop Install: Everything in ROS-Base plus tools like rqt and rviz
- ROS-Base: (Bare Bones) ROS packaging, build, and communication libraries. No GUI tools.
There are even more packages available in ROS. You can always install a specific package directly. To find available packages, see ROS Index or use:
apt search ros-noeticWe will first install all dependencies:
sudo apt-get install -y python-rosdep python-rosinstall-generator python-wstool python-rosinstall build-essential cmakeThe dependencies here include ROS specific tools (rosdep, rosintall_generator, and ws_tool) and some essential build tools like make and cmake.
Step 7 – Set up ROS Noetic dependency sources/repos
First, we initialize rosdep, which is a ROS tool for installing dependencies:
sudo rosdep initYou should see the following output after it’s done:
Wrote /etc/ros/rosdep/sources.list.d/20-default.list
Recommended: please run

	rosdep update
Next we run rosdep update to fetch package information from the repos that are just initialized.
rosdep updateYou should see the following output:
reading in sources list data from /etc/ros/rosdep/sources.list.d
Hit https://raw.githubusercontent.com/ros/rosdistro/master/rosdep/osx-homebrew.yaml
Hit https://raw.githubusercontent.com/ros/rosdistro/master/rosdep/base.yaml
Hit https://raw.githubusercontent.com/ros/rosdistro/master/rosdep/python.yaml
Hit https://raw.githubusercontent.com/ros/rosdistro/master/rosdep/ruby.yaml
Hit https://raw.githubusercontent.com/ros/rosdistro/master/releases/fuerte.yaml
Query rosdistro index https://raw.githubusercontent.com/ros/rosdistro/master/index-v4.yaml
Skip end-of-life distro "ardent"
Skip end-of-life distro "bouncy"
Skip end-of-life distro "crystal"
Add distro "dashing"
Add distro "eloquent"
Add distro "foxy"
Skip end-of-life distro "groovy"
Skip end-of-life distro "hydro"
Skip end-of-life distro "indigo"
Skip end-of-life distro "jade"
Add distro "kinetic"
Skip end-of-life distro "lunar"
Add distro "melodic"
Add distro "noetic"
Add distro "rolling"
updated cache in /home/pi/.ros/rosdep/sources.cache
Step 8 – Install ROS Noetic dependencies
Before we begin, we will need to create a catkin workspace by:
mkdir ~/ros_catkin_ws
cd ~/ros_catkin_ws
Then we use rosinstall_generator to generate a list of Noetic dependencies for different Noetic variants, such as desktop-full, desktop, and ros_comm. I’ll go with installing Desktop Install here.
rosinstall_generator desktop --rosdistro noetic --deps --wet-only --tar > noetic-desktop-wet.rosinstallThere won’t be any output if it succeeds.
Next we will use the wstool to fetch all the remote repos:
wstool init src noetic-desktop-wet.rosinstallThe command will take a few minutes to download all of the core ROS packages into the src folder. If wstool init fails or is interrupted, you can resume the download by running:
wstool update -j8 -t srcThen before compiling the packages in the src folder, we install all system dependencies using rosdepinstall:
rosdep install -y --from-paths src --ignore-src --rosdistro noetic -r --os=debian:busterYou should see the following output at the end :
#All required rosdeps installed successfullyStep 9 – Compiling Noetic packages on Raspberry Pi 4
Once it has completed downloading the packages and resolving the dependencies you are ready to build the catkin packages.
sudo src/catkin/bin/catkin_make_isolated --install -DCMAKE_BUILD_TYPE=Release --install-space /opt/ros/noetic -j2 -DPYTHON_EXECUTABLE=/usr/bin/python3It takes around 1 hour for compilation process. You should see the following output:
<== Finished processing package [184 of 184]: 'xacro'Now ROS Noetic should be installed on your Raspberry Pi 4.
Step 10 – Verify Noetic installation on Raspberry Pi 4
First, let’s source the bash.
echo "source /opt/ros/noetic/setup.bash" >> ~/.bashrc
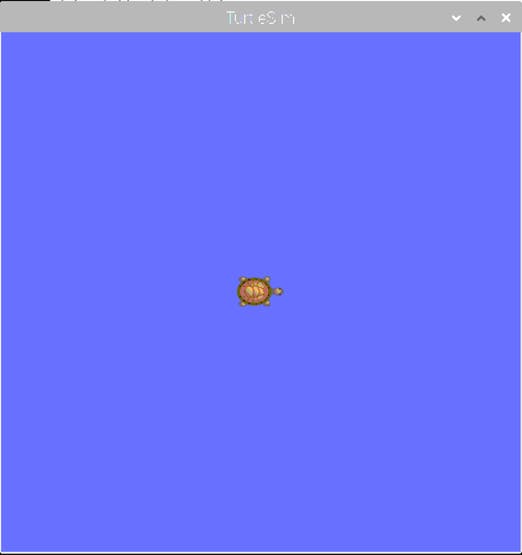
source ~/.bashrcLet’s try some ROS commands to make sure the installation has finished successfully. A simple way to check the functionality of ROS is to use the turtlesim simulator that is part of the ROS installation.
Open a new terminal and run the following command:
roscoreStart a new terminal prompt and run the below command in the terminal:
rosrun turtlesim turtlesim_nodeIf everything is correct, we will get the following screen:
- Open up yet another terminal window. Run the following:
rosrun turtlesim turtle_teleop_key- Click the mouse in the last container window you created so that it has focus. Use the arrow keys to move the turtle around the screen
If everything goes right, you will obtain the following result on current terminal:
- Press Ctrl-C to stop roscore, etc.
Congratulations! We are done with the ROS installation.
Step 11 – Connect your RPLiDAR to Raspberry Pi
Connect your RPLiDAR to Raspberry Pi 4 Model B using Micro USB Cable. Flashing green light indicates normal activity of sensor.
Once you have connected the RPLiDAR to your Raspberry Pi, type the following command line to check the permissions:
Open your terminal and run the following command.
ls -l /dev | grep ttyUSBOutput of the following command must be:
crw-rw---- 1 root dialout 188, 0 Jan 3 14:59 ttyUSBRun below command to change permission:
sudo chmod 666 /dev/ttyUSB0Once the permissions are configured, you have to download and install the RPLIDAR ROS packages.
Step 12 – Install RPLIDAR ROS Package
Let’s create a separate workspace for other packages, that are not part of core ROS.
Create the catkin root and source folders:
mkdir -p ~/catkin_ws/src
cd ~/catkin_ws/
Configure the catkin workspace
catkin_init_workspaceand source it to bashrc:
echo "source $HOME/catkin_ws/devel/setup.bash" >> ~/.bashrcOkay, we’re ready to start installing RPLIDAR ROS package. Go to the source folder of the catkin workspace that you just created:
cd srcClone the ROS node for the Lidar in the catkin workspace.
sudo git clone https://github.com/Slamtec/rplidar_ros.gitAfter that build with catkin.
cd ~/catkin_ws/Run catkin_make to compile your catkin workspace.
catkin_makeThen run to source the environment with your current terminal. Don't close the terminal.
source devel/setup.bashand launch RPILIDAR launch file
roslaunch rplidar_ros rplidar.launchAn instance of Rviz will then open with a map of the RPLIDAR’s surroundings.
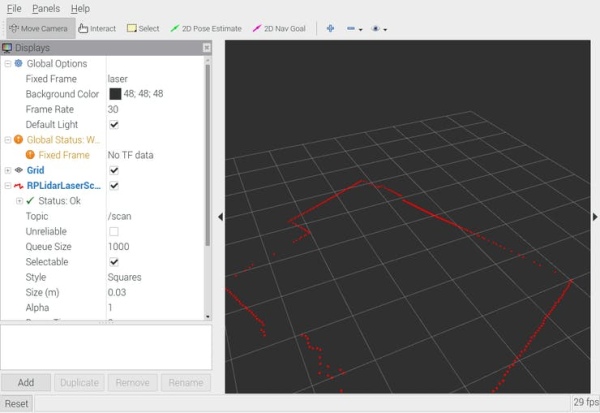
The view from the laser scanner will be marked in red. The laser scanner is positioned at the center of the grid, it has a range of roughly 15cm to 6 meters, so you’ll be able to see everything around it on its scanning plane within that range.
ROS is a good framework in which we made the map around the RPLIDAR. It is a great tool for build robot software systems which can be useful to a variety of hardware platforms, research settings, and runtime requirements. This work served to prove that the low‐cost RPLiDAR is a suitable solution for implementing SLAM.
That’s it for today! You have ROS Noetic installed and ready to use!
I hope you found this guide useful and thanks for reading. If you have any questions or feedback? Leave a comment below. Stay tuned!
Resources
- ROS Noetic Ninjemys
- Installing and Configuring Your ROS Environment
- ROS Noetic: What You Need to Know
- Installing ROS Melodic on Raspberry Pi 4 and RPLIDAR A1M8
- How to Install ROS Melodic on Ubuntu 18.04
- How to Install ROS Noetic on Raspberry Pi 4
- LiDAR integration with ROS: quickstart guide and projects ideas
- From unboxing RPLIDAR to running in ROS in 10 minutes flat
Source: LiDAR integration with ROS Noetic on Raspberry Pi OS