
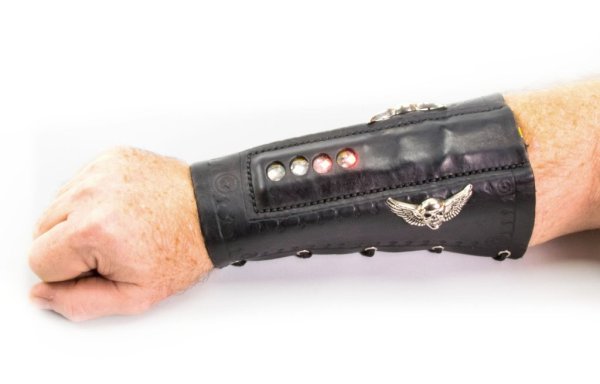
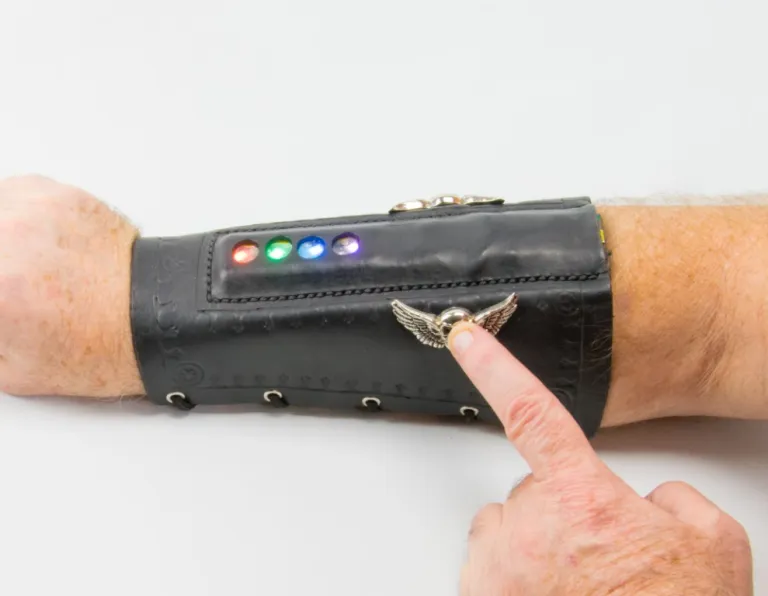
Wearable microcontrollers have found their way into cosplay, fashion, and daily wear but are usually textile based. In this Skill Builder we’ll explore techniques for including leather in your wearables by examining my forearm bracer project, which uses a built-in Adafruit Gemma and RGB NeoPixels that change color patterns with a simple capacitive touch of the medallion on its side. Read along and learn some key tips to working with leather and electronics, both on their own, and combined into one project.
Leather is a favorite material of crafters, cosplayers, and makers for good reasons. It is moldable, cuttable, colorable, and durable. It can be riveted, stitched, glued, and laced. As a substrate for a wearable project it has some very desirable qualities and a few gotchas. The particulars will vary with different efforts, but the general themes are relevant across most projects.
CIRCUIT ACCESS
With any wearables project, but especially one based in leather, how to access the electronics is a key planning decision. When it’s time to recharge the battery or reprogram the microcontroller, will you want to remove the items or deal with them in place? A design that keeps things internal typically allows for less wear and tear on the wiring because you can firmly secure and protect the components. Easily accessed or removable components generally make reuse, reprogramming, and recharging a much simpler option.
For me, recharging occurs much more often than reprogramming. So my bracer project provides in-place charging without removing the battery or unplugging it from the microcontroller. Reprogramming does require removing the circuit from the leather to get access to the USB port, but is still possible with the approach I’m taking.
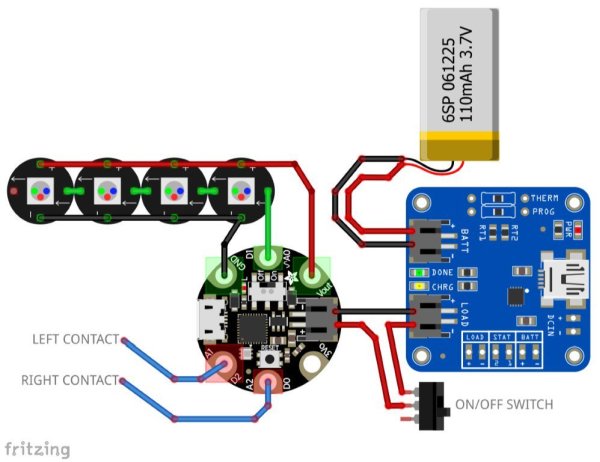
The components I chose to include are a charger board, the Gemma M0, a LiPoly battery and four Flora RGB LEDs
I also wanted to take advantage of a feature of the Gemma that has interesting opportunities when working with leather: capacitive input. Three pads on the Gemma allow sensing a touch to the pad, or something wired to the pad. This is a single wire input (no ground connection).
Leather projects often include rivets, snaps, and decorative conchos (metal ornaments) that are all potential candidates for discrete capacitive inputs. I used two conchos that will be wired to the Gemma as a trigger for the lights. Test before you commit to using an object — it’s difficult to tell which may be conductive without an ohm-meter or trying them in your circuit.
SELECTING A LEATHER
Leather comes in different thicknesses and types. Most leatherworkers tend to use vegetable-tanned (“veg tan”) leather so that they can stamp and dye their projects. “Chrome tan” leather more closely resembles cloth, so I chose veg tan, which I dyed with an all-in-one dye and acrylic finish once constructed. Experienced wearable makers will recognize these issues; they are all present in textile-based projects but are often exacerbated by the differences when working with leather.
MAKE A SABOT
Because leather can abrade wires and solder points, I’ve become enthusiastic about 3D printing carriers for components that I can insert under or into the leather. Protective outer shells to ease fitting are sometimes referred to as sabots. The sabot I designed and printed holds my components.
I made models of each of them to allow practice fitting in Fusion 360. If you don’t have a 3D printer, you could alternatively handcraft a sabot out of papier-mâché or a low-temp moldable plastic like ShapeLock, or even carve something from wood.
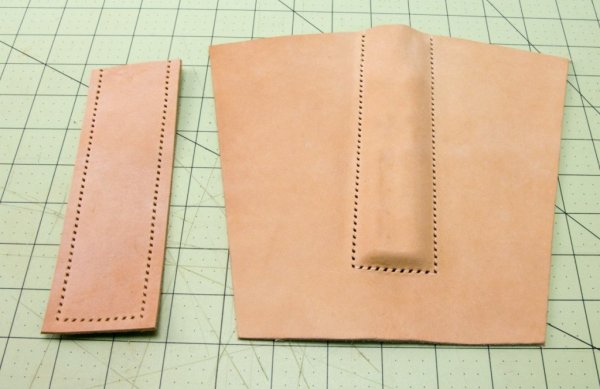
Many textile wearable projects stitch the microcontroller directly to the cloth. This is possible with leather, but harder due to the differences in stitching (see “Learn the Double-Stitch Technique to Handsew Leather” at makezine.com/2017/01/23/handstitch-leather). I’ve found that making pockets to hold my components, especially when encased in a sabot, is the most durable and flexible approach. I’m combining a molded piece of leather on one side of the pocket and a flat piece of leather on the other. I’ll stitch around them to form the pocket for the electronics.
CREATE YOUR PATTERN
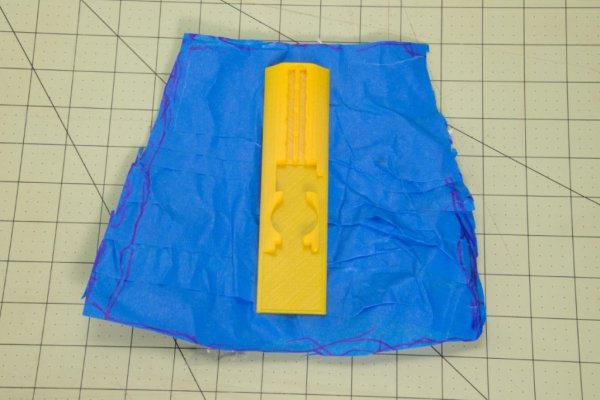
Leather bracers are surprisingly easy to make. Typically they’re a single piece of leather, but they need to taper to fit the forearm. There are many ways to make a pattern for cutting leather; I like the simple method of wrapping the target area in plastic wrap then covering that with masking tape. I use a marker to identify the shape to cut and where the components are going to be placed.
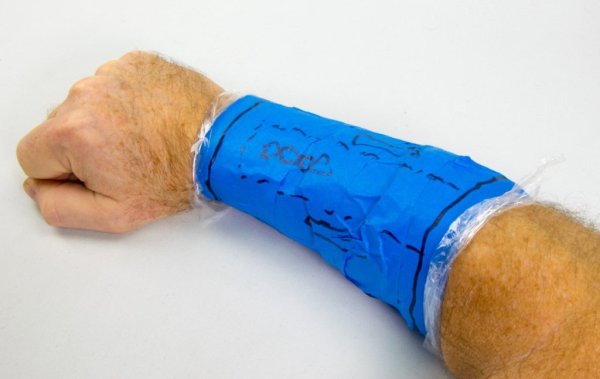
After I cut the tape off and trim it to its marked boundaries, I can place my 3D printed sabot to make sure everything is sized properly.
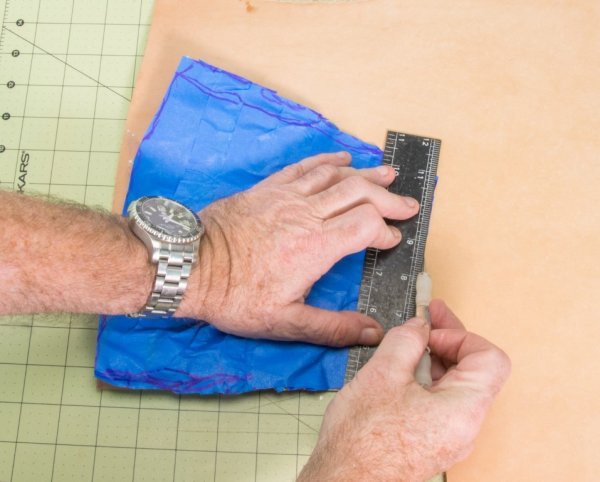
I use a ball tip stylus to transfer the pattern to leather and make the desired cuts.
Don’t worry if the pattern won’t lay perfectly flat. Unlike cloth that needs darts or other techniques to create contours, we can stretch and mold leather.
SHAPE AND STITCH
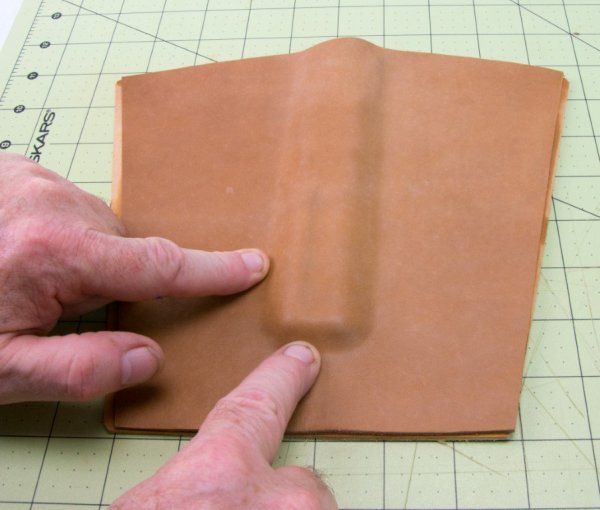
Leather is easy to mold. I used my 3D print as the model to mold over, and I cut a second pattern to be sure I kept reasonably close to the original outline of the bracer while stretching the leather over the model. Soak your leather (I used 3-4oz.,) in water and place it over the model, stretching it down around the edges with your finger or a blunt object.
If you leave “scratches,” you can rub them out with your finger.
Once the leather dries, it will harden and serve as a protective shell around the model. Be careful when molding items, as leather will shrink a bit when drying and then, with time and wear, generally loosen up again. The challenge is that it can be very difficult to get your sabot in and out of the bracer if the fit is too tight. You can re-wet and stretch the leather or better yet, print a version of your sabot that’s 5–10% larger than the one you’ll use with components, and use that to mold the leather.
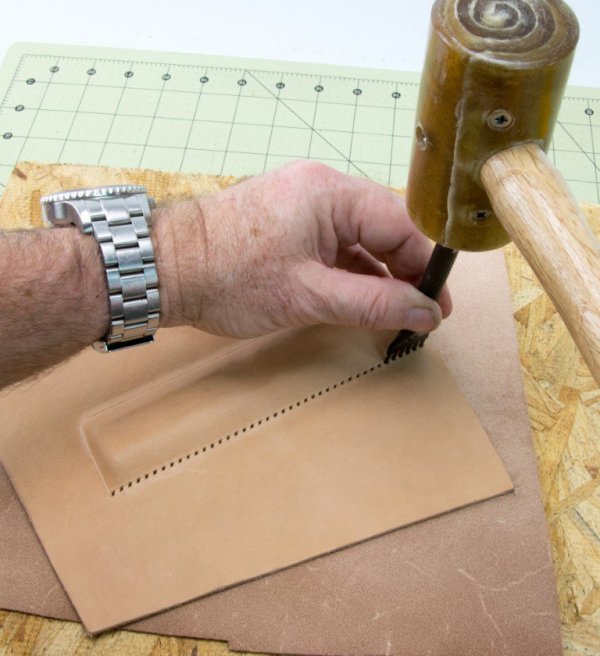
Stitching leather is a bit different than cloth in that you pre-punch the holes. Fork-style punches are an easy way to make consistent holes. I placed a second piece of leather below the top piece and punched my holes through both.
If you didn’t mold using an oversized model, be sure to give yourself a few extra millimeters of slack in how close you make the stitching holes to the model.
Trim the bottom pocket cover to about ¼” around the stitching holes.
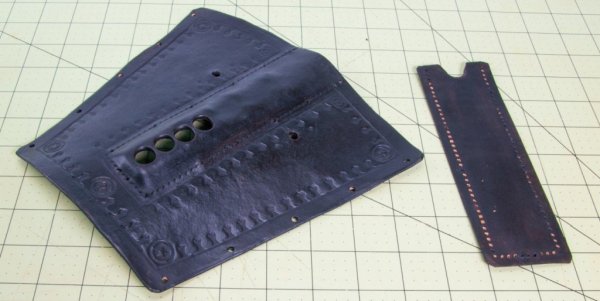
To keep things simple, I used laces rather than buckles or snaps to hold the bracer on my arm. Using leather punches, I made holes for the lacing eyelets, conchos, and the Flora RGB LEDs. I also did some light decorative tooling on the top piece, then dyed and finished the leather.
CREATE YOUR CIRCUIT
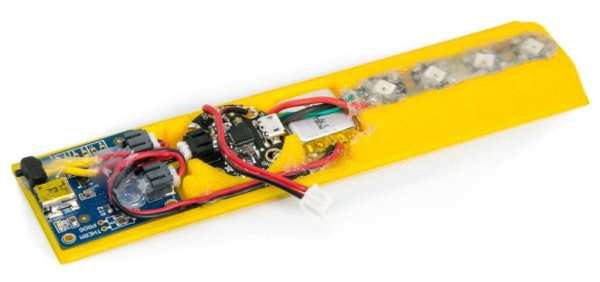
On my bracer, the assembly of the electronics was straightforward. I placed the components into the sabot and measured out my wiring so that it would fit. After soldering, with careful checks that everything would continue to fit, I used hot melt glue to hold everything in place. To assist in diffusing the LEDs, I covered them in hot melt. This also serves to protect them since they’re accessible through the holes in the bracer. Be careful to keep everything within the profile of the sabot so that it will slide in and out of the pocket.
The most difficult part of the circuit is the connection to the capacitive inputs. I used screw-back conchos with the wire wrapped multiple times around the shaft. When stitching the pocket, I made sure to bring these in from each side, terminating them in a plug that I could attach to the Gemma.
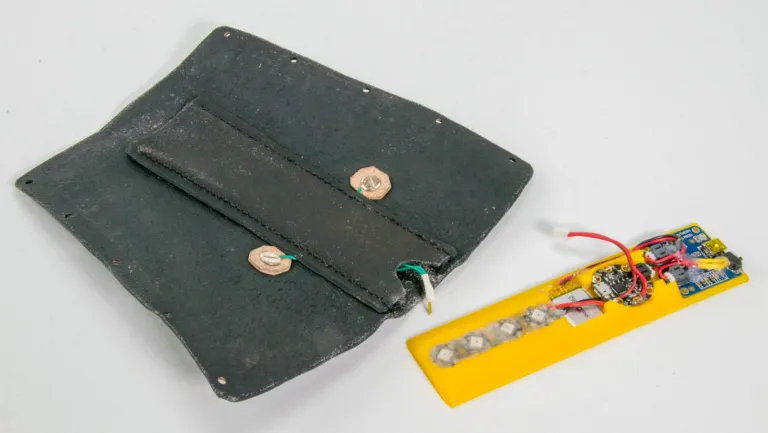
The screw on the back of the concho needs to be isolated from your skin so that it isn’t constantly triggered. This could have been done by leaving side flaps on the bottom pocket piece, but I ended up using electrical tape so that I could get at the screws if the wire broke or I wanted to change conchos.
PROGRAMMING
I’m a huge fan of CircuitPython and used a mashup of Adafruit’s Flora and capacitive input examples for my initial software. I added a simple “Knight Rider” display that changes colors when one of the conchos is touched and displays the rainbow cycling example when the other concho is touched. You can access this code.
While I’d hesitate to use the capacitive input for anything critical (it’s a little finicky), I am delighted at how well it works for this project.
GO NUTS!
Wearable projects span the gamut from exposed components that look like digital jewelry, to lights and sensors hidden in traditional clothing, to 3D printed crowns and tiaras. Makers have only scratched the surface on this wonderful approach to personal digital wear. I am of the firm position that leather is a fantastic addition to the wearable maker’s toolkit. It’s protective, it can be dyed colors and beautifully tooled, it’s easy to mold and stitch. With the addition of 3D printing and innovative input/output, we are likely to see an explosion of leather wearable projects in the years to come.
Source:Light Up Leather Arm Braces