
I love MAME . What I don't love is moving MAME cabinets. This project outlines the steps involved with building a MAME cabinet in a controller box, allowing it to be moved or stored. In this project we will build a MAME controller that is self-contained, and battery powered. I've broken it into sections so you can take this project as far as you want.
If you're asking yourself CAN I MAKE THIS the answer is yes!
It's pretty clear l'll never be a film maker or a photographer, but here's a quickvideo walk through.
Overview
Phase 1 – Building the controller
The hardest part of this whole project is building the plywood box, but if you're unable to do that, you can probably scavenge something that will work – an old chest, a toolbox, use your imagination! In this phase, you will build a plywood box, attach a hinge, drill holes in it. At the end of this phase, you will have a really cool, heavy duty, arcade style controller that can be connected to your laptop via USB. Just skip steps 3, 4, 6, 7, and 8
Phase 2 – Adding the Raspberry Pi (AKA RPi)
If you choose to go this route, you will end up with a great controller that just needs power and a monitor (or external projector)- no laptop necessary! Just skip step 4 and 7.
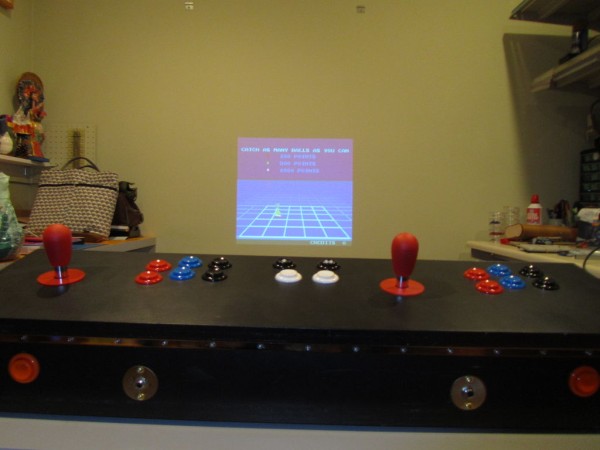
Phase 3 – Add the Projector – this is the finally step to make the whole system self-contained and wireless. The RPi is powered from the projector, and the iPAC is powered off the RPi. Of course the batteries have to be recharged eventually.
Disclaimer
1) As with everything, your mileage may vary. I haven't tested all MAME ROMS on the RPi, and I've run into a few that seem to run slow. It could be the ROMS, I'm not sure. If you have specific games you want to play, perhaps try first with just an RPi and a keyboard and see what kind of performance you get.
2) I've been getting about an hour of play time out of a charge, but usually I shut it down after that. I'm not sure what the total play time would be. The projector is rated for two hours, but that doesn't account for the extra drain from the RPi.
3) I've done my best to list all the steps I can think of here, but it's possible I've missed something. If that's the case, I'll do my best to add it once it's pointed out.
Step 1: Parts and Tools
Tools:
For the Raspberry Pi
A laptop with an SD card reader
For the controller box
A saw – a table saw is best, but a skilsaw will work
A screw driver to attach the hinge
Sand paper
3/8″ Counter sink (optional)
A drill
A set of drill bits – (really, all you should need is a couple around 1/4″ and 3/8″) for pilot holes when building the controller box and mounting the joysticks
A 6mm hex key to screw in the blind hole screws
1 1/8″ hole saw – another type of drill bit that looks like a cylinder with teeth
hacksaw – to cut the hinge and the electronics mount
For installing the wires on the switches
Wire cutters
Wire strippers
Crimping tool (or pliers)
Parts
Phase 1 – Controller Box
3/4″ plywood good one side (about 1/2 a sheet) $26 per sheet
piano hinge from Lee Valley $7.00
rubber feet $4.00
Wood plugs $3.00
Box of screws (I used 1 1/2″ drywall screws) $3.00
(optional) Primer and Paint $51.00
Acrylic, wood or some other thin, non-conductive materialsmall piece (4″ x 4″) plexiglass, . This will be used to mount the iPAC and RPi to the inside of the cabinet.
Adhesive feet $2.00
(optional) Roll of velcro $7.00
Total: $103.00
Phase 1 – Arcade Parts
I get all my parts from Ultimarc (http://www.ultimarc.com/ ) in the UK. This setup will be for 2 players. Each player will have a 4/8way joystick, 6 buttons, a player start button, and there will be on Add Coin button. Ultimarc are great to deal with, and the shipping is really quick. The controller parts required are:
* I-PAC2 Interface – this component acts as the brains in a way. All buttons and joystick controls are connected to this, and this interface then plugs into your computer. The I-PAC works right out of the box using the MAME standard for controls. It basically takes button pushes, joystick movements, etc, and converts them to keystrokes, then send them to MAME running on your computer. We will reassign two buttons later on. It comes with software that lets us do so.
* 14 Game Buttons – (only 12 are shown) I used the Happ Classic Pushbuttons. Note that the buttons from Ultimarc come with switches, but some other sources may not. Don't bother putting the switches on your buttons until they are in the controller platform. The switches that come from the Happ buttons from Ultimarc are E-Switch.
* 1 of each Player Start 1 and 1 Player 2 start Buttons – They come in white and black
* 2 Add Coin Button – This is really just another Happ button like above, but I picked a different color. Strictly speaking, you can get away without this, as you can program the I-PAC to send the ‘add coin' keystroke using existing buttons and movements. I think by default it's Player 1 start + Player 1 button 1. I wouldn't recommend it though. Just buy the extra button.
* 2 Mag-Stik Plus Joysticks – I picked these because they can easily be changed from 4 way to 8 way. Some games require 8 directions and some don't really work well with 8 directions enabled, so it's nice to be able to switch back and fourth without having to get at the bottom of the joystick. These are expensive. If you want to save some cash, get a cheaper joystick.
* 2 Mounting hardware for Mag-Stik Plus – A nice kit for mounting the joystick to the controller platform, assuming your platform is wood. You could probably get away without this if you wanted to save a few bucks. Note: If you order this, be sure to get size that matches your joystick (6mm for the Mag-Stik)
* 1 Daisy-Chain Harness – again, if you want to save a few bucks, you can probably do without this, but this is a really nice premade kit that just allows you to connect the ground from all the button switches together. We'll cover this more later, but each switch (and direction on a joystick) has a ground, a Normally Open, and Normally Closed. When we wire these, all the grounds can be chained together from switch to switch, but the Normally Open connector must be connected directly to the IPAC. This is why we have both the Daisy Chain, and other crimp connectors. Note that this harness must match the size of the switches on your buttons. This may differ by brand, but it 6.3mm for the Happ buttons I'm using. Also note that switches are included with the Happ buttons listed below.
* 1 pack Crimp Connectors – These are the connectors that connect to the joysticks and switches. As with the daisy-chain harness, these connectors must match the size of the switches on your buttons.
Total parts list (prices in Canadian Dollars):
Classic Pushbuttons from Happ Controls. Orange 2 x 1.95 = $3.90 (only one shown in photo)
Classic Pushbuttons from Happ Controls. Red 1.95 x 4 = $7.80
Classic Pushbuttons from Happ Controls. Blue 1.95 x 4 = $7.80
Classic Pushbuttons from Happ Controls. Black 1.95 x 4 = $7.80
Classic Pushbuttons from Happ Controls. White 1.95 x 4 = $7.80 (not shown in photo)
Crimp Connectors 6.3 mm 9.00 x 1 = $9.00
Daisy-Chain Harness 6.3mm (1/4in) Connectors 14.00 x 1 = $14.00
Joystick Mounting Kits 6mm for Mag-Stik 7.00 x 2 = $14.00
Mag-Stik Plus Red 33.00 x 2 = $66.00
Start Logo Pushbuttons Black. Start1 1 x 2.90 = $2.90
Start Logo Pushbuttons Black. Start2 1 x 2.90 = $2.90
Sub-Total: $134.17
Shipping: $27.00
Total: $161.15
Note this cost doesn't include the two white buttons, or the second Coin button. I added the 2 player coin later in the project after I realized that some games actually require the player 2 coin in order to go into 2 player mode. Also, the two white buttons are used as Enter and Escape. These are not absolutely required either, but I highly recommend them. They make the MAME controller playable without having to know the secret combinations for Enter (Player 2 Start + Player 1 left) and Escape (Player 1 start + Player 2 Start).
Phase 2 – Parts for the Raspberry Pi
Raspberry Pi from Lee's Electronics 1 x $45.00 (for Phase 2) – this is the amazing little computer that will run MAME.
8GB SD Card 1 x $9.99 – There's debate about the best class of card to use. I'm using a cheap class 4. This will be running the brains of the system, and I've read a few articles that discuss how different classes of cards affect speed.
Micro USB B to USB A cable 1 x $9.99 – This will provide the power from the projector (USB A) to the RPi (Micro USB). Don't mistake Mini USB for Micro USB.
Total Phase 2 Costs $64.98
Phase 3 – Parts for the Projector
1/4″ x 1 1/4″ bolt to mount the projector
Self Adhesive closed foam weather stripping for the projector mount $4.48
(Optional) 1/8″ Headphones stereo splitter 1 x $4.00 (I got mine from Lee's Electronics, but I can't find a link on their site)
(Optional) Old headphones that you can cut apart (free) or 1/8″ Headphones stereo extension cables 2 x $16.0 – I put the headphones in Phase 3 because I connect the splitter to the projector rather then the RPi. I noticed that I was getting a lot of noise when I ran the audio directly from the RPi, however, the audio from the project was fine. I think maybe because it's a digital signal from the HDMI cable, as opposed to the analog signal from the RPi? I don't really know.
Brookstone Pocket Projector from Brookstone.com 1 x $329.00 (Phase 3) – this is the key to making the system portable and battery powered, as the projector contains a rechargeable battery that can power the Raspberry Pi and the iPAC.
Plus taxes and duties: $38.46
Plus shipping: $36.84
Total projector cost: $395.79
Total Phase 3 Cost: $420.27
Step 2: Build the Control Panel Box
Notes:
I've put this step before building the frame because if you run out of steam at this point, hey you still have a cool, functioning arcade control panel! I'm not going to go into too much detail about the actual building of the box, as I'm not really much of a carpenter and I'm sure there are better ways to do it. I have attached the DXF and SketchUp drawings I've created. The measurements can be taken of either. If you don't have a copy of AutoCad, there's a free version called AutoCad 123D that works quite well.
Some other important (and possibly confusing) things about the main picture below…
When I first built this box, I didn't think I needed the Enter or Escape key, which is why those holes aren't drilled in some of the pics. Also, I added the second coin button, the headphones, and the big projector hole after the fact. I've labeled where those things ultimately went, and they're all shown in later pictures.
Design:
This is basically just a plywood box, with a hinged top. From what I hear, cabinets are normally built so that the bottom piece fits inside. I think this is so there are no plywood edges showing on the front, sides, or back. I decided not to design it this way because it will attach to the frame by mounting brackets to the bottom, and all the pressure from the button mashing will be on the top, so I thought that it makes more sense to build it with the sides fitting between the top and bottom. Also, I designed it so the top is on an angle, but that's not really necessary. I just thought it added something to the ascetics. If you happen to have access to a CNC, you could also put some really cool designs in the box as well.
Building the Box
If you can find a suitable box, you won't have to build one. I decided to build my box from scratch. In a nutshell, here was the process I used:
1) Measure and draw out the parts on the plywood as shown in the PDFs below. Use the Sketchup model as a guide if you get confused. Then cut the parts on a table saw, but you can probably use a skilsaw and a straight edge instead.
2) Now would be a good time to cut the button holes for the P1 Coin, P2 Coin, and the Projector hole. We'll do these now, as it's easier then trying to drill them when the box is assembled. In my case, I used a larger 1 3/4″ hole saw for the projector hole. It doesn't need to be that large (I tested it with the 1 1/8″ hole), but I wanted to use an insert and cover designed for running cables through furniture, which is why I picked that size. Also, if you want to mount audio jacks, this is the time to drill those holes as well. Make sure you have a face plate that you can screw over it. Jump ahead to step 4 for a second to see how we do it.
Drilling Method: Measure and mark where the center of the hole will be. Use the 1/4″ Drill to drill a pilot hole. Then use a 1 1/8″ hole saw in the hand drill. One thing I noticed is that when using a hole saw, don't put to much pressure on it. Take it out and clean the sawdust off every 5 or 10 seconds. If the sawdust accumulates and has no where to go, it will smoke quite a bit. Also, I got the best results by drilling in half way, then flipping the board and drilling the rest from the back. Since there's a pilot hole, you don't have to worry about lining things up.
3) Now we can rough fit the box bottom together. Decide where the screws that will hold the box together will go, and drill countersink holes. This is just for aesthetics again. Later on, we'll plug and sand them. Make sure you put the counter sink in deep enough. If you don't, there won't be any room to fit the wooden plug in on top of the screw.
4) Clamp it together, and drilled holes where the screws will go in the top, bottom, front and back. If you don't drill the holes, the screws will split the plywood. The holes should be drilled in the center of the counter sunk hole.
5) Glue and screw the bottom and the sides. Do not attach the top. This will be on a hinge, as we will need to get at it periodically. At this point, we should have a solid box with a detached top.
6) Once the glue dries, you can sand down the edges of the plywood, and glue the plugs in. I used a 3/8 counter sink, and I picked up a package of 3/8 wooden plugs from Home Depot for about $3.50. The plugs were oak, but since it's going to be painted, it didn't matter.
7) Once the plugs dry, you can cut, chisel, or sand off the plugs that are sticking out.
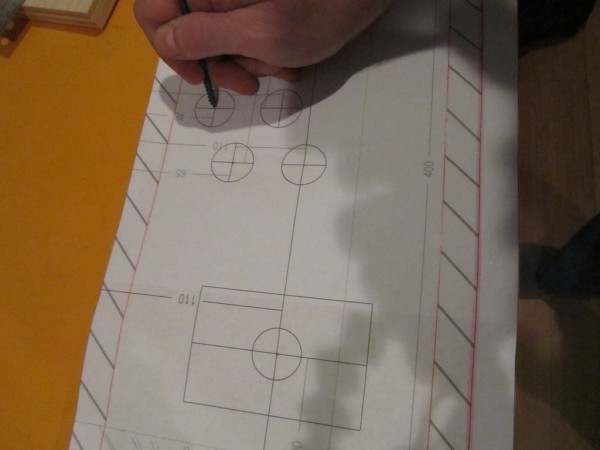
8) At this point, draw the locations for the buttons and the joysticks on the top board. I basically printed out the three PDF files attached on an 11×17 printer (I didn't have access to a plotter). Then I taped them together so they formed a 1:1 paper model of the control panel. Mark the center point of the joysticks and the buttons on the wood using a nail.
9) Drill the rest of the button holes using the method in Step 2.
Mount the joysticks
11) Now it's time to mount the joystick. The next step is to drill the holes on the underneath for the ‘blind hole' mounting kits (about halfway down the page) for the joysticks. Take the joystick apart to measure where the holes should go. If you have the Mag-Stik Plus like me, there's a bolt on the bottom. Unscrew it carefully – it's spring loaded! Check the Ultimarc site for a detailed description of how to take apart their joysticks. Then place the bottom part of the joystick on the underneath of the the control panel. Look at it from the top to make sure the hole is in the center. Also make sure the mounting plate (and hence the joystick) is parallel to the side. Otherwise, up won't really be up. When you have the plate in a good position, trace the plate, including the screw holes, with a pencil. Then drill the four corner holes using a bit slightly smaller then the mounting parts, but only drill the hole deep enough to screw the inserts flush with the board – do not drill the holes all the way through. It's much easier to do this on a drill press where you can set the depth, but a piece of tape on your drill bit, or a depth guage will also work.
Do this for each joystick. Using an allan key (6mm), screw the inserts in. Attach the joystick and confirm the position is still good. Then remove it so you can paint.
Paint
12) Sand out the inside of the button holes. Now you're ready to paint! I'll leave this up to you, but in my case, I used a white primer ($26 for a gallon – I have some other project that need paint too) and a can of black melamine paint ($25), both from Home Depot. The melamine paint is quite expensive, but it should give a very hard, washable surface. Prime and paint the box, inside and out.
Attach the feet
Screw them in near the corners. Make sure the screws don't go all the way through the box.
Attach the top panel
13) Attach the top to the bottom with a piano hinge ($5 from Canadian Tire). It will likely be too long. Cut it with a hacksaw or Dremel.
Install the buttons
14) Install all the buttons, along with their switches into your new control panel box. To attach a switch to a button, slide the switch in to the inner most mounting peg, then rotate it in until the outer peg snaps into place, like this. Pay attention to the orientation. Remember that the Player 1 and 2 Start buttons must be orientated correctly. Also, I tend to mount all the buttons that I can on an angle. It leaves more room for the connectors to attach to the button switches.
Also, the Enter, Escape, and Coin buttons should be labeled. Try something creative – maybe geotype pressdown lettering. If you have to, you can write on them with a marker. I'm leaving mine blank for now, but I'll label them eventually.

 MAMEFrame_Final.skp304 KBMAMEFrame_Lid_V2.skp316 KB
Step 3: Installing MAME on the Raspberry Pi
Obviously, if you're not installing the Raspberry Pi, you can skip this step.
If this is your first introduction to Raspberry Pi (AKA RPi), I'll try to keep it simple. But it really is an amazing little device that is capable of much more then running MAME. The quickstart guide for the RPI is available at http://www.raspberrypi.org/quick-start-guide
Of course, none of this would be possible without Shea Silverman. He's done all the hard parts, including building an image for the Raspberry Pi that we will run in our controller. Here's what we're going to need for this part:
– A raspberry pi, with a USB power cable and wall plug
– An SD card – at least 8gb if you plan on having any amount of games on there.
– Win32 Disk Imager software
– Shea's MAME image for the Raspberry Pi. Probably the latest is the best. I've used version 5 and 7.
– A PC, monitor, keyboard, etc.
– A usb memory stick to transfer the games from the PC to the RPI
On your PC, set up the SD card with the image
1) Download the MAME image from Shea's website (about 1gb), and Win32 Disk Imager (about 6mb)
2) Extract the downloaded zip files
3) Put the SD card into the PC
4) Run Disk Imager specifying Shea's image, and the SD card as the output. This will load the image onto the SD card. Once the process is done, exit the application and eject the SD card.
5) Since we're on the PC anyway, now would be a good time to copy any additional ROMS to your USB stick (assuming you've downloaded some). Copy them to a folder called roms at root level on the USB stick. The ROMS are self contained zip files. Do not extract them.
On the RPi, test the image
6) Now that the image has been loaded on the SD card, put the card in the RPi, and connect a keyboard and monitor. Then connect the power, which is a micro USB cable plugged directly into the wall. I've found that PC and Laptop USB ports sometimes don't provide enough power (3.3v from a typical PC USB vs 5v from a USB cable plugged into a wall socket). It sometimes works, but not always.
7) Once the power is applied, the RPi will turn on, and go through the boot process. Welcome to Linux!! Once the RPi boots, you should be presented with a menu. The first item on the menu is AdvanceMAME. Select it by pressing enter on the keyboard. AdvanceMAME will launch. AdvMAME is what we call a MAME front end. it's provides a graphical list of all the games that MAME can find on your system. Shea does us a great favour by including a game in his image. Select Looper and start the game. FYI, the direction arrows and enter button on the keyboard are the controls.
Increase the diskspace on the SD card
8) The image that was loaded on the SD card did not take up the whole 8gb. In order to get this additional space, we must increase the diskspace on the SD card. Once you're done playing Looper, press escape a couple of times until you get back to the menu.
9) Select the Tools option. From there, the next menu will have an option called Raspi-config. Select this option, and you will be prompted with a blue menu. Here, select Expand_rootfs. This will expand the disk image to use the entire space on the SD card, giving us more room to store games! At the end of expand_rootfs, the RPi will reboot.
10) After the RPi reboots, select Shutdown from the menu so we can connect the USB stick.
11) Now we will copy the ROMS on to the RPI by connecting the USB stick to the RPI, and powering on the RPi. The menu should appear again. Select the option Return to Shell. This will bring us to the linux command line at the bottom of the screen. I'm not going to go into the Linux command line, as it's far beyond the scope of this instructable, but the eLinux folks have some great instruction, and projects to help you get to know your RPi. But for now, just type in the commands exactly like they show. Linux is case sensitive, so be sure to type everything exactly, and let me know if there are any errors.
Unlike Windows, you must tell the RPI that a USB stick has been connected. Enter the following commands:
sudo mount -t vfat /dev/sda1 /mnt/usb
sudo mount /mnt/usb
Now that USB drive should be recognized. We can change to that directory and into our roms folder where all our files are located
cd /mnt/usb/roms
Now we can copy the files to the folder on the RPI where they should go
cp * /home/pi/roms/
This step will take a while, and it may seem like the RPI has frozen. Be patient. Once it's done, the command prompt will return again.
12) Restart the RPI by entering
sudo shutdown -h now
13) Disconnect and reapply power to restart your RPi. Check that the ROMS were successfully copied and they work by going back into AdvMAME. The new games should just show up. Not all MAME ROMs are created equal. Some will work, some won't, some will have glitches. Eventually, you'll want to purge the games that don't work from the system.
Step 4: Mounting the projector
If you just want to build a fancy Arcade stick controller for your computer, then none of this is required. However, if you'd like a self-contained package of awesomeness, read on…
Mounting the Projector
I took the easy way out with this one. Drill a hole and attached the projector with a bolt that fits in the tripod mount. I'd like to upgrade this to a ballhead tripod at some point… File under future enhancements.
Set the projector in place where you think it should go. Turn it on and make sure it shines completely through the hole in the front. If not, you may have to make the hole bigger. Once it's projecting ok, trace the sides, front and back of the projector on the bottom of the box. Then pull it out.
Cut some weather stripping. I put a piece on the left, one on the right, and one on the front of the box to protect it from bumps.
Measure where the tripod mount on the project is, and mark it on the bottom. Drill a 1/4″ hole through the bottom that lines up with the tripod mount on the projector. Then sit the projector on top of the weather stripping, feed the bolt through the bottom of the controller box, and screw it into the tripod mount.
The projector should be firmly in place, without any extreme stress on it. You might have to push the projector down into the weather stripping a bit so the bolt will reach.
Turn on the projector again to make sure the beam is not obstructed by the box, or anything else. Even if it's just the blue screen, it's a good enough test.
Now REMOVE IT!! You don't want the most expensive part to get damaged while you continue working on this.
For more detail: MAMEFrame – The battery-powered MAME system