
In the last post, we build a Robot that can be controlled via Amazon Alexa using MATRIX Voice installed in a Raspberry Pi. In this tutorial, we will install and setup MATRIX Voice Google Assistant. Yes Google Assistant using your own MATRIX Device and Raspberry Pi.
MATRIX Voice Google Assistant Demo Video
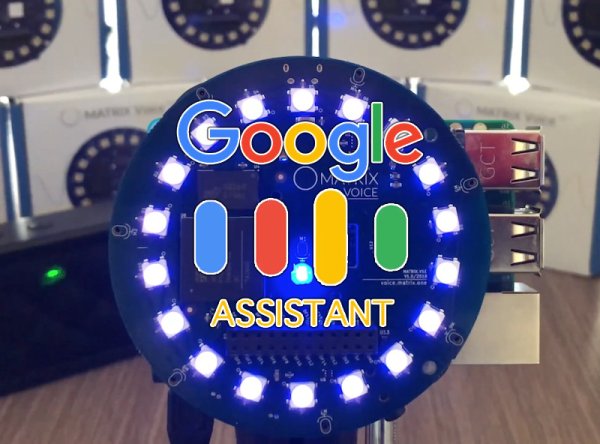
MATRIX Voice Google Assistant
Components Needed
- MATRIX Voice / Creator
- Raspberry Pi 3 (Click to Purchase)
- Speaker (Click to Purchase)
- Micro SD Card (Click to Purchase)
- Active Internet Connection
Prerequisites
Before starting the set up of MATRIX Voice Google Assistant it would be good if you know a little bit about the components and boards used in this project. You can either read it or just start the tutorial section. Let us get familiarized.
Raspberry Pi
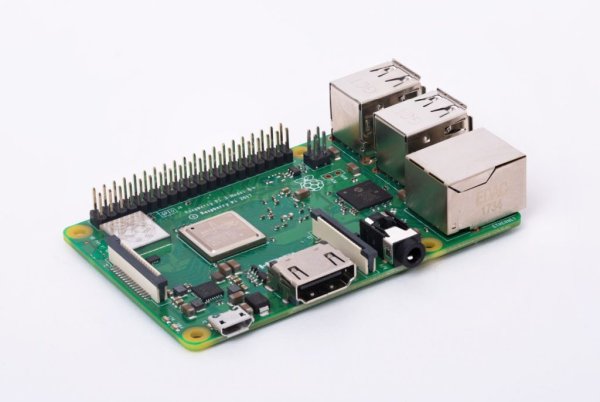
Raspberry Pi is small credit card sized, light weight and compact computer available which is used by both professions, hobbyist and of course hackers alike. This mini computer can do (almost) any thing a normal linux machine can do. It is widely used in various industries, robotics, home automation projects.
MATRIX Voice
This little development board consist of a radial array of 8 MEMS microphones, 18 RGBW LED’s and 64 GPIO pins, which is linked to a Xilinx Spartan6 FPGA and 64 Mbit SDRAM. This provides the hobbyists and developers a wonderful opportunity to add custom voice and hardware-accelerated machine learning technology In no time.
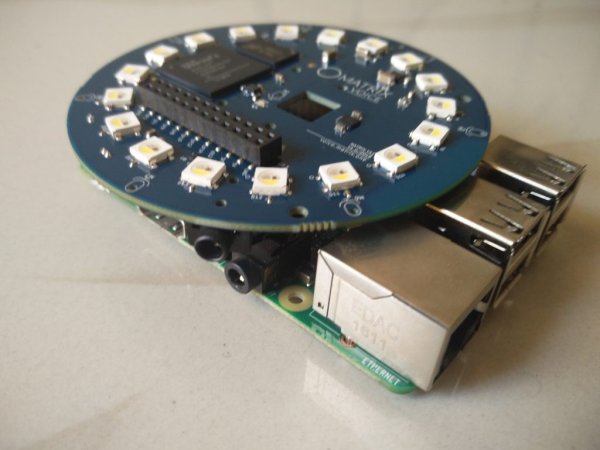
An advanced version of this MATRIX Voice is also available employing a ESP32 Wi-Fi / BT chipset which will enable users to easily connect to the network or other devices via WiFi and Bluetooth in no time.
MATRIX Voice Google Assistant Tutorial
Step 1 : Setting Up Raspberry Pi
Download and burn latest Raspbian image to a micro SD card and insert it into the raspberry Pi.
Now power it up with a power adapter that can provide at least 2.5 Ampere. Now fire up your terminal and create a password for the user ‘pi’ by executing the command
sudo passwd pi
Connect your Raspberry Pi to a WiFi router or Wired network and make sure it is connected by checking whether it is getting an IP address from the switch.
Now perform and update and upgrade by running
sudo apt update -y
sudo apt upgrade -y
Step 2 : Adding the Repositories
In order to set up Google Assistant in your MATRIX Voice, you should start by installing the right tools. First we will install the MATRIX Software by adding the right repositories. Enter the below commands to install MATRIX Software
curl https://apt.matrix.one/doc/apt-key.gpg | sudo apt-key add –
echo “deb https://apt.matrix.one/raspbian $(lsb_release -sc) main” | sudo tee /etc/apt/sources.list.d/matrixlabs.list
Once you have added the repositories, you can perform an update and an upgrade by running
sudo apt update
sudo apt upgrade
Step 3 : Install MATRIX Packages and Kernel Modules
Now you can install the MATRIX Softwares
sudo apt install matrixio-creator-init
Once this step is complete, you should do a reboot for effects to take place.
sudo reboot
Now you can install kernel modules by running
sudo apt install matrixio-kernel-modules
Reboot the Pi
sudo reboot
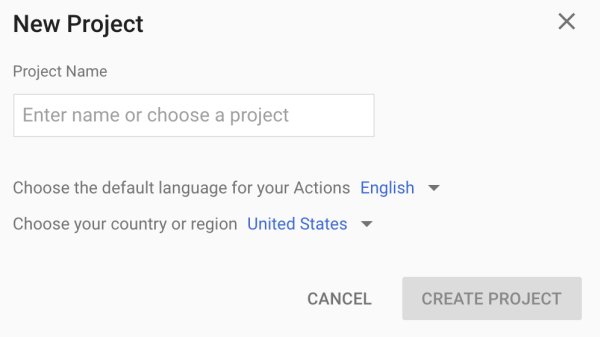
Step 4 : Create a Google Developer Project
Now use your google account to create a Google Developer project. This step will give your device access to the Google Assistant API.
You can do this by following the below steps
- Navigate to Actions Console Page – Go to the Actions Console
- Select Add/import project.
- Create a new project,Give your project a project name in the Project name box and click on CREATE PROJECT.
- Now you have your project ready. Next thing to do is enabling the API. Go to the Cloud Platform Console and Enable the Google Assistant API in the project you just created.Click Enable.
- For proper working of our Google Assistant, you should share some activity data with Google. To do that, open the Activity Controls pagefrom the account that is linked with google assistant.
Enable the Following Switches
- Web & App Activity
- Include Chrome browsing history and activity from websites and apps that use Google services checkbox.
- Device Information
- Voice & Audio Activity
Step 5 : Register the Device
- Go to Actions Console and select the project you created on the upper part of the screen.
- From the left navigation bar, click on the Connected properties.
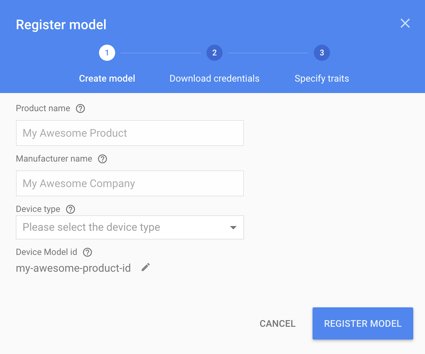
- Click on the DEVICE MODELS tab and Click on the REGISTER MODEL button.

Fill up all the information and Click REGISTER MODEL. when you are finished
Download credentials.json file to your computer and place it in your Raspberry Pi in which MATRIX Voice Google Assistant will be running.
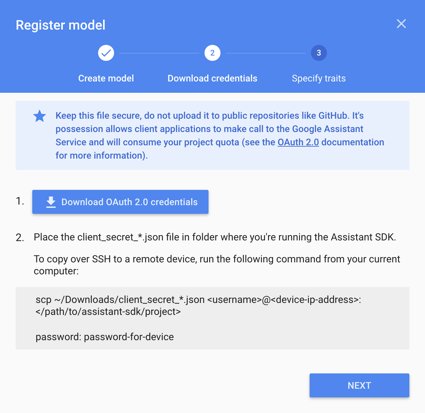
It is recomended not to rename this file and keep it under /home/pi folder.
Download this file and transfer it to the device. Click NEXT.
Step 6 : Installing the SDK
Before installing the SDK, it will be a smarter move to isolate system packages from packages that we are about to install. For that, we will set up a virtual environment for us to tinker with.
Note: Run these codes from /home/pi directory otherwise it wont work.
Setup Python Virtyual Environment using the following commands
sudo apt-get update
sudo apt-get install python3-dev python3-venv
python3 -m venv env
env/bin/python -m pip install –upgrade pip setuptools wheel
source env/bin/activate
Install the dependencies:
sudo apt-get install portaudio19-dev libffi-dev libssl-dev
Install python packages to our virtual environment using the below commands
python -m pip install –upgrade google-assistant-library
python -m pip install –upgrade google-assistant-sdk[samples]
python -m pip install –upgrade google-auth-oauthlib[tool]
Now its time to generate the credentials which we be using to run our Generate credentials to be able to run our MATRIX Voice Google Assistant. Run the below command.
google-oauthlib-tool –scope https://www.googleapis.com/auth/assistant-sdk-prototype \
–save –headless –client-secrets /path/to/credentials.json
If everything is done correctly, you should see a URL displayed in the terminal some what like this:
Please visit this URL to authorize this application: https://…
Enter the authorization code:
Now all you have to do is copy the entire URL, open up a browser and paste the URL in the address bar and hit enter. It will ask you to login to the Google Account that is linked with the developer project and as you for your approval.
Read More Information….