
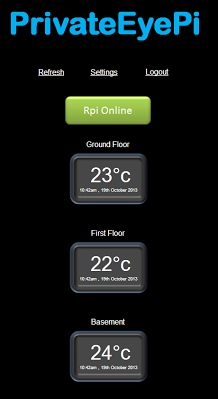
At the end of the project you will have a WWW dashboard that looks similar to this:
Multiple Sensors
Display a temperature history graph per sensor
What you need:
- Raspberry Pi Model A or B
- The following parts are available through the PrivateEyePi Store:
For support, queries or suggestions please email [email protected] or leave comments in our blog.
Step 1: Build and test the Electronics:
Parts can be purchased from our store: http://www.privateeyepi.com/store
- Purchase a DS18B20 digital thermometer
- Purchase a 4.7k Ω (ohm) resistor
- As per Figure 1 put the resistor between pins 2 and 3 as in the diagram
- Connect Pin 3 of the temperature gauge to 3.3v GPIO Pin
- Connect Pin 2 of the temperature gauge to GPIO4 (Pin 7)
- Connect Pin 1 of the temperature gauge to ground (Pin 6)
f you want to add multiple sensors daisy chain the middle pin of the sensors. This will work because every DS18B20 sensor has a unique ID that is used to differentiate the signals coming from the sensors
Once built, follow the following steps to test that it is working:
Log in to your Raspberry Pi
At the prompt pi@raspberrypi / $
Type:
sudo modprobe w1-gpio
sudo modprobe w1-therm
cd /sys/bus/w1/devices/
ls
sudo modprobe w1-therm
cd /sys/bus/w1/devices/
ls
You will see a listing of the current directory. There should be a directory that is the serial number of your temperature gauge. The serial number of my thermometer 28-0000040be5b6, but every one will be unique. Make a note of yours as you will need it later in step 4. If you have multiple sensors there will be multiple directories listed.
If you don't see a directory with lots of numbers and letters like the one above then:
- Check your circuit wiring.
- Make sure you have the correct resistor (this is very important – yellow, violet, red, gold).
- Feel the temperature gauge with your finger. If it feels hot then you have it wired back to front.
If you do see the directory then type cd followed by the directory name:
cd 28-0000040be5b6
cat w1_slave
You will now see a dump of the w1_slave file that contains the temperature data in celcius (refer Figure 3). 20812 is 20.812 degrees celcius. The dashboard does support a Fahrenheit setting that we will cover later if that is your preference.