
Create beautiful time-lapse video of your 3D Resin prints. This technique makes your prints look like they just rise from the vat.
This project uses a Raspberry Pi along with the new Pi HQ Camera to create smooth time-lapse videos for MSLA 3D printers.
The main issue with a normal time-lapse on MSLA printers is the bed is constantly moving up and down after each layer. The resulting time-lapse is nothing like the wonderful time-lapse videos one can achieve using OctoLapse with FDM printers. Ultimately the goal is to create the same style time-lapse video but for MSLA printers.
I used a photo-resistor module to act as a trigger for the camera every time the light comes on to cure each layer. This captures a photo each layer while the build plate is not in motion, giving us our smooth time-lapse.
Hardware
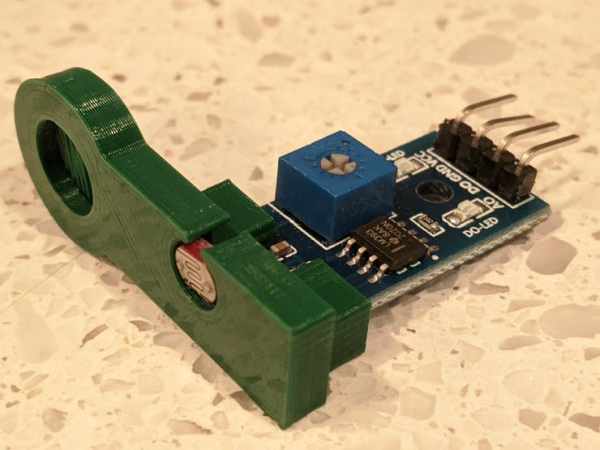
I used this photo-resistor module because it came with a digital output and a potentiometer to tune the amount of light needed to trigger the output.
The photo-resistor is connected to the Pi as follows:
- Power to pin 2
- Ground to pin 14
- Digital Out to pin 8
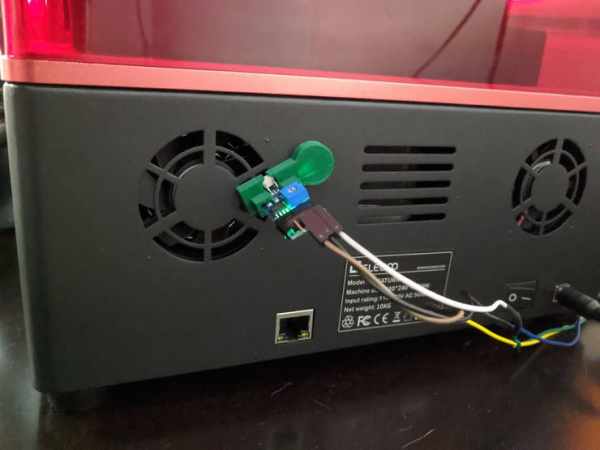
While each MSLA printer is different, I'm taking advantage of what some might think is a flaw in the Elegoo Saturn 3D printer. It has 2 vents in the back where light ‘bleeds' through. I noticed this the first time I had a print going in the garage over night. Each time the light came on, it would slightly illuminate the wall behind the printer.
I positioned the photo-resistor right up against the opening of one of the fans on the back of the printer. I printed a mount that holds it in place using a magnet.
Here is a shot of the setup. I usually run it with the lid off when I want to do a nice time-lapse.
Software
I wrote a python script that I leave running on the pi so it will always capture a photo when the printer cures a layer. I'm using `pm2` to keep it always running.
Here is the code:
from gpiozero import Buttonfrom picamera import PiCamerafrom signal import pauseimport timecamera = PiCamera()camera.resolution = '3280x2464'currentTime = intdef capture(): currentTime = int(round(time.time() * 1000)) image_path = '/mnt/usb/photos/image_%s.jpg' % currentTime camera.capture(image_path) print('Image captured: %d' % currentTime)button = Button(14)button.when_pressed = capturepause()At the time of writing this, the PiCamera python module hadn't been updated to use the full resolution for the new Pi HQ camera, so the resolution is set for the max resolution of the Pi Cam V2. I'm saving the files to a USB drive to keep from running up the writes on the SD card. I recommend a 32GB card since the photos quickly add up.
Once you have your collection of photos, you can combine them for a time-lapse video using your favorite software. I just do it in the command line using `ffmpeg`.
Here is the command I use:
ffmpeg -framerate 120 -pattern_type glob -i "photos/*.jpg" -s:v 3280x2464 -c:v libx264 -crf 20 -pix_fmt yuv420p timelapse.mp4Then, I like to crop the video to 16×9 with this command:
ffmpeg -i timelapse.mp4 -filter:v "crop=3280:1845:0:310"Results
TMNT Bust by Eastman – https://www.myminifactory.com/object/3d-print-tmnt-bust-fan-art-130321
Sorceress: Spellcaster by Loubie – https://www.thingiverse.com/thing:4019674
Model: Mr. Belz by Eastman – https://eastman.xyz/product/mr-belz/
Final Thoughts
I hope you enjoyed this project, and I would love to see some smooth time-lapses of your MSLA printer in action. I'll be posting more videos on my youtube channel if you are interested in seeing more. Happy printing!
Source: MSLA Smooth Time-Lapse