I. Summary
The purpose of this project is to build a multi-language voice control IoT home automation using Google Assistant and Raspberry Pi. This project will enable the user to control a home despite the language being used. This will be enables by using IoT devices, various components and the Raspberry Pi Smart devices and home automation is growing with the advancement of technology, specially IoT devices. It is important for upcoming engineering students to have basic knowledge about IoT devices, so the student can thrive in a job dealing with the design of smart cities, smart homes, smart devices and more.
II. Objectives
The purpose of this project is to build a multi-language voice control IOT home automation using Google Assistant and Raspberry Pi. The project will teach the student about image processing and to program the Raspberry Pi device.
III. Industry-Based Applications
This project is related to industry by many companies are implanting the internet of things into many products. These products are seen in everyday lives products, such as, televisions, refrigerators, smart speakers and more. Therefore, it is important for student to become familiar with IoT devices and the construction of them. The IoT devices will be the future of many engineering design projects. This project will develop the students programming skills and circuit design for real world application of a product.
In another paragraph (or same previous paragraph), you should tell where the importance of your project can be used in industry and use reference number ([xx]). References should be all at the end of the paper.
I. Project Methodology
a. Parts
- Raspberry Pi Zero W
- Raspberry Pi Camera
- Raspberry Pi Case
- 5V Relay
- Servo motor and wires
b. Procedure
i. Setting Up Raspberry Pi
- Set up an Apache server in Raspberry Pi.
- Open the terminal window and run the command “sudo apt-get install apache2 -y”
- Check it by typing the I.P address of your Raspberry Pi in any web browser
- If the server is working fine, the Apache page in the web browser.
Use the Apache server to process PHP Files, for this the latest version of PHP module for Apache. To get this module run the command, “sudo apt- get install php libapache2-mod-php –y”
- Create a PHP file to control the GPIO of Raspberry Pi. To do so, open terminal in Raspberry Pi and go to its html directory by this command as you can see in Figure 1.
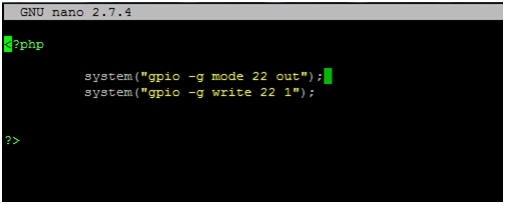
- Create a PHP file by using the command “sudo nano lightsoff.php” and write the code:
- <?php
- Create a PHP file by using the command “sudo nano lightsoff.php” and write the code:
- System (“gpio -g mode 27 out”);
- System (“gpio -g write 27 0”);
- ?>
- Press Ctrl+X to save and exit the editor.
- Create a lightson.php file for turning the lights on and paste the code into the files:
- <?php
- System (“gpio -g mode 27 out”);
- System (“gpio -g write 27 1”);
- ?>
- Repeat the same process for controlling other GPIO of Raspberry Pi.
ii. Setting Up Google Assistant
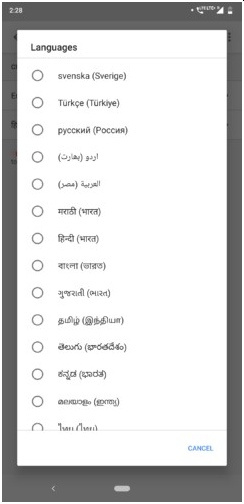
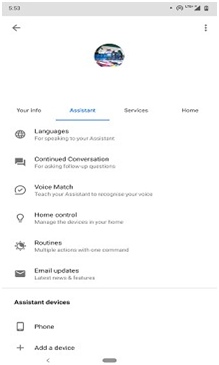
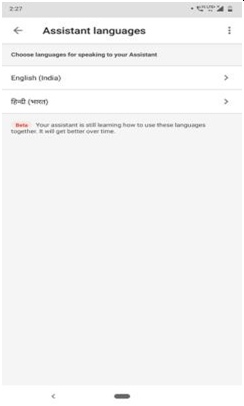
- Open the language settings of google assistant and select the language of your choice.
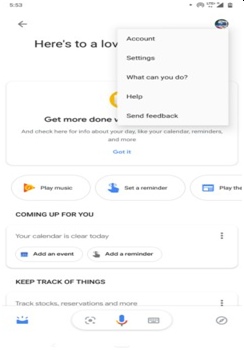
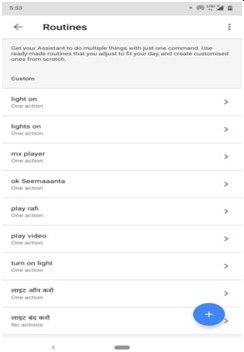
- Open the google assistant settings and go to “Routines” option.
- Click on the plus floating button in the menu of Routines to set the voice command.
iii. Connection
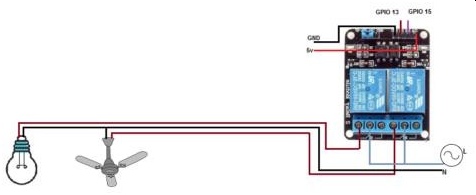
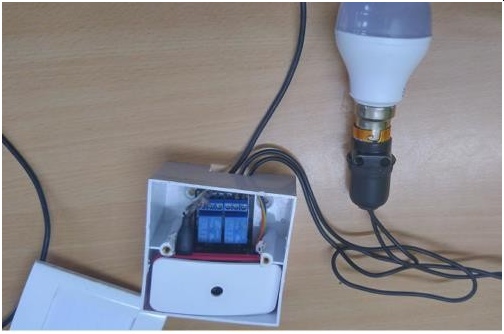
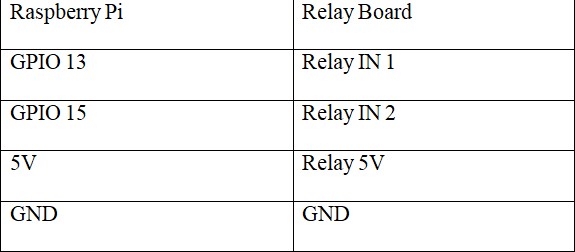
- Use the illustration below to connect relay board and Raspberry Pi
iv. App Making
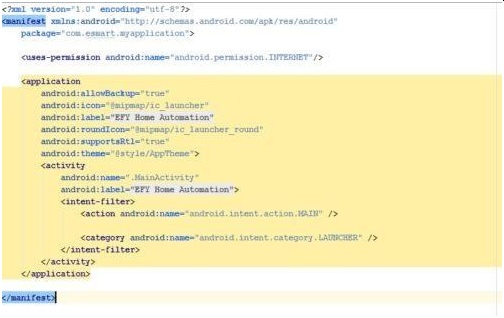
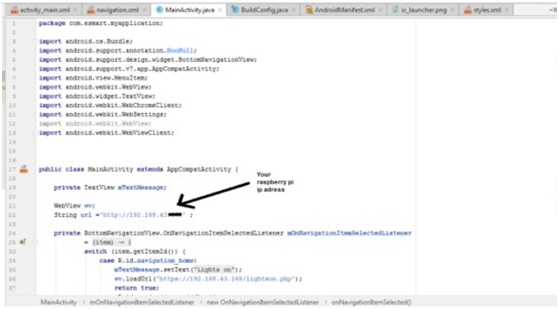
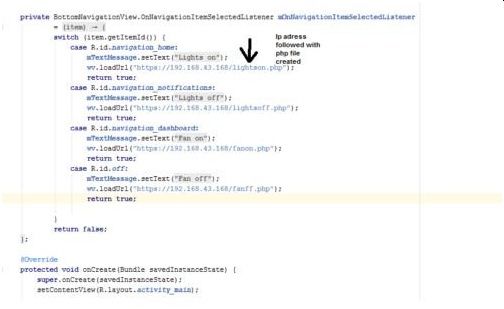
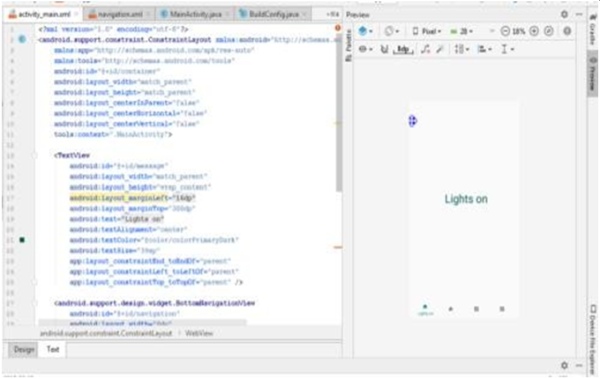
- Open Android studio to create a new project with button navigation bar and do coding as illustrated in Figures 10 through 14.
- Set the Permission in app to access the internet to use Wi-Fi to control GPIO of Raspberry Pi.
- Go to Mainactivity.java to create a WebView and String variables like in Figure 11.
- Create the navigation Bar.
v. Testing
- Power the Raspberry PI with 5V DC.
- Connect Raspberry PI and phone to a Wi-Fi network or hotspot.
- Next, say “hey google” followed by the voice command that is set in the preferred language
- It will turn on the lights
- The app can be controlled using the app as well.
- Open the app and press the icons in navigation to turn the lights on/off
II. Photos and References
control-iot-home-automation-system-using-google-assistant-and-raspberry-pi
Code: https://electronicsforu.com/wp-contents/uploads/2019/05/CODE.zip
