
I made a multiplayer wack a mole style game that is compatitive and fun!

Supplies
List of needed materials:
- 2x wooden plate
- 2x side wooden plate
- 20 springs
- raspberry pi
- ledstrip
- 2x button
- 20x hall sensors
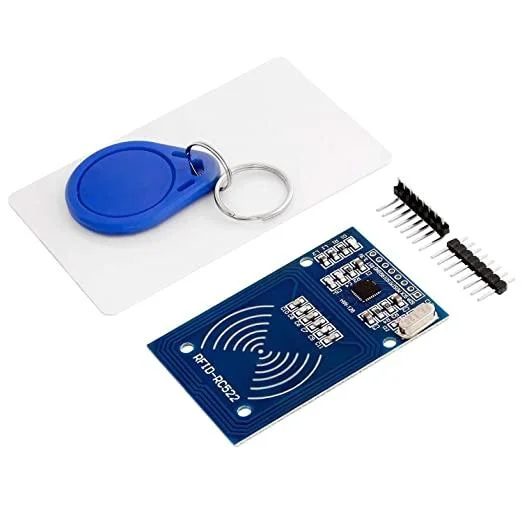
- RFID
- gyroscope
- buzzer
- arduino
- pcb
- magnets
- jumper cables
- +- 60 meter cable
Step 1: Make Custom Circuit Boards
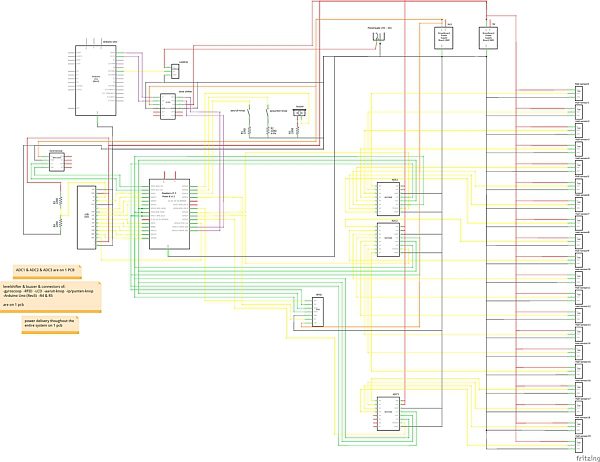
First you are going to need to make the folowing electronic schematic. It would be best to solder it to a pcb, to make it more durable than on a breadboard. Because it needs to be in a table where people are hitting realy hard.
For the pcb it would be best to make the following boards:
- – power delivery board
- -board where hall sensors connect to the 3 ADCs
- -Main motherboard with connectors to lcd, arduino, raspberry pi, gyroscope and all the conectors to the other boards
Step 2: Make Enclosure

Next is the Enclosure. In the first picture you see the final product, in the next 4 the front plate the depth of the indentation is 12mm, the next 2 the 2 side plates and the final 2 the backplate. The front, back, and side plates are all 18 mm wide
Step 3: Make Sphere's

To make the spheres you first need to sand all 20 half spheres, than make for each sphere a round seal out of the left over circkles of the top wooden board. Next you need to solder 3 leds of the ledstrip inside each speher. lastly glue a magnet to the underside of the sealing lid of each sphere.
Step 4: Layout Inside Enclosuer
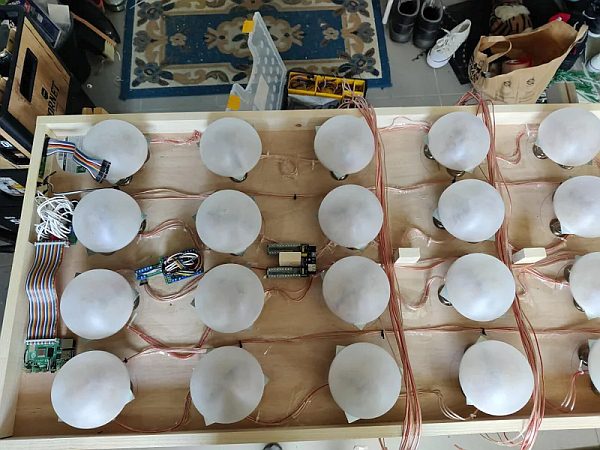
layout the spheres in a snaking motion as shown on the second picture. Next solder and glue the hall sensors under the spheres directly under the magnets. and finaly connect everything to the correct position on your pcb's
Step 5: Database
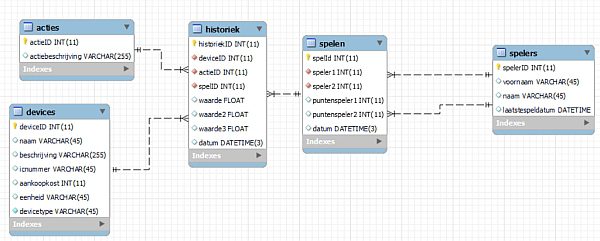
Make in MySQ
Step 6: Install the Custom Image on the Raspberry Pi
Download needed files:
download and install Raspberry Pi imager
download and unpack the custom image
place the sd card in your sdcard reader
open imager -> choose OS -> Use custom -> select .img file -> choose storage -> selecteer device -> write
place the sd card in the pi (THE PI MUST BE FULLY POWERD OFF!!!)
download and install VNC Viewer
Login:
Power the pi on
connect with VNC viewer on the ip adress: 192.168.168.169 (the network cable must be plugged in)
login with user: student and pasword: W8w00rd
Settings:
open a terminal and do the folowing inputs:
sudo raspi-config:
ADVANCED -> expand file system
reboot the pi
sudo reboot now
Step 7: Install the Needed Libraries on Raspberry Pi
Needed setup:
add folowing commands to the terminal:
sudo apt install git
pwd (this is to make sure we are in the how dir)
mkdir projectCode
cd projectCode
sudo raspi-config
interface options -> SPI -> YES -> YES
interface options -> I2C -> YES -> YES
interface options -> SPI -> NO -> YES -> OK
FINISH
Install packages
sudo reboot -h now
sudo apt install python3-dev python3-pip
sudo pip3 install spidev
sudo pip3 install mfrc522
git clone https://github.com/howest-mct/2021-2022-projectone-EggermontLiam.git
Step 8: Start Script on Boot
Run script on boot:
open a terminal and do the folowing inputs:
cd
sudo nano mijnproject.service
in this file add the following content:
[Unit]
 Description=ProjectOne Project
After=network.target
[Service]
ExecStart=/usr/bin/python3 -u /home/student//backend/app.py
WorkingDirectory=/home/student//backend
StandardOutput=inherit
StandardError=inherit
Restart=always
User=student
[Install]
WantedBy=multi-user.target
Then do
ctrl+x -> y -> Enter
to save the file
then do the folowing command in the terminal:
sudo cp mijnproject.service /etc/systemd/system/mijnproject.service
To test the system do the following:
Start:
sudo systemctl start mijnproject.service
Stop:
sudo systemctl stop mijnproject.service
If this works correctly you can do the following:
sudo systemctl enable mijnproject.service