Building and running a parallel code in C++17, implemented using Khronos CL/SYCL-model specification, on Raspberry Pi IoT boards.

Our Goals…
This project provides the useful guidelines, tips and tutorials for building a modern parallel code in C++17/2×0, implemented using CL/SYCL programming model, and running it on the next generation of Raspberry Pi 4B IoT boards, based on the innovative ARM Cortex-A72, Quad-core, 64-bit RISC-V CPUs.
An audience of readers will find out about setting up a Raspberry 4B IoT board, out-of-the-box, and using it for parallel computing, delivering a parallel code in C++17, with the Khronos CL/triSYCL and Aksel Alpay's hipSYCL project's open-source distributions, installing and configuring the GNU's Compiler Collection (GCC) and LLVM/Clang-9.x.x Arm/Aarch64-toolchains, for building the parallel code's executables and running it in Raspbian Buster 10.6 OS.
Raspberry PI 4B+ IoT Boards Overview
The next generation of innovative Raspberry Pi 4B+ IoT boards, based on the powerful ARM's multi-core symmetric 64-bit RISC-V CPUs, provides an unleashed performance, and, thus, the ultimate productivity of parallel computing, itself. Using the latest Raspberry Pi boards allows to drastically improve the actual performance speed-up of the computational processes, at the edge, such collecting and pre-processing data in real-time, prior to delivering it to a data center for processing, on exa-scale. The running of these processes in parallel significantly increases the efficiency of those cloud-based solutions, serving billons of client requests or providing data analytics and other inference.
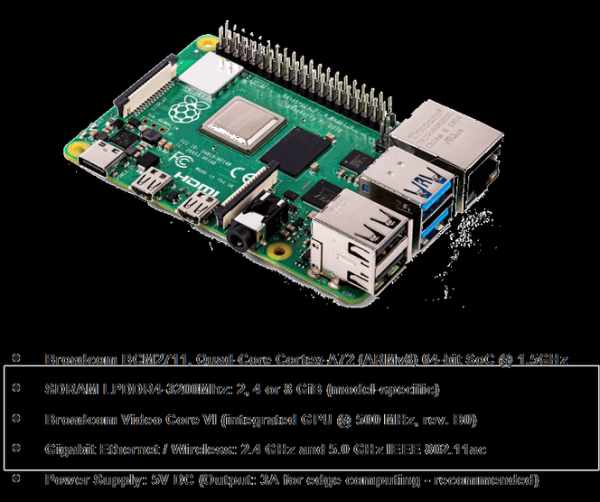
Before we'll ground our discussion on building and running a parallel code in C++17, designed by using CL/SYCL heterogeneous programming model specification for the Raspberry Pi boards with Arm/Aarch64-architecture, let’s spend a moment and take a short glance at the next generation of Raspberry Pi 4B+ boards and its technical specs:

The Raspberry Pi 4B+ IoT boards are manufactured based on the innovative Broadcom BCM2711B0 (SoC) chips, equipped with the latest ARM Quad-Core Cortex-A72 @ 1.5GHz 64-bit RISC-V CPUs, providing an ultimate performance and scalability, while leveraging it for the parallel computing, at the edge.
The Raspberry Pi is known for the “reliable” and “fast” tiny-sized nano-computers, designed for data mining and parallel computing. Principally new hardware architectural features of the ARM's multi-core symmetric 64-bit RISC-V CPUs, such as DSP, SIMD, VFPv4 and hardware virtualization support, are capable of bringing the significant improvement to the performance, acceleration speed-up and scalability of the IoT-clusters, massively processing data, at the edge.
Specifically, one of the most important advantages of the latest Raspberry Pi 4B+ boards is the low-profile LPDDR4 memory with 2, 4 or 8 GiB RAM capacity of choice, operating at 3200Mhz and providing a typically large memory transactions bandwidth, positively affecting the performance of parallel computing, in general. The boards with 4 GiB of RAM installed, and higher, are strongly recommended for data mining and parallel computing. Also, the BCM2711B0 SoC-chips are bundled with a various of integrated devices and peripherals, such as Broadcom VideoCore VI @ 500Mhz GPUs, PCI-Ex Gigabit Ethernet Adapters, etc.
For building and running a specific parallel modern code in C++17, implemented using the CL/SYCL heterogeneous programming model, the first that we really need is a Raspberry Pi 4B+ IoT-board with the latest Raspbian Buster 10.6 OS installed and configured for the first use.
Here is a brief checklist of the hardware and software requirements, that must have been met, beforehand:
Hardware:
- Raspberry Pi 4 Model B0, 4GB IoT Board;
- Micro-SD Card 16GB For Raspbian OS And Data Storage;
- DC Power Supply: 5.0V/2-3A via USB Type-C connector (minimum 3A – for data mining and parallel computing);
Software:
- Raspbian Buster 10.6.0 Full OS;
- Raspbian Imager 1.4;
- MobaXterm 20.3 build 4396, or any other SSH-client;
Since, we've got a Raspberry Pi 4B+ IoT board, now, we can proceed with turning it on and setting up, out-of-the-box.
Setting Up A Raspberry Pi 4B IoT Board
Before we begin, we must download the latest release of the Raspbian Buster 10.6.0 Full OS image from the official Raspberry Pi repository. To install the Raspbian OS image to the SD-card, we will also need to download and use the Raspbian Imager 1.4 application, available for a various of platforms, such as Windows, Linux or macOS:
Additionally, we must also download and install MobaXterm application for establishing a connection to the Raspberry Pi board, remotely, over the SSH- or FTP-protocols:
Since the Raspbian Buster OS and Imager application have been successfully downloaded and installed, we will be using the Imager application to do the following:
1. Erase the SD-card, formatting it to the FAT32 filesystem, by default;
2. Extract the pre-installed Raspbian Buster OS image (*.img) to the SD-card;
Since the steps above have been successfully completed, just remove the SD-card from the card-reader and plug it into the Raspberry Pi board’s SD-card slot. Then, attach the micro-HDMI and Ethernet cables. Finally, plug the DC power supply cable's connector in, and turn on the board. Finally, the system will boot up with the Raspbian Buster OS, installed to the SD-card, prompting to perform several post-installation steps to configure it for the first use.
Since the board has been powered on, make sure that all of the following post-installation steps have been completed:
1. Open the bash-console and set the ‘root’ password:
pi@raspberrypi4:~ $ sudo passwd root2. Login to the Raspbian bash-console with ‘root' privileges:
pi@raspberrypi4:~ $ sudo -s3. Upgrade the Raspbian's Linux base system and firmware, using the following commands:
root@raspberrypi4:~# sudo apt updateroot@raspberrypi4:~# sudo apt full-upgraderoot@raspberrypi4:~# sudo rpi-update4. Reboot the system, for the first time:
root@raspberrypi4:~# sudo shutdown -r now5. Install the latest Raspbian's bootloader and reboot the system, once again:
root@raspberrypi4:~# sudo rpi-eeprom-update -d -aroot@raspberrypi4:~# sudo shutdown -r now6. Launch the ‘raspi-config' setup tool:
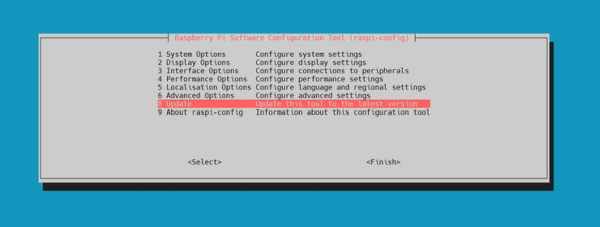
root@raspberrypi4:~# sudo raspi-config7. Complete the following steps, using the ‘raspi-config' tool:
* Update the ‘raspi-config' tool:

* Disable the Raspbian's Desktop GUI on boot:
System Options >> Boot / Autologin >> Console Autologin:
* Expand the root ‘/’ partition size on the SD-card:
After performing the Raspbian post-install configuration, finally reboot the system. After rebooting, you will be prompted to login. Use the ‘root’ username and the password, previously set, for logging in to the bash-console with root privileges.
Since you've been successfully logged in, install the number of packages from APT-repositories by using the following command, in bash-console:
root@raspberrypi4:~# sudo apt install -y net-tools openssh-serverThese two packages are required for configuring the either the Raspberry Pi's network interface or the OpenSSH-server for connecting to the board, remotely, via SSH-protocol, by using MobaXterm.
Configure the board’s network interface ‘eth0’ by modifying the /etc/network/interfaces, for example:
auto eth0iface eth0 inet staticaddress 192.168.87.100netmask 255.255.255.0broadcast 192.168.87.255gateway 192.168.87.254nameserver 192.168.87.254Next to the network interface, perform a basic configuration of the OpenSSH-server, by uncommenting these lines in the /etc/ssh/sshd_config:
PermitRootLogin yesStrictModes noPasswordAuthentication yesPermitEmptyPasswords yesThis will enable the ‘root' login, into the bash-console, via SSH-protocol, without entering a password.
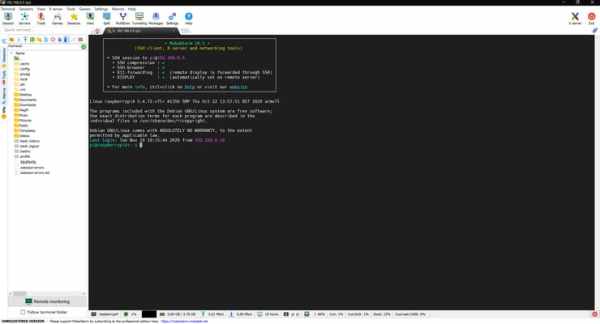
Finally, give a try to connect the board over the network, using the MobaXterm application and opening the remote SSH-session to the host with IP-address: 192.168.87.100. You must also be able to successfully login to the Raspbian's bash-console, with the credentials, previously set:

Developing A Parallel Code In C++17 Using CL/SYCL-Model
In 2020, Khronos Group, Intel Corp., and other vendors, announced the revolutionary new heterogeneous parallel compute platform (XPU), providing an ability to offload an execution of “heavy” data processing workloads to a widespread of hardware acceleration (e.g. GPGPU or FPGAs) targets, other than the host CPUs, only. Conceptually, the parallel code development, using the XPU-platform, is entirely based on the Khronos CL/SYCL programming model specification, – an abstraction layer of the OpenCL 2.0 library.
Here's a tiny example, illustrating the code in C++17, implemented using the CL/SYCL-model abstraction layer:
#include <CL/sycl.hpp>using namespace cl::sycl;constexpr std::uint32_t N = 1000;cl::sycl::queue q{};q.submit([&](cl::sycl::handler &cgh) { cgh.parallel_for<class Kernel>(cl::sycl::range<1>{N}, \ [=](cl::sycl::id<1> idx) { // Do some work in parallel });});q.wait();The code fragment in C++17, shown above, is delivered, entirely based on using the CL/SYCL-programming model. It instantiates a cl::sycl::queue{} object with the default parameter initializers list, for submitting SYCL-kernels, for an execution, to the host CPUs acceleration target, used by default. Next, it invokes the cl::sycl::submit(…) method, having a single argument of the cl::sycl::handler{} object, for accessing methods, that provide a basic kernels functionality, based on a various of parallel algorithms, including the cl::sycl::handler::parallel_for(…) method.
The following method is used for implementing a tight parallel loop, spawned from within a running kernel. Each iteration of this loop is executed in parallel, by its own thread. The cl::sycl::handler::parallel_for(…) accepts two main arguments of the cl::sycl::range<>{} object and a specific lamda-function, invoked, during each loop iteration. The cl::sycl::range<>{} object basically defines an amount of parallel loop iterations, being executed, for each specific dimension, in case when multiple nested loops are collapsed, while processing a multi-dimensional data.
In the code, from above, cl::sycl::range<1>(N) object is used for scheduling N-iterations of the parallel loop, in a single dimension. The lambda-function of the parallel_for(…) method accepts a single argument of another cl::sycl::id<>{} object. As well as the cl::sycl::range<>{}, this object implements a vector container, each element, of which, is an index value for each dimension and each iteration of the parallel loop, respectively. Passed as an argument to a code in the lamda-function's scope, the following object is used for retrieving the specific index values. The lamda-function's body contains a code that does some of the data processing, in parallel.
After a specific kernel has been submitted to the queue and spawned for an execution, the following code invokes the cl::sycl::wait() method with no arguments to set a barrier synchronization, ensuring that no code will be executed, so far, until the kernel being spawned has completed its parallel work.
The CL/SYCL heterogeneous programming model is highly efficient and can be used for a widespread of applications.
However, Intel Corp. and CodePlay Software Inc, soon, have deprecated the support of CL/SYCL for hardware architectures, other than the x86_64. This made it impossible to deliver a parallel C++ code, using the specific CL/SYCL libraries, targeting Arm/Aarch64, and other architectures.
Presently, there's a number of CL/SYCL open-source library projects, developed by a vast of developers and enthusiasts, providing support for more hardware architectures, rather than the x86_64, only.
Since 2016, Khronos Group, Inc. releases the revisions of their triSYCL library open-source project (https://github.com/triSYCL/triSYCL), recommended for using it as a testbed while evaluating the latest CL/SYCL programming model layer specification and sending a feedback to Khronos- and ISO-committees. However, the following library distribution is not “stable” and can be used solely for the demonstration purposes, and, not, for building a CL/SYCL-code, in production. Also, the Khronos triSYCL library distribution fully supports the cross-platform compilation, on a x86_64 development machine, using the GNU's Arm/Aarch64 cross-platform toolchain, rather than building a code, “natively”, with LLVM/Clang compilers, on Raspberry Pi.
In 2019, Aksel Alpay, at Heidelberg University (Germany), implemented the latest CL/SYCL programming model layer specification library, targeting a various of hardware-architectures, including the Raspberry Pi's Arm/Aarch64 architectures, and contributed the most “stable” release of the hipSYCL open-source library distribution to GitHub (https://github.com/illuhad/hipSYCL).
Further, in this story, we will discuss about installing and configuring the GNU's cross-platform GCC/G++-10.x.x and “native” Arm/Aarch64's LLVM/Clang-9.x.x toolchains, and using the triSYCL and hipSYCL library distributions, for delivering a modern parallel code in C++17, based on using the libraries, being discussed.
Source: Parallel Computing On Raspberry Pi 4B+ IoT Boards Made Easy

