
Phillips Hue light synced to a TV image through a webcam or other input, providing ambient light around the TV the same color as on screen.
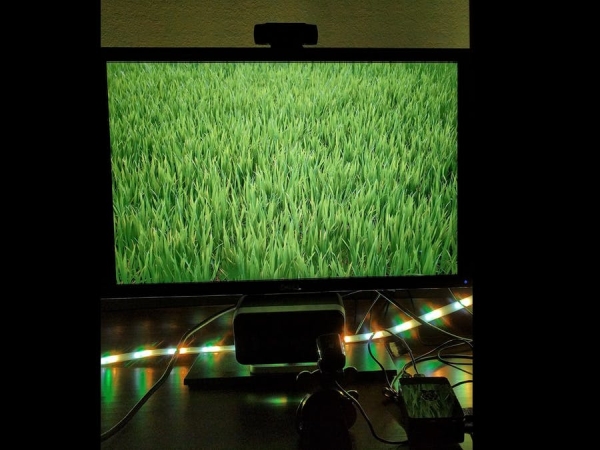
A recent trend in televisions has been the addition of ambient lights behind the screen that is synchronized with the action on the screen. After adding some Phillips Hue lights to my home I wanted to see if I could achieve the same effect with extra parts I had laying around the house.
For this project you will need a USB webcam compatible with Windows 10 IoT (see here for compatibility) or a UVC Capture Card, a Hue Bridge, and a Hue light bulb capable of color changing.
Updates
V 1.0 – Initial Posting
V 1.1 – Added calibration to TV, see description at end of article.
V 1.2 – Added Ability to use Capture Card, see description at end of article.
V 1.3 – Bug Fixed that made the colors inaccurate, color change smoothing added.
Project To Do's
- Currently selects the first Hue Bridge found, this should be configurable
- Currently filters for lights with the word “strip” in them and modifies the color on all of them, allow this to be configurable
- Better configuration for different capture devices
Hardware Setup
- Install the latest Windows 10 IOT for your Pi (Does this work with other hardware? Let everyone know in the comments section!)
- Attach your webcam via USB
- Connect your Pi to your local network (Required to communicate with the Phillips Hub)
- Connect your Pi to a monitor and mouse for configuration, after configured you can run headless
Software Setup
- Use your favorite source control tool to clone the source code:
git clone https://github.com/CameronVetter/AmbiHueTv.git - Open AmbiHueTv.sln with Visual Studio 2015
- Select Debug and ARM as the configuration profile
- Select Remote Machine and click run.
- You will have to select your Raspberry Pi or enter the IP address if it can't be found automatically
- Use the IoT Dashboard to configure AmbiHueTv as your startup application on the Apps page.
Note: I recommend doing a Release/Arm build before making this a permanent startup application, this will allow AmbiHueTv to process more frames per second.
Using the Software
When AmbiHueTv runs it will automatically start (the equivalent of clicking the Start button). The first time it starts AmbiHueTv will search for Hue bridges and select the first bridge it finds. You must then tap the link button on the Hue Bridge and click register in the app. The app will be registered with the bridge and on future app start ups will connect to the bridge without user intervention.
Once the app is running you will see a preview of what the camera is seeing in the app. Use this preview to align your camera's field of view with as much of the television image as possible. To the right of the preview is a preview of the dominant color that the Hue lights will be changed to automatically.
The app has a few options to choose from to optimize your experience. These options are saved and the changes start immediately with the next frame processed, so that you can experiment with these in real time and see their impact. I suggest starting with PureAverage and RuleOfThirds for a good balance of performance vs accuracy.
Algorithms
All algorithms throw out Grey and Black colors, when these color are considered you mostly get grey for the color of the lights and the dominant color is rarely picked up.
PureAverage – Fastest and least effective. Each frame is examined as an RGB value and the average value for Red, Green and Blue is calculated. (Red, Green, and Blue components of each pixel are treated separately)
MostFrequentColor – Slightly faster and Slightly more accurate. Each frame is examined as an RGB value and the Red, Green, and Blue value that appears most often is selected. (Red, Green, and Blue components of each pixel are treated separately)
MostFrequentWholeColor – Slow and very accurate. Each frame is examined and the whole RGB value that appears most often is selected.
Biases
Each bias can be applied to any of the algorithms to bias their color selection towards the most important object in the scene. These are based on cinematography principles and in testing have greatly improved color selection with little performance impact.
None – No bias applied
RuleOfThirds – Uses the Rule of Thirds to bias color selection towards areas where the subject is likely to appear if the cinematographer is using the Rule of Thirds to frame his shot.
GoldenRatio – Uses the Golden Ratio to bias color selection towards areas where the subject is likely to appear if the cinematographer is using the Golden Ratio to frame his shot. This uses an integer approximation to get close enough to the golden ratio without a performance hit.
Calibration to TV Size
I found it was nearly impossible to align the camera so that the tv exactly filled the frame. To help with this I have a calibration button that allows the user to select what part of the video frame being captured should actually get used. Click the calibration button and follow the instructions.
Using a Video Input instead of a Webcam
I really disliked the Webcam solution, it was a hack that worked ok, but took a lot of effort to setup and required the pi and webcam to be in front of the Tv. To resolve this I purhcased a Generic UVC Capture device from Amazon, I've added the exact one that is tested and works in the list of parts. This allows you to input Composite video and appears as a generic webcam. I took my HDMI signal and split it, I then connected that to a HDMI to Composite converter and connected that to the Capture device. This setup works great and allows all of the components to be hidden.
Configure for your capture device
Each Capture device has different capture capabilities. You may need to change the line that initializes the capture device to match your capture device. To do this modify the line below the //TODO in MainPage.xaml.cs in the WatchFrames method. To find the correct settings build the project in debug mode and run it. When the capture device is initialized it will output to Visual Studio and in app all the different settings for your device that are valid.