Make a device that can measure environmental conditions and relay to the user.
Make it wearable.
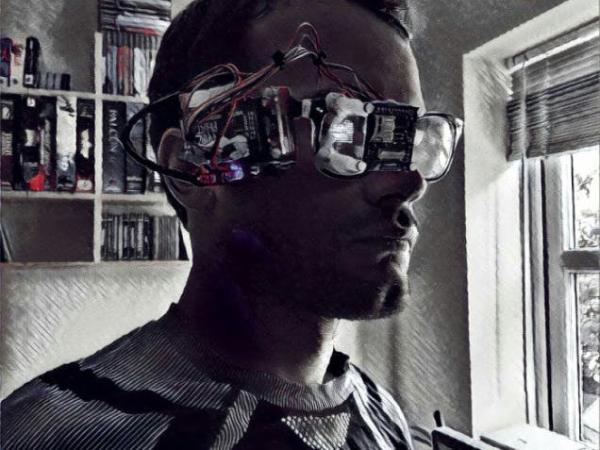
In the interests of producing more wearable tech, I thought; what would be cooler than a Raspberry Pi attached to a pair of glasses that can show sensor data to the wearers eye?
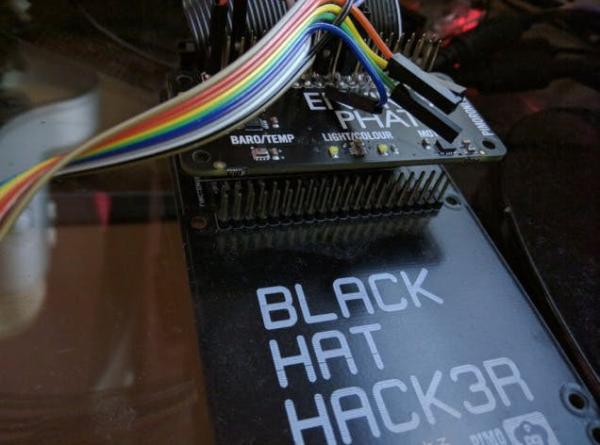
I hooked the board up to my Black HAT Hack3r and checked out this handy tutorial to get reading some data from it. Thank you Pimoroni.
Once it was reading out some data I decided to hook up the OLED screen on top, using jumper wires on the extended header.
As usual the simple thought turns into a few hours of trying to figure out how everything is even wired. Thanks to this random person for figuring out the correct wiring for a Raspberry Pi, if you ever see this.
Here's the OLED wiring from the above:
oled (GND/G) — Pi ( Pin 6 Gnd) oled (Vin/+) — Pi (Pin 1 3.3v) oled (MOSI/SI) — Pi (Pin 19) GPIO 10 (MOSI) oled (SCK/CL) — Pi (Pin 23) GPIO 11 (SCLK)) oled (DC/DC) — Pi (Pin 16) GPIO 23 oled (Reset/R) — Pi (Pin 18) GPIO 24 oled (OLEDCS/OC) — Pin 24 (GPIO 8 CE0)
You can get a good look at the Pin layout of a Pi here.
The pins on the OLED should be shown on the PCB of the board itself.
Once wired up it was OLED code time.
First I hit up a tutorial here. < This one is the most important as it guides you through the installation of the necessary software.
Then looked at some code from here. And also this handy stuff here.
I’d suggest the tutorial first followed by looking at the second links examples, these will get you setup writing stuff to the screen successfully. The third link has some further cool stuff for drawing shapes to the screen.
On my first attempts with the above I had some issues getting the screen to work, when trying to run text examples I ended up with a garbled screen – a bad feeling when you think you’ve busted a new piece of hardware in the first five minutes.
However I eventually discovered how to display a picture of a cat. With further trial and error I was able to display text – I combined this with the code for reading the Enviro pHat data and BEHOLD:
At this point I was excited – I moved onto making the text tidier and added some spacers to get the correct distance from the glasses + the lens:
I am an experienced technical writer holding a Master's degree in computer science from BZU Multan, Pakistan University. With a background spanning various industries, particularly in home automation and engineering, I have honed my skills in crafting clear and concise content. Proficient in leveraging infographics and diagrams, I strive to simplify complex concepts for readers. My strength lies in thorough research and presenting information in a structured and logical format.
This website uses cookies to improve your experience. We'll assume you're ok with this, but you can opt out if you wish.ACCEPTCheck Privacy Policy
Manage consent
Privacy Overview
This website uses cookies to improve your experience while you navigate through the website. Out of these, the cookies that are categorized as necessary are stored on your browser as they are essential for the working of basic functionalities of the website. We also use third-party cookies that help us analyze and understand how you use this website. These cookies will be stored in your browser only with your consent. You also have the option to opt-out of these cookies. But opting out of some of these cookies may affect your browsing experience.
Necessary cookies are absolutely essential for the website to function properly. This category only includes cookies that ensures basic functionalities and security features of the website. These cookies do not store any personal information.
Any cookies that may not be particularly necessary for the website to function and is used specifically to collect user personal data via analytics, ads, other embedded contents are termed as non-necessary cookies. It is mandatory to procure user consent prior to running these cookies on your website.


