
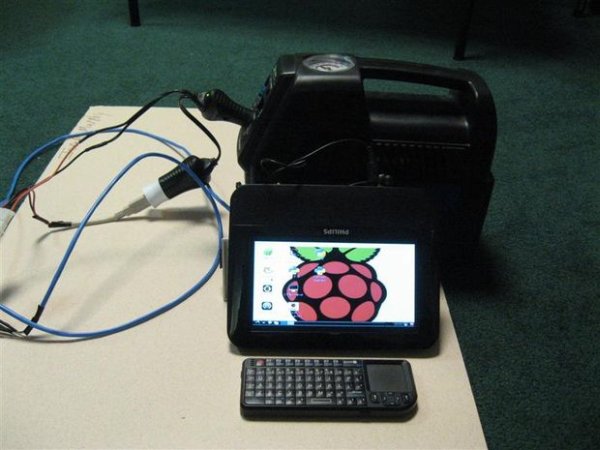
The eventual result of this instructable is, a portable (self powered) raspberry pi system to run field experiments.
Part 1
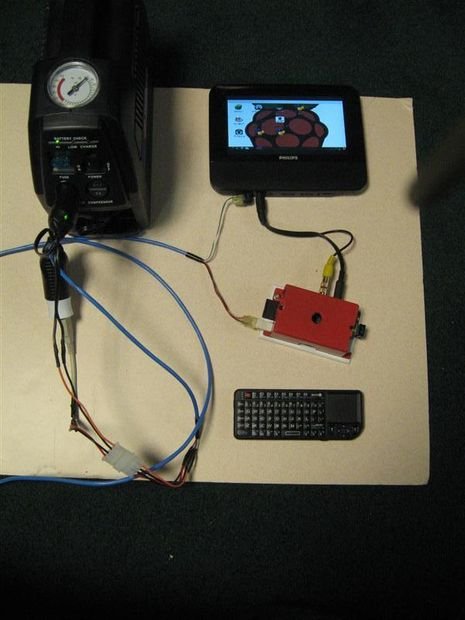
Small inexpensive portable system that includes, Computer (RPI), Monitor with Audio speakers (Secondary screen from refurbished Auto DVD player $29 including the DVD player to be repurposed), wireless keyboard with touch-pad (FAVI or alike micro keyboard).All powered by my rechargable compressor/ 12 volt power source ($39 and I already had it for use with my pneumatic cannon). The compressor has another use filling tires when away from power but that was just an excuse to buy it. I also plan to have an AC supply make from a USB Hard DIsk programmer (12v and 5v 1.5A each convenient).
(new my UPS battery backup died, but the battery is still good I will make a pigtail to auto accessory adapter)
Yes I know you could use a Atrix Lapdock (I have one it was only $35 and use it for demos, but this is more fun and less fragile, if you have one you know). Besides it just looks like a laptop, and kind of takes away from the mad scientist image I am shooting for.
So Lets get going..
materials
Raspbery Pi and case (see my instructable) http://www.instructables.com/id/Raspberry-PI-case-with-built-in-surface-mount-for-/
Auto DVD player secondary screen (mine was from Cow Boom for $29)
Keyboard Favi wireless micro keyboard
Favi keyboard
12V Power Supply rechargeable: Home Depot Link
PC Hard drive power extender cable male and female.
Sabernet hard drive programmer power supply.
USB car charger (make sure you can deliver at least 1 amp otherwise it is useless).
radio shack car lighter slitter (you will be cutting one off but so be it.)
12 volt connector for your dvd second screen ( I had one from some other device I had, junk drawer)
Micro USB connector, cut one of your cables but my suggestion is to buy one of the “charger connectors” from radio shack, the RPI needs current and the more you can deliver the better it will perform.
Optional WIFI I use a AM150 it can run off the PI with no power issues (this is big).
Latest Raspbian Build ( I won't go into this part it is part of owning a PI).
Various connectors cable depending on your screen:
Stereo jack (from an old head set or a common connector from Radio Shack, I went for this they are cheap and easy to assemble).
I used intercom cable for power the stuff I have can is 24 guage more than I needed.
Composite video male to male.
Usb Type A to plug into the charger.
Tools:
Wire strippers and snips.
Soldering Iron / solder (you can do all this without it but the cost of cables and connectors gets high)
Glue Gun / glue
I am an older engineer from the days when the ability to solder was taught in EE labs. Now here in the US we don't graduate as many EEs and almost all of those never touch any analog power circuits filters or antennas (about the only place you still solder). OK, I will get off the soap box.
Step 1: Power Cable and AC to DC Power Scource
Cut your 4 conductor cable to the desired length (you can use three but separate grounds are better for current, I won't get into hole verses electron flow). Strip the sleeve off about 3 inches on one end and a little more on the other end. Strip all ends so that about 1/2 inch is exposed. Take your hard drive extender cable and cut it in half (less if you want to dress it better), strip all the ends. Splice the pairs RED on the hard drive connector is 5 volts on mine ORANGE is 12 volts (try to make black or green your grounds for 12 and 5 volts). If you have heat shrink tubing you can use to cover your spice, if not use electrical tape.
To make it easy to splice do not just twist them together (end to end), this make it bulky and forces an unnatural bend. Instead twist then beginning to end see the pictures. On the device side you have to solder your +5 and ground to your micro usb charging connector ohm it twice solder it once (spend some time here to get it right no sense in blowing up your PI). Do the same for your DVD screen power most are labeled with an orientation (ground is usually the outside.
Now that you have the DVD screen wired use a glue gun to 1. keep the two power from shorting and 2. create some strain relief for when you disconnect.
Again check your power connections all the way through, better safe than sorry.
Step 2: Construct the Composite Video and Audio connections
In my case the device came with a video and audio slitter cable.
Step 1. Attach the maile to male composite video connector on the yellow female (composite video is always yellow).
Step 2. I didn't want to purchase cables to convert from RCA male to male (the red/white connectors) and then to a 1/8 inch stereo jack. Instead I bought a a jack that you could solder to, NOTE: You could have cut the end off an old set of ear buds and soldered it inline this turned out a little neater. (sorry no pictures but finished product)
 Cut off the red and white ends of your cable.
You may have to cut the rear end of you stereo jack sleeve to thread it over the two audio wires. (thought I took some pictures but cannot find them).
Strip the first layer off about 1 inch to expose the ground shield (use a scribe or anything pointed to unbraid the ground braid) and gather the ground braid twisting it. Strip about 1/4 inch off the center insulator to expose the conductive wire twist this so that it does not become frayed. Do the same for the other connector.
Now this may not be easy and you may have to adjust lengths due to your connector, thread the conductive end of one (left or right) into the hole provided. I didn't care about left or right but you can look it up if you like. Solder first one then the other.
Now twist the two ground wires together, wrap it around the ground post as shown. Solder the braid to the post again see the pictures and then push the jack sleeve down and screw it in place.
If you have cash you can avoid all this by buying connectors, you could also cannibalize a head set if you wish.
For more detail: Port a Raspberry Pi Project