
DIY jump scare portrait from scratch using Raspberry Pi 3 B, Python and AtmosFX Videos unliving portraits.It's October again and I wanted to come up with a Halloween project using a Raspberry Pi. I saw a few haunted portraits scattered here and there but none of them really presented much in the way of a scare, just some simple movement.
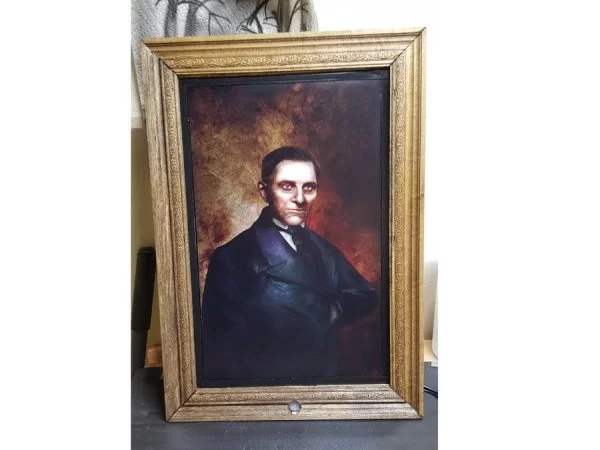
I decided to expand on that idea and started looking for some good jump scare type videos I could use. This lead me to AtmosFx they have some really cool Unliving Portrait videos that are only $7.99 each. These were perfect for what I had in mind and allowed me to have more than one jump scare video that I could select manually or have it run each one at random.
Here is a video of the finished project.
I didn't want to write the PIR code from scratch so I search the web for examples of accessing the PIR with Python. I found an old article By Arc Software that demonstrated a similar project.
The code I am presenting is mostly from their example but I made several modifications to it to suit my needs.
STEP 1: Build the LCD Frame
After disassembling the LCD monitor and removing the LCD panel and electronics I measure the exact size of the display 17 X 11, in portrait orientation.
I used this online tool to figure out measuring my frame cuts to fit my LCD panel.
I built a wood frame using 1″ x 2″ wood that would have an inner dimension of 17″ x 11″, that would hold the LCD. I cut 4 pieces that when framed together would be the exact size of my LCD and mounted the LCD into the frame and made the LCD flush with the LCD frame. The picture frame attaches to the LCD frame and leaves all the electronics accessible from the back.
After staining the picture frame and letting it dry I used a brad nailer to attach the picture frame to the LCD frame.
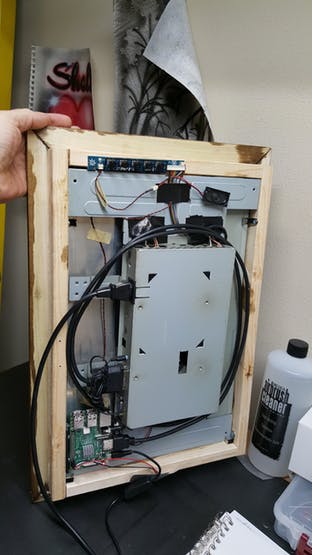
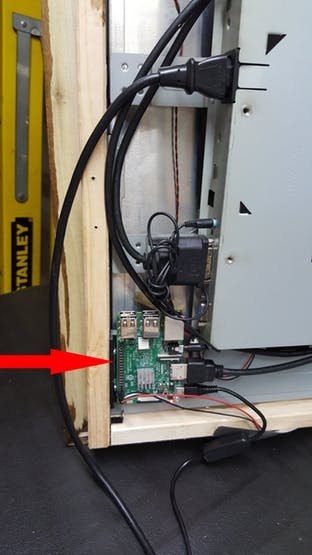
Next I mounted the Raspberry Pi using a nice little mount from Thingiverse.com (Pi Side Mount) that I printed with my 3D printer.
I used Mirror holders to bolt the LCD into place to keep it from shifting and keeping it flush with the front of the frame against the picture frame.
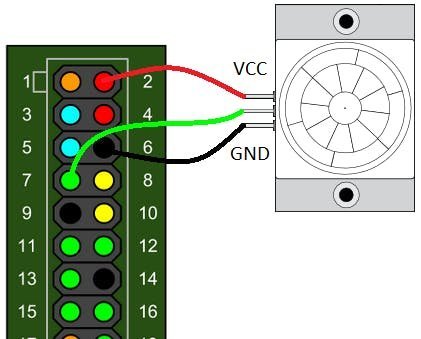
The final step of assembly was to drill a whole for the PIR sensor and attach it to the GPIO header of the Pi. The PIR is pretty simple, it has a hot, ground and sensor pin.
STEP 2: Images, Videos and Code
I used three of the Unliving Portrait videos from AtmosFX in my project.
The first hurdle was to get the video to play when there was motion detected not just loop constantly on the screen. I could load the video and then pause it on the first frame and then when there is motion make it continue playing and when complete reset and start all over again.
It would be simpler to display a still of the first frame and then when motion is detected fire up OMXPlayer to play the appropriate video file. The advantage to this is that when OMXPlayer exited the loaded still would still be in the framebuffer and be on screen.
To display the initial image I used the Linux FBI (framebuffer imageviewer).
The player used is OMXPlayer and while it does support pausing there is no command line command that I could call in Python to pause and play without implementing something like DBuscontrol which would overly complicate the project.
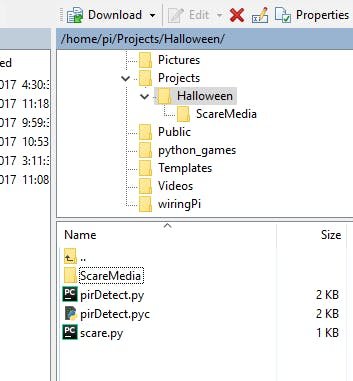
Folder Structure:
The folder structure below matches the paths in the script to access the images and videos. The path can be changed as long as the paths in the scripts are updated to match.
Images:
So for each video I loaded it up in VLC and did a screen cap of the first frame in the same resolution the video was in so that they would overlay perfectly on the screen with the video when it played.
The three videos were of a Man, Woman and Child so I took a screen cap of each and named them MaleStart.png, FemaleStart.png and ChildStart.png. I created a folder in my Halloween project called ScareMedia and uploaded the 3 stills.
Videos:
Next I named each video MaleScare.mp4, FemaleScare.mp4 and ChildScare.mp4, and uploaded them to the ScareMedia folder.
Code:
There are 2 scripts need to automate the videos on motion detection.
pirDetect.py
#!/usr/bin/python
import RPi.GPIO as GPIO
import time
import os
class detector(object):
def __init__(self, sensor):
self.callBacks = []
self.sensor = sensor
self.currState = False
self.prevState = False
GPIO.setmode(GPIO.BOARD)
GPIO.setup(self.sensor, GPIO.IN, pull_up_down=GPIO.PUD_DOWN)
def read(self):
self.prevState = self.currState
self.currState = GPIO.input(self.sensor)
def printState(self):
print( “GPIO pin {0} is {1}”.format(self.sensor, “HIGH” if self.currState else “LOW”))
def subscribe(self, callBack):
self.callBacks.append(callBack)
def callBack(self, state):
for fn in self.callBacks:
fn(state)
def start(self):
try:
self.read()
self.printState()
while True:
self.read()
if self.currState != self.prevState:
self.printState()
self.callBack(self.currState)
time.sleep(.1)
#Since fbi doesn't restore the console correctly when the application is exited we do a little clean up and handle the KeyboardInterrupt event.
except (KeyboardInterrupt, SystemExit):
os.system(‘stty sane')
#!/usr/bin/python
import subprocess as sp
import time
import os
from pirDetect import *
import sys
video = [“omxplayer”, “filename”, “-o”, “both”, “–win”, “0 0 1280 720”, “–aspect-mode”, “fill”, “–no-osd”, “–orientation” ,“180”,“–vol”, “-600”]
scareFile = “/home/pi/Projects/Halloween/ScareMedia/{0}ScareV.mp4”.format(sys.argv[1])
print(scareFile)
def onMotion(currState):
if currState:
video[1] = scareFile
subVideo = sp.Popen(video)
while subVideo.poll() is None:
time.sleep(.1)
def showImage():
os.system(“sudo fbi -T 1 -d /dev/fb0 -noverbose -once /home/pi/Projects/Halloween/ScareMedia/{0}Start.png”.format(
sys.argv[1]))
showImage()
objDetect = detector(7)
objDetect.subscribe(onMotion)
objDetect.start()
os.system(“sudo killall -9 fbi”)
Bringing It All Together:
The scare script can be passed a single parameter with the video sequence you want to play. Later I will automate this to play any of the three randomly.
There is also a modification to add a Pi camera and take a 5 second video of the person activating the motion and save it to the Pi each time motion is detected. (Not implemented yet).
Read More Detail :Possessed Portrait – Updated