
How to use Raspberry Pi 4 as a web server. In addition to that we will also see how to make web pages in HTML & style with CSS
Story
In this tutorial we will learn how to use Raspberry Pi 4 as a web server. In addition to that we will also see how to make web pages in HTML & style with CSS. So let’s get started.
Components Required:
Installing Apache:
Apache is web server application, it serve HTML files over HTTP.
First, update the available packages. Open terminal and type command
sudo apt updatetype this command to install apache2
sudo apt install apache2 -yInstalling PHP:
PHP is used for server-side programming which will interact with databases to retrieve information, storing, email sending, runs the logic and provides content to HTML pages to display on the screen.
Install PHP and the PHP module for Apache.
sudo apt install php libapache2-mod-php -yTesting The Web Server:
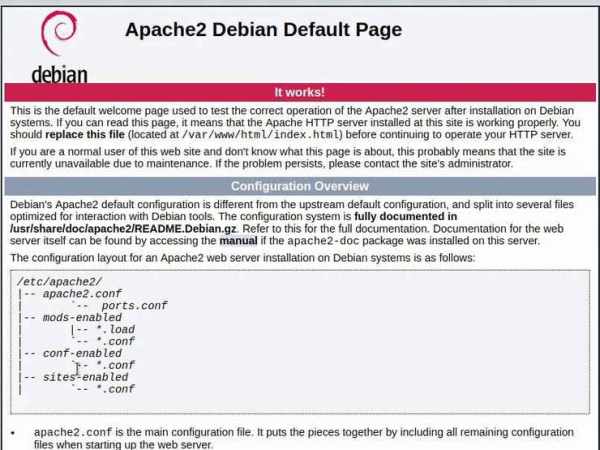
When you install apache by default it will put web page on web folder. You can access that web page within pi itself by opening your browser and typing http://localhost/ or raspberrypi.local (if your pi host name is raspberrypi). If you want to access that web page on another PC or computer, you can type http://192.168.1.102 (you have to type your pi IP address here). For finding pi IP address you can open terminal and type
hostname -IIf you see this page on your browser it means apache is working.
How to change default web page:
After installing apache and testing web page. You are thinking to change web page to your web page. But you can’t edit it right now. You need to change its ownership to your own username (by default it is pi, if you haven’t changed).
Navigate to this directory
cd /var/www/html
ls -al
Change ownership to your username
sudo chown pi: index.html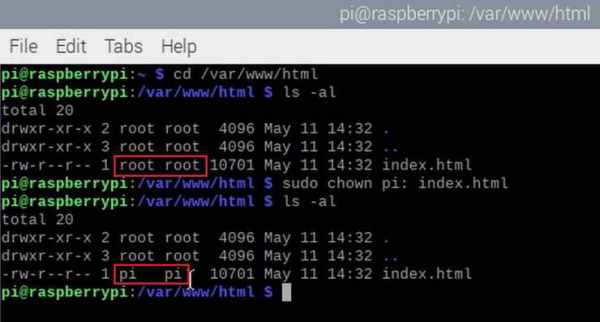
Now you are able to change, edit your web page and refresh the web page to see changes.
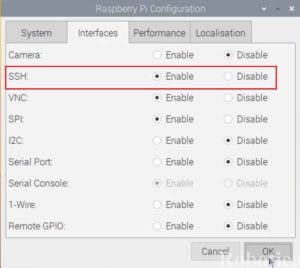
Enable SSH:
Go to Menu → Preferences → Raspberry Pi Configuration → Interfaces → enable SSH
WinSCP:
You can edit index html file in raspberry pi itself but if you are testing a lot, I would recommend to download WinSCP. WinSCP (Windows Secure Copy) is an open source SecureFTP client for Windows. It allows secure file transfers between the client’s local computer and the remote server. You can directly edit your html file inside the WinSCP.
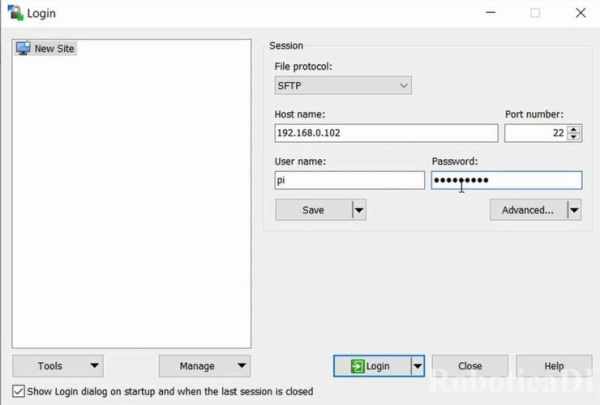
Select File Protocol → SFTP
Host name Raspberry pi → IP address
port number → 22
user name → pi
password → raspberry
save & Click on login.
Now you will be able to see raspberry pi files on right side and Your PC’s file on the left side.