
The Pi 4 is finally powerful enough to function as a standalone machine. Let’s use it to turn a Lapdock into a laptop.
Some Background
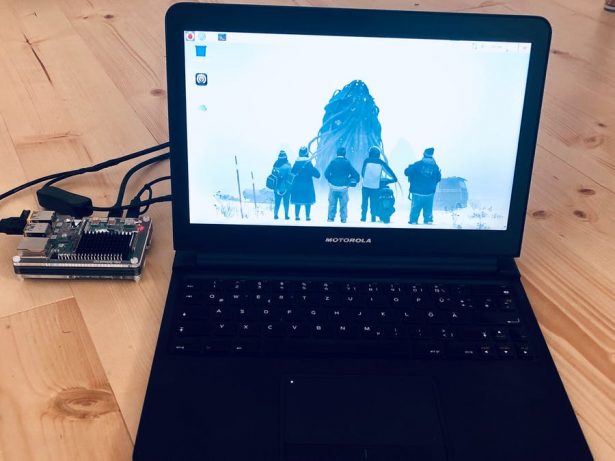
The Raspberry Pi 4 is finally powerful enough to be used as a proper computer – one with a keyboard and a screen, and not hidden away behind some cabinet. I wanted my set up to be portable and light and not a desktop computer, a laptop would be nice. But most DIY laptops look a bit too much like DIY for my taste, so I kept looking for a nicer solution.
I found the PiTop, but there is no Pi 4 support (yet) and the device itself is quite pricy. So I continued my search and stumbled upon the Motorola Atrix Lapdock, a phone dock from 2012 which was supposed to kill your laptop – but never did.
The Lapdock looks like a proper laptop and features a 11″ screen (1366 x 768), a touchpad and keyboard, a USB hub and a built-in power bank (4400 mAh). But since it is only a dock (and not a standalone computer) it has no mainboard nor a graphics card, only a female Micro HDMI and female Micro USB connector.
Using these two connectors you can turn it into a Pi laptop. The hardest part (after buying a used one – I paid 50 € for mine) is finding the proper cables: female Micro HDMI and Micro USB connectors. You also need to solder your own USB cable, but this is not really that complicated…
Note: You can also use the Pi 3 as an alternative. The setup is even easier that the Pi 4 one. But it be less snappy since is only the Pi 3. In the following I will describe both setups.
Step 1: Making the HDMI Connection
Making the HDMI connection is easy. I used a Micro HDMI female to HDMI cable and a HDMI to Micro HDMI cable since I couldn't find a single Micro HDMI extension cable. You can discard the second cable for the Pi 3 since it offers a regular HDMI input connector.
Some cheap HDMI cables might not work since their pins are not properly connected. I had no problems with mine but I read about it in quite a few places. If your HDMI cable works, an indicator in the top left corner of the trackpad is turned on and the Lapdock provides power through the USB port. Unfortunately it is not enough to feed 3.1A to the Pi 4. But more on this later.
Step 2: Building an USB cable
In addition to power, the USB cable provides also data from the trackpad and keyboard. The easiest way is to use a Micro USB female to USB cable to get the Lapdocks trackpad and keyboard signal.
I built my own cable out of two existing ones, to separate the power line from the data lines. After a bit of soldering I got an Y-shaped cable combo: the female Micro USB adapter sends the power line and the ground signal to a Micro USB adapter with an on/off switch, and the data and ground signals to a regular USB plug.
Source: Raspberry Pi 4 Laptop