
If you are using your Raspberry Pi with Breadboard, and you have lots of connections to make, then the Pi Cobbler from Adafruit is pretty neat. However, sometimes you only need to make a couple of connections and the Cobbler is overkill and a few Male to Female jumper leads will do just fine.
 The drawback with using Male to Female jumpers direct onto the GPIO is that you then have to count down the pins trying to find the pin you need, because nothing is labelled. Matching a diagram of the pinout to the actual pins is not easy and mistakes can be made.
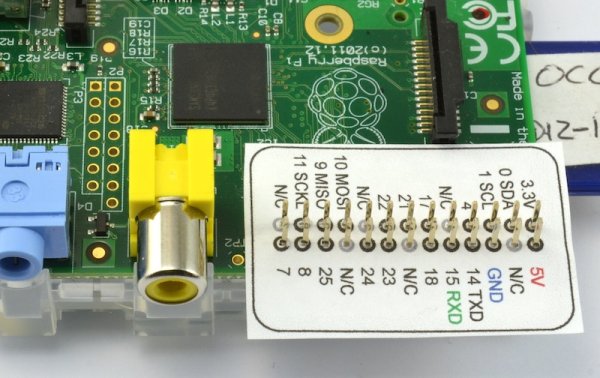
Enter the Raspberry Leaf! Okay, so its just a bit of paper, with all the pin labels on. The image for this is at the end. Just save it, print it out, and cut around the border. It's saved at 300 dpi.
To fit it onto the GPIO pins, I found it easiest to make the holes first by placing it over some breadboard and pushing a header pin through each hole in turn.
Pushing it all the way down to the bottom of the GPIO connector needs tome help from a plastic tool – or if you turn off your Pi and, use a small screwdriver. DON'T DO THIS WITH THE Pi POWERED UP!!!
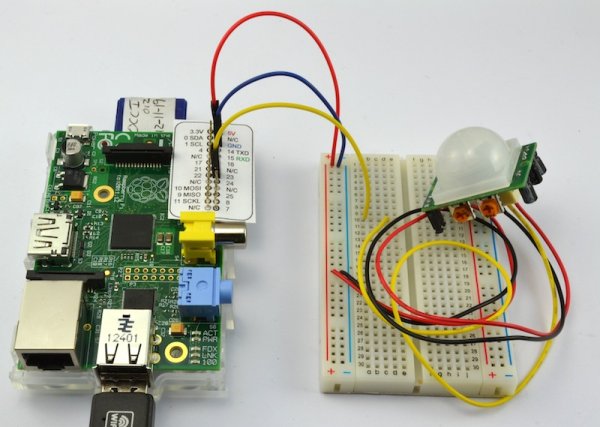
This has now become a permanent fixture on my prototyping Pi.
All the numbers refer to the BCM GPIO number, so if you are using the RPi.GPIO library then be sure to set the mode to BCM using the function setmode.
For more detail: Raspberry Pi and Breadboard (Raspberry Leaf)