
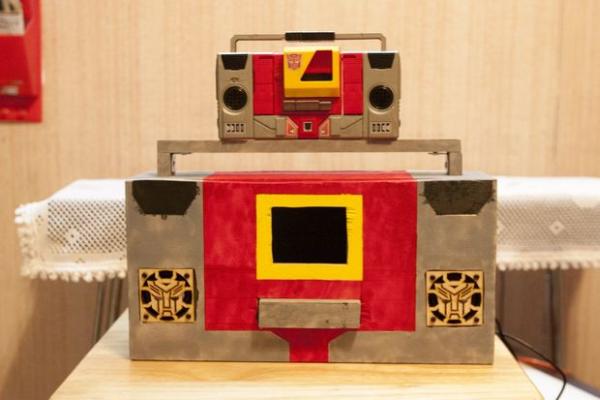
The model that is being used for this project is the Autobot Blaster Generation 1 from Transformers.In the following steps, I'll show you step by step on how to design a larger scale model of the original Generation 1 Autobot.
Click here for the video demonstration of the finished product.
Step 1: Internal hardware
Enclosure – $7.35SD card (2 GB, 4GB, 8 GB) – prices vary
Note – get a card that has a fast write. this will speed up the OS configuration settings.Frisby FS-55NU USB Speakers – $7.95
– Note: For this project, get this speaker because it is cheap and it's loud for a USB powered speaker.
3.5″ TFT LCD Monitor – $44.95 from Adafruit
– Comes equipped with dual RCA Video, and power plug (AC Adapter sold separately)
Female DC Power Adapter – $2.00 from Adafruit
Adafruit Mini Wi-Fi – $11.95
12 VDC 1 Amp AC Adapter (for 3.5 LCD Screen) – $8.95 from Adafruit
USB Hub WITH AC Adaptor ~ prices vary
– This is to provide extra power to the USB devices so the Raspberry Pi can recognize them.
2-3 32 or 64 GB USB sticks – prices vary.
Step 2: Software
Software you need:
- OpenELEC XBMC player.
- XBMC Remote for Android / iOS
Please download the latest version OpenELEC-RPi.arm-3.2.4.img.zip.
Click here to go directly to the Windows installation of OpenElec.
Here's the instructions for those who don't want to leave this page:
- Warning: Installing XBMC on SD Card will erase the current contents on the SD Card.
- Download Disk Imaging Software http://sourceforge.net/projects/win32diskimager/
- Download the latest OpenELEC Image http://resources.pichimney.com/OpenELEC/official_images/?C=M;O=D
- Insert your SD card into your system. It should appear as a new drive letter.
- Extract the image so you have a file ending in .img
- Extract the disk imager software and run Win32DiskImager
- Select the image file and verify the destination drive letter is correct, then click write.
Once you finished writing to the SD Card, insert the SD Card into your Raspberry Pi and power on the machine.
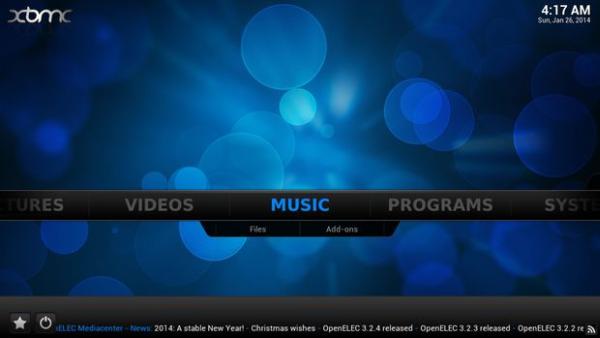
Step 3: Configuring the XBMC layout
Once you have powered on the Raspberry Pi, please accept all the defaults and you should see the main menu.
You can leave it as is but since this is a music player, lets remove all the options EXCEPT the Music and System buttons.
- Navigate to System –> Settings
- Select Appearance
- Select Skin and navigate to Settings
- Select Home Window Options
- For the first section, enable only Show Music info
- In the next section, deselect everything EXCEPT Hide – Music
- Go back to the home screen and you should now see only the Music button being displayed.
Step 4: Network and Web Server Configuration
The next step after the layout is to configure the network settings and web server services (for remote control with Android / iOS).
Network Configuration:
Setup (Beginners):
- Navigate to System –> OpenELEC
- Check the Network tab. WIreless Network should be enabled.
- Then go to Connections. Select your wireless network and hit connect. Enter any security pass phrases if any and you should be connected to the wireless.
- A list of wireless networks should show up including yours. If nothing shows up, please check the USB Wifi Adapter and see if it's compatible with the Raspberry Pi. For a list of all compatible Wi-Fi devices, please visit http://elinux.org/RPi_USB_Wi-Fi_Adapters.
- Scroll to the Web Server section.
Setup (Advanced):
- Follow Steps 1 through 4 for Beginners
- You need to change the type of IP addressing from DHCP to Manual. This is to easily recognize the Raspberry Pi by IP address.
- Select your wireless network and select Edit.
- Select the IPv4 tab and change the IP Address Method to Manual
- Find your your current Network Settings on a PC / Mac
- PC
- Open up the Command Prompt and enter ipconfig /all
- Make a note of the Subnet Mask and Default Gateway. The Default Gateway is your Wireless Router.
- Log into your router and navigate to the section where it mentions about DHCP server.
- Check the DHCP range and select an IP address that is OUTSIDE of the range for your Raspberry Pi.
- Mac
- Open up the Terminal and enter ifconfig
- Look up the ip address for either eth0 (wired) / eth1 (wireless) and Subnet Mask. Most likely it's 255.255.255.0
- The Default Gateway should end in .1 and the first three numbers should match the first three numbers of eth0 / eth1.
- Like the PC, log into the router, find the DHCP server range and pick one outside the range.
- PC
- Go to Web Server section.
Web Server Configuration:
- Navigate to System –> Settings
- Select Services
- Scroll to the Webserver Tab.
- Please enable Allow control of XBMC via HTTP
- Leave the default port at 8080
- You can leave the default Username or change it. Create a password.
Proceed to the Remote Control configuration
Step 5: XBMC Remote Control
Now it's time to configure the XBMC Remote Control so that you don't have to rely on a USB keyboard to navigate.
XBMC setup:
- On an Android / iOS device, download the Official XBMC Remote. I installed it on my Android phone.
- Open the application where is should bring you to the XBMC Hosts.
- If there's no menu option, hit the menu option on your phone to bring up the list of choices.
- Select Add host
- Give a Name for connection
- Enter the IP address of the Raspberry Pi. Refer to the Network configuration section from the previous step. If you used Beginner setup, just navigate to System –> OpenELEC –> Connections. Look for your wireless network, It should display the current IP address.
- The HTTP API port matches the same Port number in the Raspberry Pi Web Server configuration.
- Remember the Username and password you created before in the Raspberry Pi Web Server configuration? Enter that in their respective fields.
- Leave EventServer Port with the default number.
- Select WiFi only and click ok.
- You should now see Use as Remote Control feature.
- Select Remote Control. Look at the Screen where you've connected the Raspberry Pi. Press on the arrow keys on your DEVICE and you should see the selection move. Bingo! You can now disconnect the USB keyboard and use your Android / iOS device.
For more detail: Raspberry PI Autobot Transformer