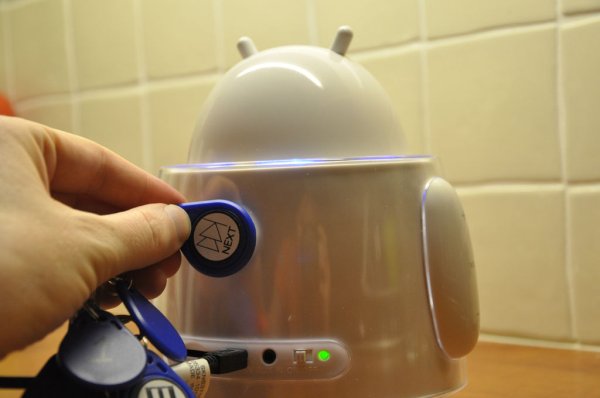
A couple of weeks ago, I saw this really cool Raspberry Pi based RFID-enabled cassette player. It ran PiMusicbox and the maker created a module to control PiMusicbox via RFID. This would be perfect for my three year old daughter. Ok, as she's clearly not familiar with cassette players, I needed something simpler. She already had a KNG Andrew MP3-player, that plays MP3's from an SD-card and is controlled via touch buttons. For those who are not familiar with this player, it's simply an SD-card based MP3-player with built-in speakers that looks like a robot.
So, the idea was born, an RFID controlled Raspberry Pi based music robot, or short RFID Music Robot (that's how we refer to it at home). My daughter really loves her music robot, when she wants music, she chooses the tag she wants, holds it near the robot and it will play her favourite music!
Although PiMusicBox is a very easy to install music player for the RaspberryPi with many installation guides, I could not find a guide how to make PiMusicBox respond to RFID's. Therefore, I decided to create something similar to the RFID cassette player. As my Python programming skills are around beginner's level area, building a PiMusicbox module was clearly a bridge too far for me.
That it's not that difficult to connect an RFID-reader to a Raspberry Pi, I learned this from another great instructable: http://www.instructables.com/id/Attendance-system-…
My instructable will show how simple it is to create a Python program that plays music triggered by RFID-tags, so you can make one as well!
Step 1: Materials/tools
For this instructable, you'll need the following:
- KNG Andrew Home Invader
- Note that you actually only need an amplified speaker to connect to the headphones output
- So it should work with any amplified speaker with an input that you can connect to the Raspberry Pi
- For better sound quality, have look at the cool hifi audio DACs
- Raspberry Pi A+ incl. Wifi Dongle and a micro SD card (4 GB minimum)
- Note that I needed the smallest Raspberry Pi, so it would fit in the KNG Andrew
- Any other Raspberry Pi can be used as well
- Actually, a ‘B' might be easier, as you can connect a keyboard and wifi dongle simultaneously (for an A you could use a powered USB-hub of course)
- Mifare RC522 Card Read Antenna
- Around $3 on ebay including blank card and key ring tag
- Extra tags
- Choose Mifare 13.56MHz tags/tokens/cards
- You'll need one tag per function / playlist / audiostream / action
- So, decide for yourself how many you need
- Currently, I already have 12 tags in use
- Initially, I figured 5 would be enough
- Dupont female-female cables
- Power supply for the Raspberry Pi
- I used a Micro USB Host Cable Male to USB Female ( < $1 on eBay)
- A regular Raspberry Pi power supply is also ok, downside is that you most probably have two power supplies, one for the Raspberry Pi and one for the amplified speakers
- 3.5mm Auxiliary cord male to male
- To connect Raspberry Pi to the amplified speakers
Tools used:
- Soldering station
- Glue gun
- Drill
- Screw driver
- Tape
Step 2: Electronics
The electronics are actually very simple, as there are only four major components:
- Raspberry Pi
- MF RC522 reader
- Power supply
- Amplified speakers
In the Fritzing diagram, you can see how to connect the Raspberry Pi to the RC522 reader. I connected the two using regular Dupont wires. After making sure all components work as expected (always test the electronics before you put it into a case), I used tape to combine the single headers. This will make it much more easy to reconnect when you glued the components in place.
Step 3: Assembly
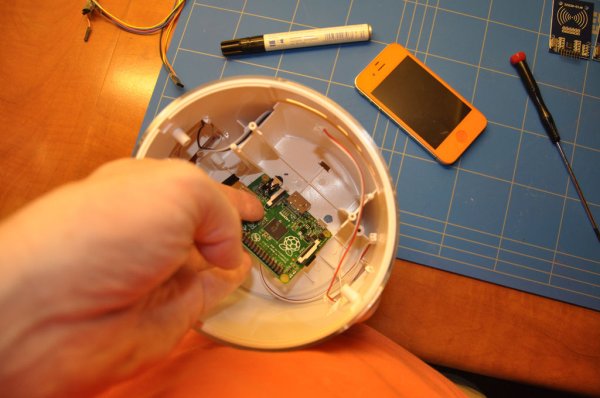
The music robot looks quite large on the outside, however, the speakers take up a lot of space. That's why a Raspberry Pi A+ has been used for this build, as it fits perfectly. In the future, I might decide to use the Raspberry Pi for another project, so all connections are made via the regular connectors. The headphones output is connected to the audio input of the KNG Andrew (or any other amplified speaker set). For this, I used a short 3.5mm male-to-male cable and cut off one of the connectors. The wires in the cable are connected to the audio input connector (black is ground, white left channel, red right channel). Note that the tip is the left channel, the middle the right channel and last one is the ground.
A very short micro-USB to USB cable provides power to the Raspberry Pi. With a sharp knife, I cut open the regular USB connector, so I could connect wires to the power pins. As the KNG Andrew is powered via a regular (mini-) USB connector, it was very simple to find a +5V and GND on the internal KNG Andrew PCB.
There was not enough room in the belly of the music robot to simply connect the audio and power connectors. Therefore, two holes at the top should fix this issue (so the rest of the connector/cable ends up in the head of the robot). Using a permanent marker to indicate the exact spots for the holes, made it easier to drill the holes. As I didn't want to make the hole too large, I started with a small drill bit and used larger drill bits until the hole was large enough.
The RFID reader is glued in place with a glue gun. Note that the header is soldered on to the back of the reader. This makes it possible to put the reader the closest to the outside as possible. Then, connect the taped Dupont wires to the reader and the other ends to the Raspberry Pi. Last steps are gluing the Raspberry Pi in place, connect the audio and power connectors and close up the case!
Step 4: Installing the Raspberry Pi
First of all, you need a recent version of Raspbian installed to the Raspberry Pi.
In the raspi config, activate the audio output via headphones and enable the SPI interface (both can be found in the Advanced options menu).
Make sure the Raspberry Pi is connected to the internet. For setting up a wifi connection, please check the following link.
It's always good to be up-to-date, using:
For installing Python modules, the development packages are required:
For the MFRC522-python interface, SPI-Py has to be downloaded and installed:
Enter the SPI-Py directory and install it via:
Next up is the MFRC522-python module:
Enter the MFRC522-python directory and install it via:
Finally, as this solution is made around mplayer, you'll need mplayer of course:
Please check whether mplayer works fine on the Raspberry Pi when it's connected to the speakers.
For more detail: Raspberry Pi based RFID Music Robot


