When I setup my Raspberry Pi server 8 months ago, one of its potential uses was for me to play with PHP and hopefully learn more about this language.
I found a bit of time this week, so decided to try making a minimal PHP program to control the Pi gpio from a remote computer or phone.
What I've come up with is a simple file using HTML and a few lines of PHP code.
Background
My Raspberry Pi server is using lightpd as configured in this earlier post.
I also installed wiringPi and configured the system in order to be able to access and control the gpio.
This server is also being used to automatically control a light outside the back of the house, and to monitor temperatures and graph the readings.
What is PHP
PHP is a server-side language. This means it executes (runs) on a server while allowing some degree of interaction with the client, which is most often your computer web browser.
This definition is important, because a simple PHP file will generally load when you point your web browser at it, run its code, and then stop.
Consider this simple “Hello world” example;
<?php
echo “Hello world!”;
?>
If you save this file on your server as (say) HelloWorld.php when you point your remote web browser at it, it will simple return the string: Hello world!
The PHP code will only run once, but each time you refresh your browser it will run again. You can see this more clearly by adding the PHP time() function to HelloWorld.php:-
<?php
echo “Hello world!”;
echo “<br>”;
echo ‘Time: ‘. date(‘H:i:s');
?>
So if you wanted the “time” to update, you would have to keep pressing the browser refresh button to run the file again and again. The alternative is to get the browser to do it for you, something like this;
<html><head>
<title>PHP refresh</title>
<meta http-equiv=”refresh” content=”1″>
</head></html>
<?php
echo “Hello world!”;
echo “<br>”;
echo ‘Time: ‘. date(‘H:i:s');
?>
You can also do this with a PHP method;
<?php
header(“Refresh:1”);
echo “Hello world!”;
echo “<br>”;
echo ‘Time: ‘. date(‘H:i:s');
?>
…which is considered a better way of doing it. In both cases the update is set for 1 second intervals.
Toggle a gpio output
If we want to switch the state of a Raspberry Pi gpio pin from high to low and low to high with PHP, we need some way to control our server-side PHP program.
One way is to make use of HTML Forms, which is what is commonly used to allow users to enter and submit details, for example on sites which require user registration.
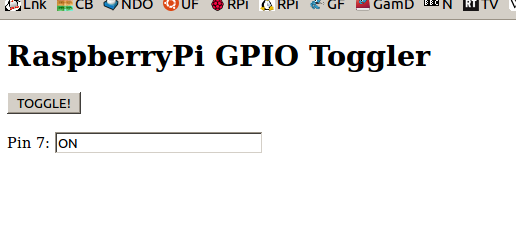
So here I'm using a button to toggle the gpio pin 7 output and a text box to display the status of the output.
…and here is the code;
<!DOCTYPE html>
<html>
<head><title>GPIO Tog</title></head>
<h1>RaspberryPi GPIO Toggler</h1>
<body>
<form method=”POST” action=””>
<input type=”submit” name=”btnToggle” value=”TOGGLE!”><br><br>
</form>
<?php
# set pin 7 mode to output
exec(“sudo gpio mode 7 out”);
if ( isset( $_POST[“btnToggle”] ) ) {
# GPIO pin 7 toggles state
# If error codes are not 0, you have a problem
# read pin level
exec (“sudo gpio read 7”, $rReturn, $errcode );
if ( $rReturn[0] == “0”) {
$rReturn[0] = “1”;
}
else {
$rReturn[0] = “0”;
}
exec(“sudo gpio write 7 “.$rReturn[0] );
}
# read pin
exec (“sudo gpio read 7”, $rReturn, $errcode );
if ( $rReturn[0] == “0”) { ?>
Pin 7: <input type=”text” name=”Pin7″ value=<?php echo “OFF”;?> />
<?php
}
else { ?>
Pin 7: <input type=”text” name=”Pin7″ value=<?php echo “ON”;?> />
<?php
}
?>
</body></html>
When the file is loaded by a web browser, pin 7 of the gpio is set as an output and the pin status is read. Its condition determines whether the text box displays OFF or ON.
If a user presses the button, pin 7 status is read and then inverted (low to high, or high to low). The status is then read again and the text box is updated.
This works fine unless the gpio pin 7 output is also being controlled by another source (e.g. a second browser or other control software). In this case we need to periodically read and update the pin status, which we can do using one of the refresh methods mentioned earlier.


