You will need…
-Raspberry pi model b+ with raspbian and Python 2(which should come with raspbian)
-HDMI monitor and cable
-3 tactile push switches
-Breadboard(you can get by without it be connecting straight to the buttons, but this also works as a stand for the buttons)
-male to female wires (or, in my case, male to males with a ribbon cable)
-Power supply
Step 1: Setup
You should know how to connect your power supply and monitor already
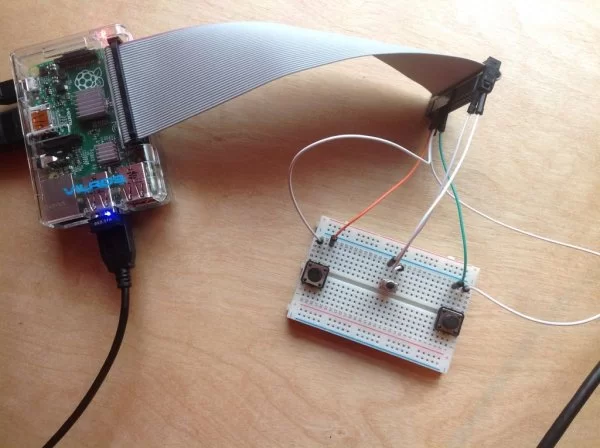
To Start, we will set up the three Push Switches.
If you aren't familiar with the GPIO pins, I found that this forum had a good diagram for each of the pins:
https://www.raspberrypi.org/forums/viewtopic.php?f…
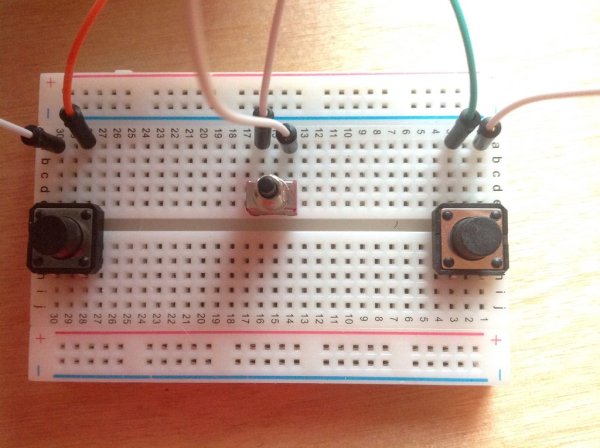
Take your Push Switches and place them in your breadboard as shown in the picture. Connect one side of each button to a ‘ground' pin. Then connect the other Side of your left button to GPIO17. Note: that isn't the same as pin 17.
Next connect the middle button to GPIO21, then the right button to GPIO18.
You can use different GPIOs but be sure to set up the correct pin in your code.
Step 2: Writing The Code
Feel free to use your own code if you like, but I will provide a simple program that I wrote that uses pygame with simple shapes and text, no images.
Note: to run the code, you need to use a lx terminal session. Enter the command:
sudo python filename.py
Step 3: Run at boot(optional)
Open an LX Terminal session and enter the command:
crontab -e
This should open a nano editor. Scroll all the way to the bottom the following command to the very bottom:
@reboot sudo python filename.pyNow, if you reboot your Raspberry Pi, it should run normally until it reaches the point where, normally, you would log in. Depending on the file, it may take a second to load, but the game should pop up on the screen. When you quit the game, it will close that window and go back to the login. It should run normally from there.
For more detail: Raspberry Pi GPIO game


