
Hey guys, first of all I'd like to introduce myself to everyone. My name is Jack, commonly known as Jackk or JackkTutorials over on YouTube where I do technology tutorials but mainly cover Hacking & Security and other useful things that you wouldn't normally know about.
For this competition I decided I would make a completely universal Home Automation control panel using a Raspberry Pi 2, Relay Channels and some other cheap products. This is a very cheap home automation system!
For my example, the home automation controls my Desk LED's, Bedside Lamp and Lava Lamp. It also displays the current time and current weather forecast for my area (Which I chose to remove in the picture because it shows my exact location). It can also switch my Media Center PC and Workstation PC on using a Wake on Lan feature. The camera section will also redirect to a live IP Camera feed from my old HTC One M7 with the IP Camera application on which runs 24/7. Under the miscellaneous sections was supposed to be an Alarm Clock which I could set a time for all the lights to turn on and an alarm sound to play through speakers, that'll be sure to wake me up! But I never got round to implementing that part – but there's no reason why it wouldn't work!
I'd like to mention that this project isn't for the faint of heart and some basic knowledge electronics will help you such a Soldering, Wire Striping, GPIO and Relay Switches; however everything will be explained. Also remember that messing around with electricity that comes directly from your wall socket is very dangerous and can result in a serious injury so please be careful!
Also basic knowledge of Web Servers, Python, PHP and GPIO will help you out a lot!
Finally, I will only be showing you guys how to make one lamp turn on and off from a Web GUI. As everything else if very easy to setup. Such as the World Clock being a HTML Widget and the IP Camera being a hyperlink to a IP Server.
Anyway, lets get started!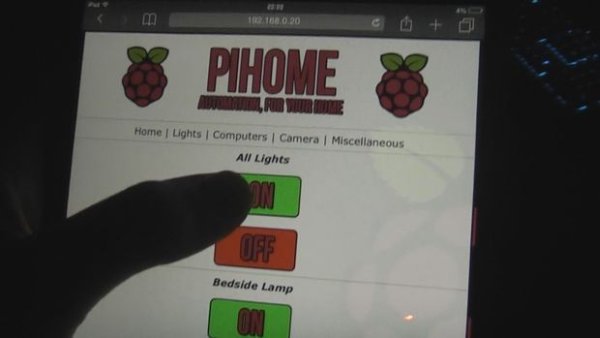
Step 1: Tools we will need
Time to talk about what we are going to need. For everyone's convenience I have made links to both Amazon/eBAY UK and Amazon/eBAY US to help out my International readers. So below is a parts list with links to all the products.
Important Components
Raspberry Pi Model 2 – I'll admit, you could use a Model B or B+ (Or maybe even A) but I'd just go all out and buy the best one on the market. For £30/$41 you have a tiny power house that you can use for this project and many more!
Amazon.co.uk – Link
Amazon.com – Link
Make sure you also pick up the SD Card (MicroSD), Power Supply and a case (Case not nessessory but will keep the Raspberry Pi safer!). Also the Raspberry Pi will need an internet connection for this project as the whole user interface is web-powered!
Relay Channel Module Boards – These relay switches are used only for the lights (In my example). They are what are going to be capable of switching things on or off from our Home Automation system. Now these come as modules that have so many relays. I personally bought an 8 Channel relay board for other future projects however you can get 1/2/4/8/16 so just pick which one you want. An 8 Channel relay board cost me £5.64 or $8.38 (Cheaper from China but longer shipping time!)
eBAY.co.uk – Link
eBAY.com – Link
If you want to buy a different size one, for example 2 channel or 4 channel just search “x channel relay module board” x being the number of channels you want. Each channel can control one function.
Raspberry Pi Jumper Cables – These are used to connect the Raspberry Pi to the Relay Module Board so we can communicate with it. They are very cheap, very reusable and come in a variety of different colours! They cost around £4 or $5 for around 40 of them. It also means we don't need to solder!
eBAY.co.uk – Link
eBAY.com – Link
Additional Tools you may already have!
Now for tools most of us will already have lying around. I won't bother posting purchase pages for these just because most of us have these tools at hand!
Philips/Crosshead Screwdriver (PH0/PH1 works best)
Flat Head Screwdriver
Wire Snippers
Wire Strippers
Craft Knife/Stanley Knife/Any Sharp Knife
Soldering Iron/Cable Crimps/Cable Blocks
Cable Flex (For extending our original wires to our lamps, ideal to keep everything in it's original place, most lamps use 2 core flex)
That should be all the tools we need for this project!
Step 2: Software
I ain't kidding when I say this is a large project. This is going to require an equal amount of effort in both hardware and software. So let's talk about the software we are going to need for this project. I will put links to all the different softwares need and setting each software up will be an individual step as it can be quite complicated. So lets dive in!
Raspbian – We are going to need an operating system for our Raspberry Pi to run. For this I will be using Raspbian as it comes pre-installed with Python and is a piece of cake to set-up and use. We don't need a pretty GUI however because we will just be using it's command line interface
Download – Link
* Ignore these tools if you are using a Keyboard, Monitor and Mouse!
PuTTY * – We are going to need to be able to connect to our Raspberry Pi via SSH. So PuTTY is the perfect client to do this.
Download – Link
Nmap * – If you need to know what the IP Address of your Raspberry Pi is we are going to use Nmap to find it.
Download – Link
FileZilla – We are going to need a way to transfer files onto the Raspberry Pi using SFTP which is FTP over SSH. Usful stuff
Download – Link
Win32DiskImager – This will be used to burn Raspbian onto an SD Card for use in our Raspberry Pi
Download – Link
We will also need a Web Server for our Raspberry Pi but we will get that later because we will be using apt-get.
I won't be showing how to install a Raspberry Pi because it's super simple and I am assuming you guys know how to setup one because you are reading this guide. So let's move on…
Step 3: Designing the GUI
This whole project is driven using a Web GUI I made. It's super simple and uses mostly HTML with little bits of PHP too. Some basic HTML knowledge will help you with this because I won't be showing you how I designed my website as this is a Raspberry Pi guide; not a web design guide. However I do have a video tutorial which is based on the same design I have used. You can watch in the video I have attached.
However you are going to need to create buttons. For example I made a “On” and “Off” image and linked that too a page which makes a nice big button. I'll talk later in a few steps about setting these buttons up to make lights turn on and off.
If you're interested, the image sizes are 200×100.
When you design your website make sure that your extensions are *.php and not *.html just to keep things all the same. However we are only going to be using two PHP files for one light.
Once you've designed your website and it looks the way you want too, we can move onto the next step. The next step is hardware so bare that in mind.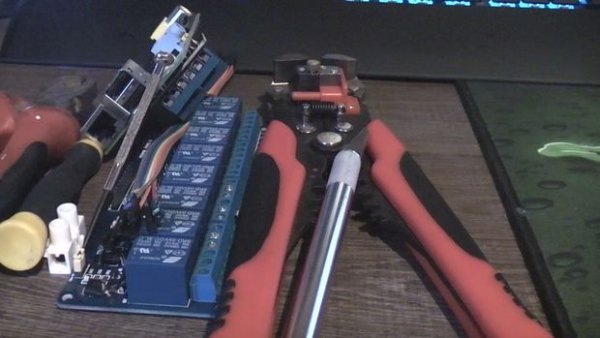
Step 4: Wiring up the Lamp, Relay Connectors and Raspberry Pi.
I have tried my best to make a simple diagram which will help you wire up this. It's not too hard so don't fear. First of all let's prepare our Raspberry Pi and our Relay Connector. I recommend looking at the diagrams I have created to help you out. Depending on how many lights/lamps you want to add will depend on how many jumper wires you use.
The first image shows you how to wire up your Raspberry Pi to the 8 Channel Relay board using the Jumper cables. I recommend using Red for Positive and Black for Negative just to keep things simple.
Now that you've wired this up we can prepare our lamp. Please refer to the diagram featuring the lamp. I apologize for my crude designs, but hopefully they make sense. Please read the step by step instructions incase you are confused.
1. Cut the flex cable in half using Wire cutters and then strip back the insulation.
2. You will have two wires inside the flex – Blue(Neutral) and Brown(Live) (In most cases). Strip back the insulation on both of these wires and twist the ends up to make a neat end.
3. Connect the two blue ends of the wire together using a connector block or solder. Connect the brown wire to the relay channel using the middle and left side of one relay switch. Fasten this down with the screw and make sure it's secure. Ensure that the wires cannot short out.
Take a look at the final diagram to make sure you have everything setup correctly.
Now let's move onto testing our creation so far. Once we know it works we can start making it work via the web.
For more detail: Raspberry Pi Home Automation – Control lights, computers, CCTV and more!