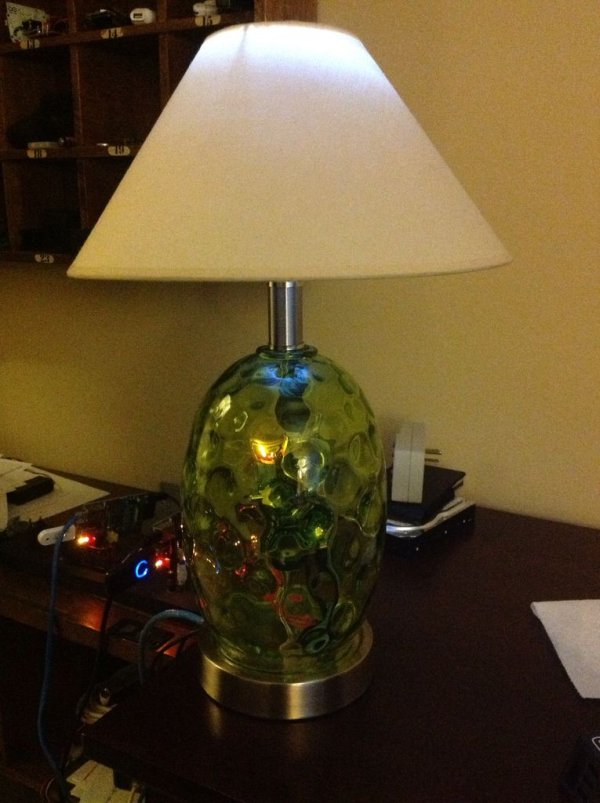
I was using a Raspberry Pi as a LAMP server. I also needed a new lamp for more lighting. My brain then decided I should combine the two, thus creating a Lamp LAMP server. Fun and completely nerdy at the same time. Here is how you can create your own.
Step 1: Assembly
Find a lamp with a clear glass or plastic body. The whole point is to be able to see through the body so that you can view the Raspberry Pi that will live inside it. The body needs to be big enough to accommodate a Pi.
Remove the base of the lamp. There should be a rod inside that runs to the lightbulb. Remove this rod.
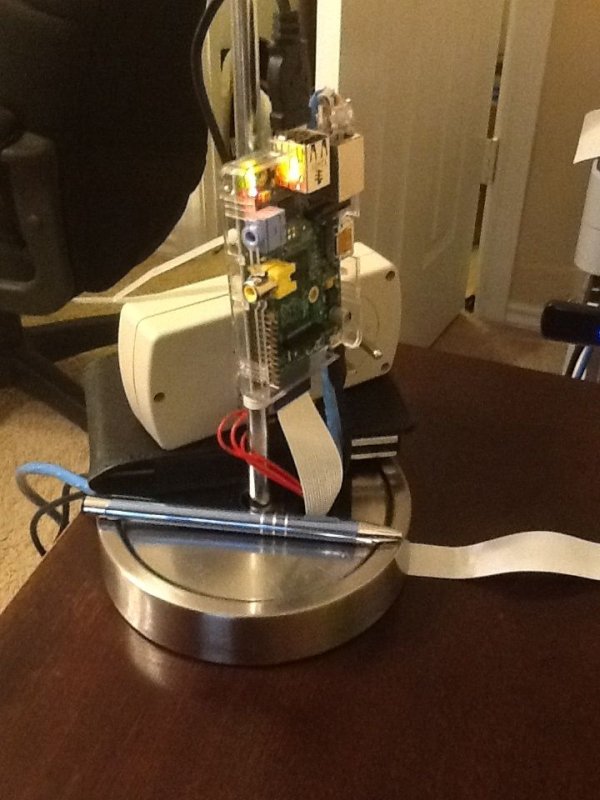
Next, place your Pi in a plastic case. Adhere the case to the lamp's rod. I used zip ties to secure it through the holes on the back of the case.
Plug in all necessary cords you need to run your Pi (power cord, ethernet, USB, etc). Run them into the lamp where the power cord would normally be found. 
(Side note – I recommend using an inexpensive lamp because you will likely need to make structural modifications. Inexpensive lamps will be made of plastic or other material that is easy to drill through. And, if you make a mistake and mar the lamp you do not get as upset).
One note, on the lamp I chose I found out that the I needed to use an SD card extender so that I did not have to completely disassemble the lamp every time I needed to access the SD card. You can now use one of the multi-boot distros built for the Raspberry PI so you can switch operating systems without accessing the SD card.
Step 2: Prepare Your SD Card
Almost any distribution built for the Raspberry Pi will work. Rather than rewrite all the steps, you can find them here or read the advanced version below.
1. Log into Pi
2. sudo apt-get update && apt-get -y upgrade && sudo apt-get -y install apache2 php5 mysql-server
Make sure you change the host name for easy identification on your network. You can do this through the raspi-config command (sudo raspi-config).
Step 3: Turn it on
Put the lamp rod with the attached Pi inside the lamp's body and run the cords out through the base. Re-assemble the lamp. Plug in the lamp power cord and the Pi cords. Enjoy the glow of your new lamp LAMP. For the additional “lamp like feel” I added a cheap battery powered touch light. You take the project further by having the GPIO pins control the light at the top.
Credit to http://thomasloughlin.com/incomplete-but-complete/ for helping me implement and test the project.
For more detail: Raspberry Pi Lamp LAMP Server


