
A motion tracking airsoft or Nerf gun turret with autonomous and manual operation modes, controlled by a Raspberry Pi.
We have many valuable possessions that need protection, but we can't be everywhere at once. Luckily, using image recognition and motion detection software, we can build autonomous gun turrets to protect our most prized possessions even in our absence. Whether its those pesky possums always destroying your backyard vegetable garden, or your family members getting into your cookie jar, you can create your own security guard to protect against them.
In this project, we will build a motion tracking airsoft (or nerf gun) turret with a Raspberry Pi 3. The gun turret is autonomous so it moves and fires the gun when it detects motion. There is also an interactive mode so that you can control it manually from your keyboard. We used an airsoft gun for this project, but you can easily modify this build to use a Nerf instead. This project is small, lightweight and entirely battery operated.
We created two separate operation modes: Interactive and Motion Detection. Interactive allows you to control the turret remotely and stream live video. Motion Detection uses openCV and computer vision to track moving targets in front of the camera.
Since this device fires projectiles, please use the necessary safety precautions while operating the turret. Use a nerf gun instead if you are planning on shooting people, never an airsoft gun!
Check out this video for a detailed walk-through on how to build it:
Building the Base
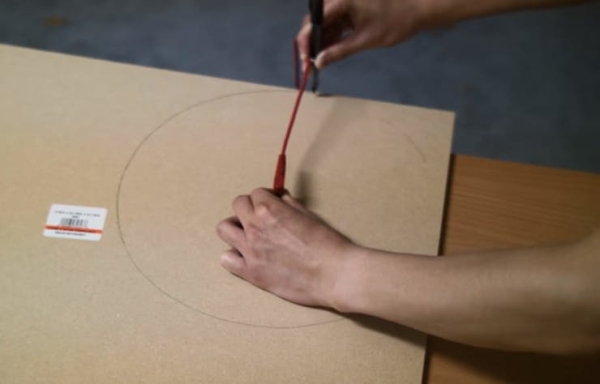
First off, take the 2′ by 2′ medium-density fibreboard (MDF), and trace out two 9-inch diameter circles with a pencil and cut them out using either a handsaw, or preferably an electric jigsaw.
Measure out the center of the circular MDF pieces and mark it with a pencil. A motor will be mounted to the center of one circle, and a 3D-printed flanged collar will be mounted to the center of the other circle.
For the the motor mounting holes, take a piece of paper and lay it over the motor mounting face, piercing the paper with the motor shaft. Using a pen, poke holes in the paper for each of the threaded mounting holes. This paper can then be used as a template to locate the holes on the MDF circle. Center this template on one of the MDF circles, and drill the four mounting holes using a 1/8″ drill bit. Drill out the center hole using a 5/8″ drill bit.