
I recently had a Crosley mini jukebox/CD player handed to me with the intention of “fixing” it. The person who gave it to me only ever used it for a radio since nobody listens to CD's anymore, so I decided it would be a much more enjoyable to make it a pandora box.
Step 1: Get your materials.
Now you don't need an actual mini jukebox, any enclosure for the 7in monitor that will also fit the speakers would work fine; however, I am making this instructable based on the parts in the jukebox, so if you use something else, you will need to add 8 ohm speakers to the list as well as your chosen enclosure.
Materials:
Raspberry Pi (B) (~35$) (with SD raspbian img)
-Velleman 7W audio amplifier http://www.vellemanusa.com/products/view/?country=… (~15$)
-Crosely Jukebox radio/CD player (if you want exactly what I have) http://www.amazon.com/Crosley-CR11CD-Jukebox-Authe… (144$)
-7″ backup camera monitor (any monitor that has RCA or TRRS in would work, you can find these for super cheap)
-10K ohm potentiometer
-110-120V to 15V Transformer (a quick google search will get you this for around 5$)
-LM7812 12V Regulator (I got mine from Ebay, 5 for a dollar)
-LM7805 5V regulator (same as the 12V reg, except it was 3 for a dollar)
-Bridge rectifier (the one I used is overkill, but its cheap and it will never burn up!) http://www.newark.com/vishay-general-semiconducto… (2$)
-Capacitors: 220uF/25V, .1uF/25V, 100uF/12V 10uF/12V, 100nF/12V
-Aux cable (pi to amp) (I got mine for 3 dollars from microcenter)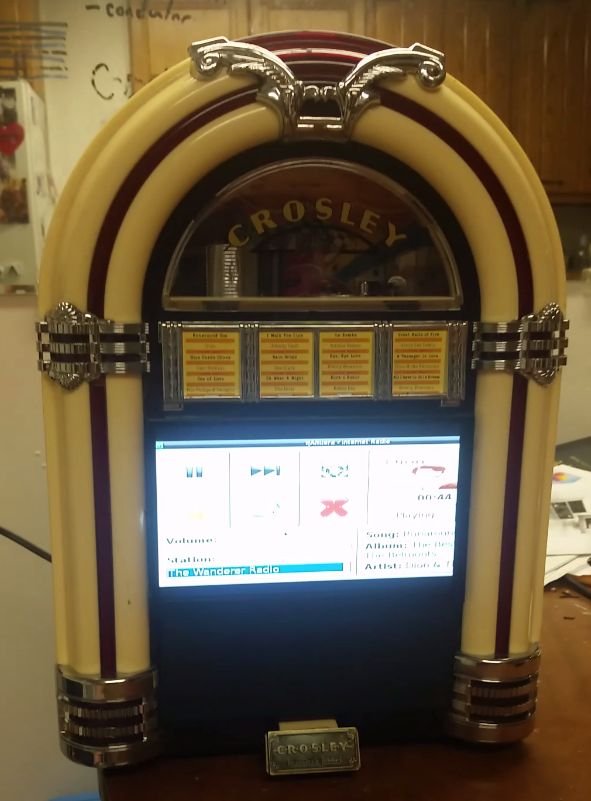
-Micro USB (B) cable (this is for splicing to your 5V power supply for the existing micro usb port on the pi. I prefer to use this port instead of bringing power directly to the 5V rail/GPIO which I do not suggest)
-low profile usb wifi dongle (available in various locations, usually around 10$)
-Wireless keypad/touchpad (the link is to the model I used, which i got on ebay for 12 dollars) http://www.gearbest.com/mice-keyboards/pp_23739.ht…
I made the drawer behind the faux vintage looking “track display” for the keypad/touchpad (see video at the end of this instructable if that was confusing) out of stiff cardboard that I glued together and mounted inside with loctite 382. I'm not going to go into the process as it's not difficult, although don't hesitate to let me know if you need help.
Step 2: Building circuit/wiring
The regulation circuit is pretty simple and self explanatory, just watch your polarity on those caps!
Solder the leads from your 8 ohm speakers together (unless you want stereo, which i didn't feel was necessary for this project, and would require more parts/steps) then directly onto the Velleman amplifier as shown in diagram. Solder the micro usb gnd(black) to the gnd of your 5V supply, and the VCC(red) to the supply 5V+. Splice Aux cable and tie the two channels together and solder to the potentiometer (see diagram) solder leads between amp and potentiometer as seen in diagram. Finally, attach power to amp as seen in diagram.
My monitor came with the power leads pre-spliced and tinned, though if yours does not, make sure that your polarity is correct (red+,blk-). Solder monitor to 12v supply.
Connect amp to pi via the aux cable. Connect monitor to pi via RCA. Connect power to pi via micro usb.
Put it all together and boot your pi.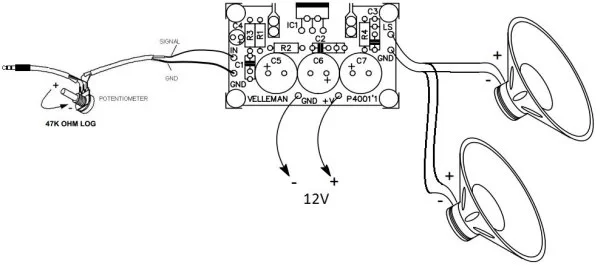
Step 3: Pandora on the pi
I apologize for the bluntness, but I am not going to tell you how to set up your Raspbian as there are about a thousand tutorials readily available.
After Raspbian is set up, follow the link below and download the debian version of qAndora.
https://github.com/JeffHoogland/qAndora/blob/maste…
Once the package has completed downloading, navigate to the download directory (I don't remember where this is default in Raspbian, though it isn't hard to figure out)
Then run the following commands:
sudo apt-get update
sudo dpkg -i qandora.deb
sudo reboot
qAndora
For more detail: Raspberry pi Pandora's Jukebox