
This is a simple instructable for making a RasPi-based photosensor-triggered alert and logging system which can easily be extended to show possible entries into a room like a closet or equipment locker that's usually dark, or to monitor light levels for any other reason.
In this tutorial I use LEDs as the outputs, but they can really be anything.
 This tutorial pretty much only requires the Adafruit RPi Starter Kit (here). It's a great kit and is pretty cheap, too. If you don't want that or already own the components, here's the bill of materials:
3x 10mm diffused LED (red, blue, and green)
1x 1uF capacitor
1x photocell resistor
3x 560 Ohm resistors
1x Pi Cobbler breakout
10x Breadboard wires
1x full-length solderless breadboard
Now there's one problem with this. The Raspberry Pi has no onboard ADC. But, if all we want is a basic (and actually fairly accurate) photosensor, we can run the current through a small capacitor and time how long it takes to charge.
Step 1: Prerequisites
The program is written using Python. I highly recommend you use Adafruit's distro, Occidentalis, but if you don't want to do that just make sure you have the RPi.GPIO library installed.
This particular project is pretty low power, so a good power supply isn't really needed.
You should make sure you have a good light source to test this with, preferably one that you can change the brightness of.
OK, let's get started.
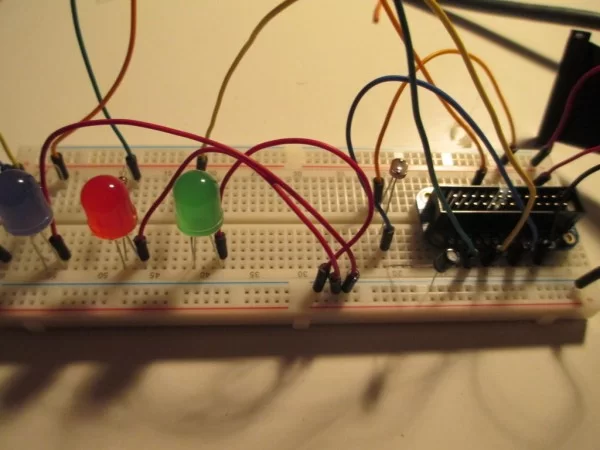
Step 2: Wiring and testing the Photocell's RC circuit
Plug the Cobbler into one end of the breadboard. Make sure that no pins are on the same rail; if they are you could SERIOUSLY damage your Pi!
Take a breadboard wire and connect the 3v3 pin to the positive rail of your breadboard, and connect the ground (the one next to the 5v0 pins) to the ground rail on the other side of the breadboard.
Place the photocell across the gap between the two halves of the breadboard. On one side, connect another lead from one side of the photocell to the breadboard.
On the other side, connect a wire from pin 18 to the photocell and the 1uF capacitor to ground.
We're now ready to set up the calibration assistant to test the circuit.
Enter this code as a python script and run it. You should see a long list of numbers appear, which will become lower when you shine a light on the photocell. This code is based on Adafruit's tutorial on this technique.
#!/usr/bin/env python
# Example for RC timing reading for Raspberry Pi
# Must be used with GPIO 0.3.1a or later – earlier verions
# are not fast enough!
# Set for resistive input on pin 18
import RPi.GPIO as GPIO, time, os
DEBUG = 1
GPIO.setmode(GPIO.BCM)
def RCtime (RCpin):
reading = 0
GPIO.setup(RCpin, GPIO.OUT)
GPIO.output(RCpin, GPIO.LOW)
time.sleep(0.1)
GPIO.setup(RCpin, GPIO.IN)
# This takes about 1 millisecond per loop cycle
while (GPIO.input(RCpin) == GPIO.LOW):
reading += 1
return reading

while True:
print RCtime(18) # Read RC timing using pin #18
For more detail: Raspberry Pi Photocell log and alert system