
A print server that tastes of pi. This project assumes that you have the latest version of raspbian (which can be downloaded at) https://www.raspberrypi.org/downloads/raspbian/. And an active internet connection.
(When imaging the SD card be careful to select the right device otherwise BOOM! There goes your shopping list and the 4086 page novel you were working on)
Let’s get started!
Step 1: Updates!
Turn on your pi and login to the GUI. Next go to LX Terminal and type
sudo apt-get update
That’s it for this step.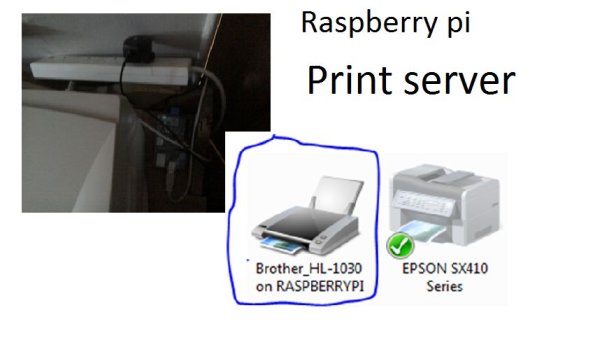
Step 2: Auto login
Do you really need to log into your pi every time you turn your print server on? No! So in Lx terminal type:
sudo nano /etc/inittab
Then go to the following line in the file
1:2345:respawn:/sbin/getty 115200 tty1
Put a # before the line. It should look like this
#1:2345:respawn:/sbin/getty 115200 tty1
Then below it type
1:2345:respawn:/bin/login -f pi tty1 /dev/tty1 2>&1
Press crtl+x then press y to save the file
Step 3: Installing CUPS
CUPS is the print server software required to instruct the printer to print. So to install it type
Sudo apt-get install cups
Into LX Terminal
That was easy!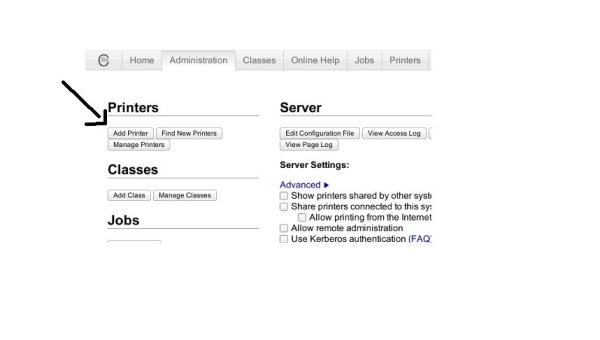
Step 4: Configure CUPS
Ok so CUPS has been installed but now you need to configure it
To configure CUPS type:
Usermod –aG lpadmin pi
Step 5: Plug in your printer
Now is the time to shut down your pi and plug in the printer and move it to an ideal location. I’m using the brother HL-1030 which has a parallel port. To use a printer with a parallel port use a USB to parallel wire.
Source: Raspberry pi print server