
The Raspberry Pi is a very useful computer that can be used for many different things. The people over at Imperial College Robotics Society have a new way to use your favorite treat. They designed a program that turns the Pi into an FM radio transmitter. This instructable will show you how to make your own Pifm transmitter, installing and using the program.
Some Updates (03/11/15):
There is a new program up that I wrote where you only need the filename (NOT THE PATH). It will install everything for you, all you have to do is type in the frequency and the filename to be played (WAV or MP3, stereo or mono). github.com/CodyJHeiser/PiStation
ICRS has released another version on PiFM a while back, it allows you to play stereo sounds (mp3 files) over the radio now. You can go to this link here to check out the new information (the new code is included in my program listed above.)
More Updates (08/06/15):
The member, AndrewG29, has given me a link to GitHub that supports the Raspberry Pi 2! Through the traditional method, this doesn't work on the RPi2.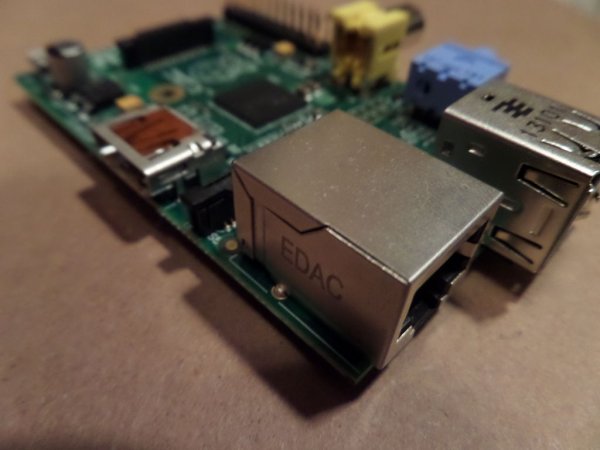
Step 1: Having the Necessary Parts
Obviously this will not work unless you have the right parts to start your Pifm radio. I will list the basic things that you need to start up your Raspberry Pi that most of you already have, but I will put it there for the people that don't. In the second paragraph are things that you may not have that you need.
1. Raspberry Pi
2. 5 volt 1 amp (between 750 milliamps and 2 amps is what I have tried) USB power supply
3. Micro USB cable
4. At least 2 GB SD card with Raspbian on it
5. A display or ssh
Now past the basics, you will need these items as well for it to work.
1. Ethernet cable or a wifi dongle (See step two if you don't have this)
2. Some sort of antenna
You can just use your finger but it will not work as well, you can use a Pi Cobbler with some wire sticking out of the pin like I did, it works fine, the projected range is about 10 meters, but I found it to go much longer than that.
Step 2: Downloading the Packages
Now that we have everything we need, we can get to installing the software, it is a very simple process. Keep in mind that this will not work if you are not connected to the internet (see below**). You only need the internet to download the software, you can use this afterwards without internet.
** If you have an Ethernet cable you can ignore this paragraph. If you don't have an Ethernet cable but you still want to do this you can download the files onto your computer and put it on a flash drive and upload it to the “pi/home” directory.
Now in your Pi terminal type in this exactly, pay attention to capitalization!
wget www.icrobotics.co.uk/wiki/images/c/c3/Pifm.tar.gz
(Capitalized ‘P' in ‘Pifm.tar.gz')
ls
(If you did it right when you type ‘ls' you should see other files along with one named, ‘Pifm.tar.gz')
tar -xvf Pifm.tar.gz
(Again, capitalized ‘P' in ‘Pifm.tar.gz')
That's it! All of the code is done, now on to the next step to learn how to actually play music over any station you want.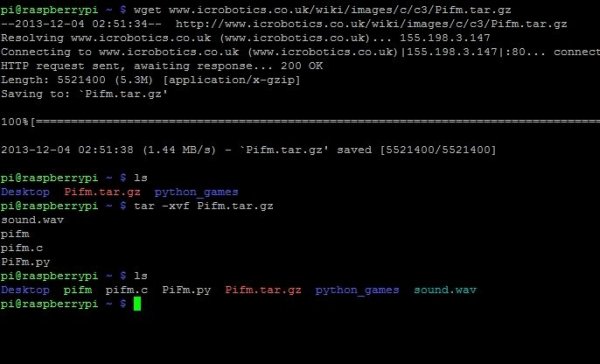
Step 3: Using the Software
Finally we are to the end of our journey, but all of this hard work pays off when you can impress your friends with your awesome new ‘hacking' abilities!
There are a few commands that are used to control the pi I will list them below and break them up and tell you what they mean step by step.
Before we get into the code, you need to know what pin it broadcast's out of so you can attach your antenna to it. GPIO pin 4 is what is being used, unfortunately you can't change the pin number because it have specific specifications embedded into it, so if you have something else running out of GPIO pin 4, you will have to change it or take it out for this to work.
sudo ./pifm sound.wav 100.1
sudo – This gives you administrator power (like on windows the admin)
./pifm – The ./ is used to run a program, the program you want to run is what you put after it (pifm)
sound.wav – Here is the music you want to be played over the radio, you can change it to any** .wav file
100.1 – This is the station that you want your music to be played on, you can change this to anything between 87.1 and 108.1
To exit your song press, ‘control' + ‘c'
If you have a microphone you can plug it into the USB port and broadcast your voice over the radio station here is what you will type in:
arecord -fS16_LE -r 22050 -Dplughw:1,0 – | sudo ./pifm – 100.1 22050
(pay attention to capitalization)
To do this of course you have to have a USB microphone, I have an old Wii Karaoke microphone that works just fine. You can just pick one up off Amazon to, I just found a Guitar Hero one for about $15 here
For more detail: Raspberry Pi Radio Transmitter