
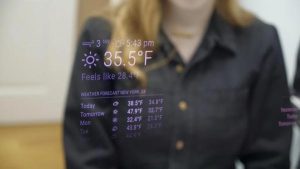
Here's how to build a smart mirror using Raspberry Pi and the MagicMirror2 software ecosystem. It shows me the weather, the time, my calendar, and any of the other hundred available open-source modules. My mirror also has built-in LED strip vanity lighting.
Supplies
For this project, you will need:
- A Raspberry Pi 3 or 4
- Power supply
- HDMI cable
- Keyboard and mouse (can be disconnected after up and running)
- An old computer monitor or other HDMI display
- Power strip
- Two-way mirror glass
- Sturdy frame
- 3/4″ plywood
- Pocket hole jig, bit, and screws
- Power drill
- Black paint
- LED strip (optional) if using:
- Power supply
- Wood router and forstner bit
- Sturdy TV mount
- Nylon webbing
- Grommets
This project is sponsored by Digi-Key– check out this project on maker.io. To keep up with what I’m working on, follow me on YouTube, Instagram, Twitter, Pinterest, and subscribe to my newsletter. As an Amazon Associate, I earn from qualifying purchases you make using my affiliate links.
Step 1: Software Setup
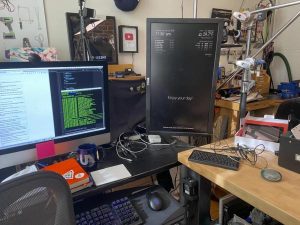
The MagicMirror2 site walks you through the installation process, and I didn't have any hiccups following their instructions. I'm impressed– the last time I built one of these things was in 2015 and it did not go nearly as smoothly.
Installation does require use of the terminal/command line. I performed the installation over SSH from my main computer.
Once my modules were installed, I edited the main config file using BBEdit over SFTP.
Step 2: Remove Monitor Bezel
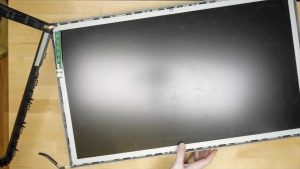
Since I'm using an old computer monitor, it had a bezel on the front that could be removed to create a more flush fit with the glass. I also rerouted the controls that used to be under the front bezel so the monitor could still be powered on and have its menu adjustments made after the whole thing is transformed. This video helped me with my Dell monitor, specifically.
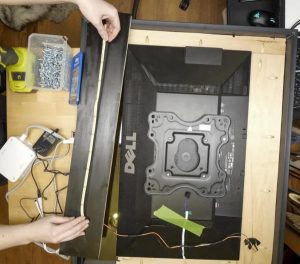
Step 3: Wood Carpentry
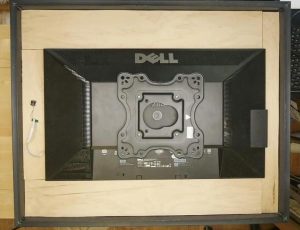
I filled in the extra space between the frame and the monitor using strips of scrap plywood. Pocket holes made it easy to sturdily connect the plywood to the frame. I used a router to cut a groove for the LED strip to live before painting the fronts of the plywood pieces black.
Step 4: LED Strips
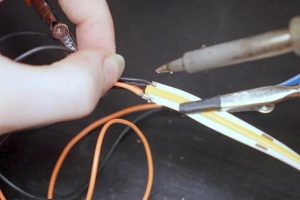
I picked up some 12V LED strip with a controller already connected, so I didn't have to fuss with using the Raspberry Pi to control it. The strip came on one big spool, but I wanted two parallel strips framing the monitor, so I cut it and soldered a second piece in parallel.
Step 5: Assembly
After the paint was dry, I threaded the LED strips through the holes I drilled earlier and used its adhesive backing to stick it into the groove.
I used pocket hole screws to affix all the plywood pieces to each other and the frame. The plywood also makes a great base for mounting the Raspberry Pi and power strip.
To secure the monitor to the frame, I used pieces of nylon webbing threaded through the extra holes in the TV mounting plate, secured to the plywood with grommets and screws. After this step, I could finally turn the mirror upright to see the effect.
Step 6: Installation and Use
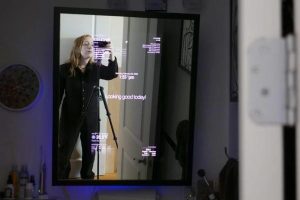
The whole frame assembly weighs about 40lbs (18kg), so I used a beefy articulating TV mount to secure it to the wall in my bathroom. It works great! Thanks for reading my Instructable– I hope you'll post up your version in the I Made It section below!
To keep up with what I’m working on, follow me on YouTube, Instagram, Twitter, Pinterest, and subscribe to my newsletter.
Source: Raspberry Pi Smart Mirror