Most Raspberry Pi garage door remotes had open ports, or other features I wasn't too fond of. So I created my own that contains much more security, logging of who opens the garage, video capture, garage status and more.
Features:
100% secure garage door operation, with access control lists. Only authorized family members can open.
Ability to monitor or control garage anywhere in the world from a controlled website, with no open router ports
Full video capture of who's coming into the garage, uploaded securely to your website for later perusal
Ability to remotely stop or kill the process in case of malfunction or abuse
Email notifications when a family member arrives or leaves the house.
Cheap SMS solution (3/4 a cent per text), with no GSM card purchases or any cell contracts
Standard Linux code, easily setup on a new Pi, and quickly portable to other platforms like BeagleBone or whatever future Linux technology arrives. Basically, I wanted the ability to restore this system on a fresh device within 30 minutes or less
Step 1: Requirements
You will need:
- A Raspberry Pi or BeagleBone Black setup with base configuration. I use Raspbian Wheezy
- Wireless connectivity via a wireless dongle (or just plug in a network cable)
- A camera (compatible webcam or PiCam)
- A relay board. I use “SainSmart 5V 2-Channel Solid State Relay Board“, because it defaults to LOW instead of HIGH
- Enough wire to access your garage door opener, or just break apart a spare remote
- A website with hosting. You can get a small amount of space on DropBox or Google Drive and use that, or you can create a random website from a cheap hosting service like 1and1.com, which will provide 100gb of space for only $11 PER YEAR. You won't need to keep these files anyhow, since they're just logs.
- If using the PiCam, a little poster putty
Step 2: Install required libraries on your Raspberry Pi
You first need a Twilio account (free, go to Twilio.com), a Twilio phone number ($1 per month) and some money in your account.
Once setup, install necessary libraries into your Raspberry Pi:
sudo apt-get install -y python-pip mysql-server python-dev libmysqlclient-dev
sudo pip install MySQL-python twilio
And create two directories:
/home/pi/movies
/home/pi/pictures
Step 3: Create SQL databases, users, permissions
Next, login to your new MySQL localhost server, and then add a user + set privs + create the database and tables needed:
mysql -pYourSQLPassword -u root -h localhost
create database GarageDoor;
use GarageDoor;
create table Door(sSid CHAR(40));
create table Authorized(sPhone CHAR(20));
create table Log(sPhone CHAR(20), sAction CHAR(10), dDate datetime);
— put your phone number, with a +1 before it if you're inside the USA
insert into Authorized (sPhone) values (‘+12145551212');
CREATE USER ‘garage'@'localhost' IDENTIFIED BY ‘garagepassword';
GRANT ALL PRIVILEGES ON * . * TO ‘garage'@'localhost';
FLUSH PRIVILEGES;
Step 4: Hookup a relay and garage door opener
For this step, we'll be hooking up your Raspberry Pi's GPIO pin 23 (physical pin 16) to a relay. I like the SainSmart 4-Channel Relay Module off Amazon for about $9. Now either break apart a spare garage door remote, or just wire the relay directly to your garage door. Consult your garage manual how to do this.
You can see my spare garage remote has an obvious button that I soldered two wires to, and jammed into my relay.
Next, connect all the proper wires from your Raspberry Pi to the relay. Pin 2 = 5v. Pin 6 = Ground, and Pin 16 controls the relay. Now ensure your relay is ACTIVE LOW, which means sending a HIGH signal opens the garage. This relay off Amazon was the proper fit for me: SainSmart 5V 2-Channel Solid State Relay Board
Step 5: Add a camera
In this example, I used the Raspberry Pi camera. You can use a webcam if you're on BeagleBone Black or some other Linux computer. Click here for a list of Raspberry Pi compatible webcams
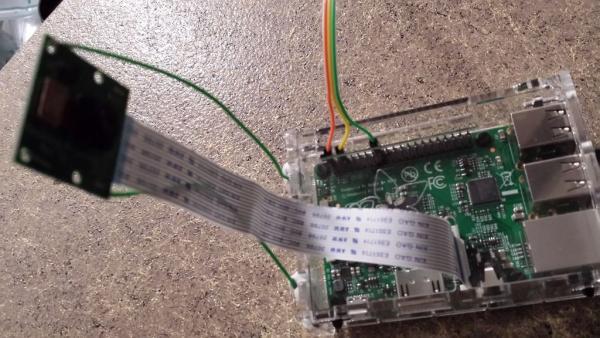
Mount the camera using some stiff wire + poster putty. You can mount on either your Raspberry Pi case, or the shelf your device is sitting on. You alternatively CAN make a fancy 3D printed larger case to house all of this inside, but I'm cheap.
For more detail: Raspberry Pi – SMS Garage Door Butler


