
Introduction
There are many peripherals that can be added to a microprocessor over the I2C and SPI serial interfaces. These include atmospheric sensors, EEPROMS, and several types of display.
This tutorial will walk you through getting the I2C and SPI interfaces of your Raspberry Pi working. These interfaces aren’t enabled by default, and need some extra configuration before you can use them.
Recommended Reading
Before we get started, you might want to review some related background material.
Background & Software Setup
The Raspberry Pi has three types of serial interface on the GPIO header. You’re probably already familiar with the UART serial port, which allows you to open a login session from a serial terminal application, such as PuTTY.
The other two serial interfaces are the Serial Peripheral Interface (SPI) and Inter-Integrated-Circuit bus (I2C). SPI on the Pi allows for up to two attached devices, while I2C potentially allows for many devices, as long as their addresses don’t conflict.
Software Details
The software landscape for the Raspberry Pi has evolved considerably since the introduction of the Pi. Many different operating systems have been ported to the Pi, and the device driver infrastructure has also changed quite a bit.
For this tutorial, we’ll be using a recent version of Raspbian (installed via NOOBS), and the wiringPi I/O library.
With the implementation of device tree overlays in Raspbian, some of the specific interface enablement details have changed. If you’re working with an older install, it might be worth backing up your SD card, and starting with a fresh install.
OS and Library Install
If you’re starting from scratch, with a blank SD card, you’ll want to install Raspbian. If you’ve already got a working Raspbian system, skip ahead to step 3.
- Download the NOOBS image. As of this writing, it’s at version 1.4.2.
- Follow the official installation instructions.
- Follow the Wiring Pi Instructions to get git, update and upgrade your Rasbpian packages, then install WwiringPi.
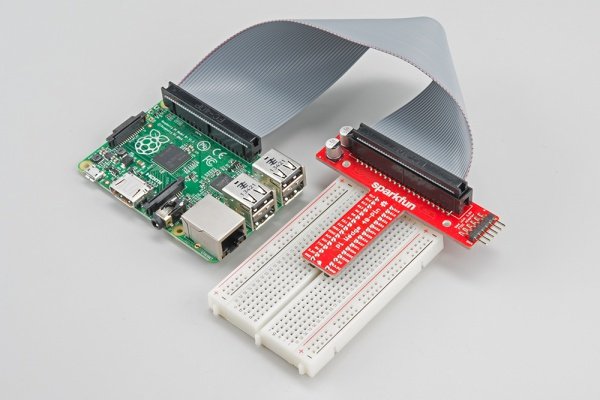
Connecting To The Ports
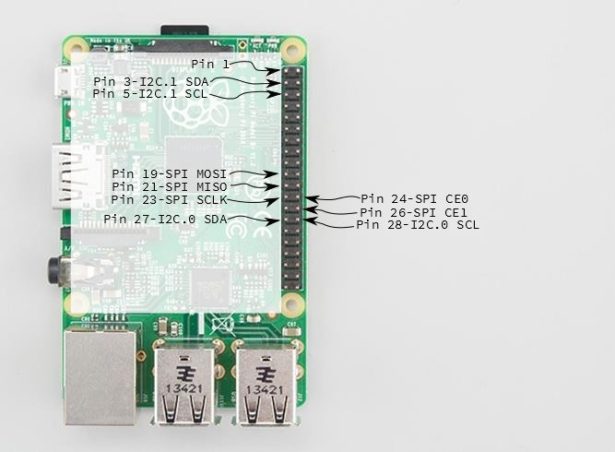
Before we get into the configuration and software examples, lets locate the pins used by each of these interfaces.
If you’re directly connecting to the pins on the Pi, they’re a little disorganized. I2C.1 is near one end, while SPI and I2C.0 are in the middle of the header. If you’re connecting to these pins, be sure to count carefully.
For more detail: Raspberry Pi SPI and I2C Tutorial