| Hardware components: | ||||||
 |
|
× | 1 | |||
|
× | 1 | ||||
|
× | 1 | ||||
|
× | 1 | ||||
|
× | 1 | ||||
| Software apps and online services: | ||||||
 |
|
|||||
 |
|
|||||
STORY
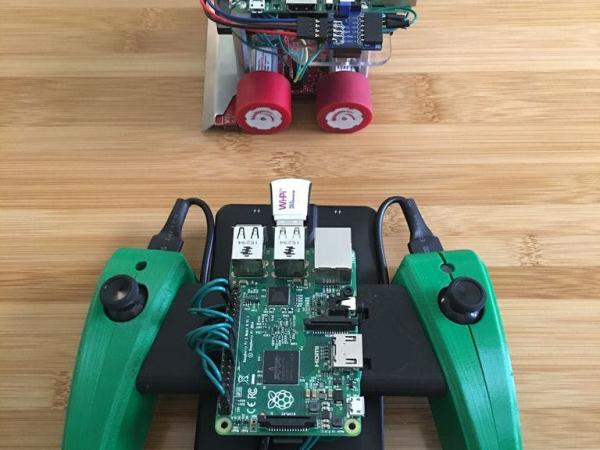
For this project, I used LabVIEW to create a Raspberry Pi controlled Sumobot. I also made a 2 joystick, 2 trigger controller that is also powered by a Raspberry Pi and can control the Sumobot over WiFi. This bot is going to be used to compete against its BeagleBone Black counterpart to see which robot can stay in the ring the longest. The LabVIEW VI for the BeagleBone Black and Raspberry Pi 2 is attached in the last step, LabVIEW 2014 and Linx 3.0 are required to run this code. Below are some related tutorials:
PmodJSTK 2 controller LabVIEW code
Mimicking PWM for the Raspberry Pi 2 Sumobot with LabVIEW
Step 1: Materials
- PmodJSTK 2
Step 2: Mounting the Raspberry Pi to the Fingertech COBRA Minisumo
Go to this Link for an tutorial detailing the setup of the Cobra Minisumo. Once you have followed those instructions the next step is mount the Raspberry Pi. I used a laser cutter to cut out a plexiglass stand that would allow the Raspberry Pi to attach to the spacers.
Step 3: Raspberry Pi Setup
Go to this Link to watch a video with instructions on how to set up the Raspberry Pi 2 as a LabVIEW target using LINX.
Step 4: Controller Setup Part One: 3D Printing the Controller
The 3D printable files for the Controller are attached. you will need to print 2 of the “Single Joystick”, one for each side of the controller.
Read More: Raspberry Pi SumoBot


