
| Hardware components: | ||||||
 |
|
× | 1 | |||
 |
|
× | 1 |
 |
|
× | 1 |
| Software apps and online services: | ||||||
 |
|
|||||
 |
|
|||||
Story
Because Windows 10 IoT Core is not supporting Pi Camera, I can only use Linux instead. These days, I made a surveillance camera, the functionality is simple, when a person passed by the camera, it will take a picture and upload to Microsoft Azure Storage. It also got a website to remotely view the photos.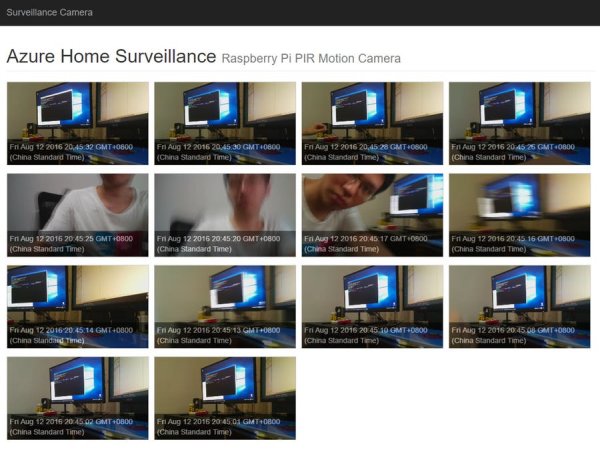
1. Hardware
A PIR Sensor, a Pi Camera, a couple of jump wires. Connect the Singal port of the PIR sensor to GPIO 04, install the camera into CSI interface on the Raspberry Pi.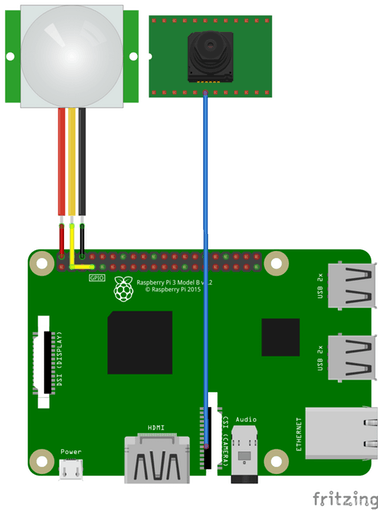
For installing the camera, please refer to official document here: https://www.raspberrypi.org/documentation/raspbian/applications/camera.md
2. Working with PIR Sensor and Camera
SSH into Raspbian, create a new python file:
sudo nano pircam.py
The API for the PIR sensor is built in Raspbian system. We only need to use it directly:
from gpiozero import MotionSensor pir = MotionSensor(4)
To test if a person is passing by the PIR sensor:
pir.wait_for_motion()
To test if no one is standing in front of the PIR Sensor:
pir.wait_for_no_motion()
The camera API is also already in place.
from picamera import PiCamera camera = PiCamera()
To take a photo:
camera.capture(filename)
So, to take a photo when a person is passing by the PIR sensor, we could do it this way:
from gpiozero import MotionSensor
from picamera import PiCamera
from datetime import datetime
camera = PiCamera()
pir = MotionSensor(4)
while True:
   pir.wait_for_motion()
   filename = "pircam-" +  datetime.now().strftime("%Y-%m-%d_%H.%M.%S.jpg")
   camera.capture(filename)
   pir.wait_for_no_motion()
Save the python file, and execute the script:
sudo python pircam.py
If everything is good, you can cross your fingers before the PIR sensor, the camera will take a photo. You can use “ls” command to verify if the photo has been saved to disk.
For more detail: Raspberry Pi Surveillance Camera With Linux and Azure