
There are many Raspberry Pi guides out there that helps you to transform your Pi into a server supporting downloading torrents and sharing files via Samba and DLNA. However, they all have a major flaw: supporting only ONE hard drive. In this instructables, I will help you to setup Transmission, Samba and miniDLNA on your Raspberry Pi to support as many hard drives as you like (as long as there is enough power)
List of required components:
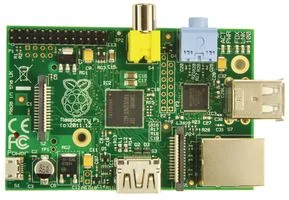
1. Raspberry Pi Model B for internet access
2. Powered USB hub
—– http://www.ebay.com.au/itm/Brand-new-USB-2-0-HUB-Powered-7-Port-High-speed-AC-Adapter-Cable-/251280391263?pt=AU_Laptop_Accessories&hash=item3a817a7c5f&_uhb=1
3. Power supply with 3-4A
—– http://www.ebay.com.au/itm/5V-AC-Power-Supply-Charger-Adapter-for-D-Link-DUBH7-DUB-H7-Hub-5V-3A-5-5-2-5-/181291153550?pt=AU_Laptop_Accessories&hash=item2a35cb788e&_uhb=1
4. (Optional) USB Wi-Fi dongle. Guides on setting up the Wi-Fi dongle are plentiful. You can do it with command line via SSH or from the GUI.
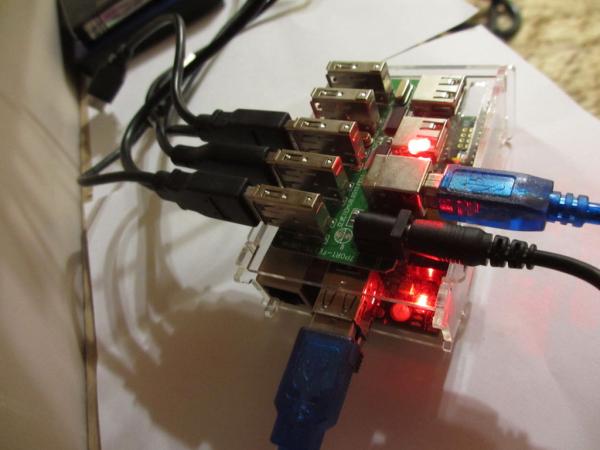
Step 1: Hooking up the Raspberry Pi
On the software side, I'm using the default Raspbian image, then install the bits and pieces I need later on. There are plenty of guides on installing the image and setting up the Pi.
Hardware wise,
Step 1.
Discard the power adapter that comes with the powered USB Hub if it supplies less than 3A. You need 700mA for the Pi and 500mA for each hard drive you connected.
Step 2.
Connect the USB Wi-Fi dongle to the Raspberry Pi.
Step 3.
Connect the USB output cable from the hub to the Pi. This should also power the Pi, so no need for a mini USB cable.
Step 4.
Connect the hard drives to the hub,
Step 5.
Power on the Pi. Powering Pi before plugging in USB components may restart Raspberry Pi.
Step 2: Setting up hard drives
Plug in your USB Hard Drives. If you are using NTFS, install ntfs-3g.
sudo apt-get install ntfs-3g
Step 1.
Execute
ls -l /dev/disk/by-uuid
Write down drives UUID and drive paths (sda*, sdb*, sdc*…).
Step 2.
Execute
ls -l /dev/disk/by-name
Write down name and drive paths.
Step 3.
Match drive paths, names and UUID
Step 4.
Create locations for mount points for each hard drive. Replace DRIVE_NAME_* with names you like, I chose to use the same name as my disks' name as obtained from Step 2.
sudo mkdir /media/DRIVE_NAME_*
Step 5.
Mount the USB drives
sudo mount -t ntfs-3g -o uid=pi,gid=pi /dev/sdxx /media/DRIVE_NAME*
Note:
ntfs-3g for NTFS drives
vfat for FAT32 drives
ext4 for ext4 drives
Replace sdxx and DRIVE_NAME_* from the list you have compiled in step 3 and 4.
Step 6.
Now we will configure the Raspberry Pi to mount these drives after every reboot.
Make a backup for your current fstab
sudo cp /etc/fstab /etc/backup_fstab
Add mount information to the fstab file
UUID=xxxxxxxxxxxxxx /media/DRIVE_NAME_* ntfs-3g rw,defaults 0 0
Replace with the correct UUID, mount point and drive type
Step 7.
Turn off GUI mode by using sudo raspi-config
Restart Raspberry Pi with sudo reboot
At this point, your USB drives should be mounted properly.
Step 3: Installing Transmission / rTorrent (updated 18.03.2014)

Because this is a headless server, we are accessing the command lines through SSH. Fortunately, SSH is enabled out of the box for Raspbian.
Step 0.
Let's update and upgrade the repositories and distribution by using:
sudo apt-get update
sudo apt-get upgrade
sudo apt-get dist-upgrade
Step 1. You can either install Transmission or rTorrent or both. Skip to Step 2.2 for rTorrent installation.
Install Transmission
sudo apt-get install transmission-daemon
In order to download torrents, we need to access Transmission's WebUI. This can be done by running Transmission daemon (started after installation) and accessing the Pi's internal IP address and Transmission's designated port.
Step 2.1. Transmission setup
Next, we need to setup who can access Transmission by setting up username, password and allowed IP addresses:
1. Stop Transmission service with
sudo service transmission-daemon stop
2. Start modifying the settings:
sudo nano /etc/transmission-daemon/settings.json
3. Find rpc-username and rpc-password, change the values to your liking.
4. Find rpc-whitelist and add the IP addresses of your other computers. You can use wildcard to include a range of IP addresses, for example, in my case, 10.1.1.* is added.
5. Setup the WebUI:
Transmission's default WebUI only allows you to download to 1 folder. In this instructable, you will find out how to load and use a custom WebUI
- Download the latest version of Transmission Web Control: https://transmission-control.googlecode.com/svn/r…
- Extract the downloaded archive. Navigate to /usr/share/transmission.
- Rename the existing web folder to backup_web.
- Copy the extracted web folder from archive into /usr/share/transmission.
- Set Transmission's web interface path:
export TRANSMISSION_WEB_HOME=/usr/share/transmission/web
6. Save and reload transmission service
sudo service transmission-daemon reload
Remember to use reload, as restart will revert your changes.
7. On other machines, navigate to http://server_ip_address:rpc_port/rpc_url
For example, in my case, it is 10.1.1.12:9091/transmission/web
Step 2.2. rTorrent setup
I recently discovered rTorrent and boy oh boy, it's much simpler than Transmission to download to multiple folders. ruTorrent, a rTorrent web GUI, even supports downloading to multiple folders out of the box!
Thanks to Koper89 from xbian forum, the installation is as simple as running a script! http://forum.xbian.org/thread-2037.html
Change the parameters in the script as needed.
Step 4: Installing Samba and MiniDLNA

Now the important bits – mounting and setting up torrent downloading for 3 hard drives – are done. In this section, we will install Samba and miniDLNA. There are many quality guides on the internet showing you how to install Samba and miniDLNA and I recommend you to source and read them. However, for completion, steps I took to install these two services are written below.
Step 1.
Install Samba
sudo apt-get install samba samba-common-bin
Step 2.
Backup and modify Samba's configuration file
sudo cp /etc/samba/smb.conf /etc/samba/backup_smb.conf
sudo nano /etc/samba/smb.conf
- Find workgroup, and modify its value. This is the workgroup your Windows machine need to be a part of to view the files
- Remove irrelevant drives, printers if you don't need them
- Add your own drive:
comment = Some comment about this drive
path = /media/DRIVE_NAME_*
create mask = 0777
directory mask = 0777
read only = yes
read only option depends on whether you want your users to change files or not. In my case, I chose yes.
Step 3.
Restart Samba
sudo service samba restart
If you run into problems with Samba, consult online manuals and Raspberry Pi's forum as they know a lot more about setting up Samba than I do.
Step 4.
Install miniDLNA
sudo apt-get install minidlna
Step 5.
Backup and configure miniDLNA
sudo cp /etc/minidlna.conf /etc/backup_minidlna.conf
sudo nano /etc/minidlna.conf
In the configuration file, add
db_dir=/home/pi/.minidlna
so the database is saved across reboots
Change miniDLNA's media directory to point to mount points
media_dir=V,/media/<em>DRIVE_NAME_*
First parameter of media_dir is the types of files for miniDLNA to detect.
P for Photos
V for Videos
Add as many media directories as you need. Change names of drives as needed.
Step 5: Conclusion
Now, your Pi should be able to download torrents and access files via Samba and miniDLNA to and from 3 hard drives. The hardest part of this guide is setting up the webUI for Transmission. After that, everything should be smooth sailing.
Have fun and enjoy your server!
Source: Raspberry Pi Torrent, Samba and DLNA with 3+ hard drives