The Twitterverse
Like it or not, Twitter is a force to be reckoned with. Millions of people use Twitter to talk about general happenings in the world and their lives. Large events like conventions, elections, and uprisings have a habit of crashing the Twitter servers.
You, an avid DIY hacker, want to know how to use that massive stream of digital social media. There are plenty of fun projects built around Tweeting something that happens. Today, we offer you an alternative: make something happen when a specific Tweet occurs.
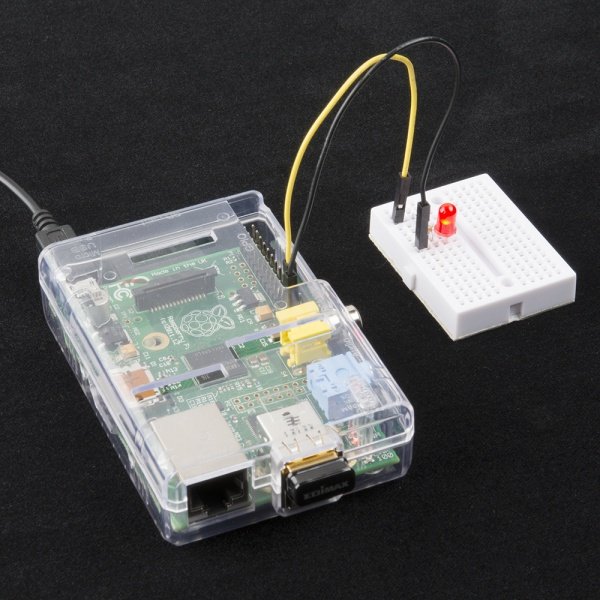
This is a basic project that will walk you through the steps to get an LED flashing when a specific hashtag appears in the Twitter stream. While a blinking LED might not be the most exciting of outcomes, attaching Twitter to the physical world will get you started on creating that Twitter controlled robot.
Suggested Reading
We need to build a rather simple LED circuit to connect to the Raspberry Pi’s GPIO header. Be sure you are familiar with LEDs and resistors.
Required Components
You will need to have a Raspberry Pi running Linux of some sort. We recommend the latest version of Raspbian, as it comes pre-loaded with Python and GPIO libraries. Additionally, the Pi will need to be connected to the Internet so that you can monitor the Twitter stream. This can be accomplished using an Ethernet cable or a USB WiFi dongle. If you like checklists, this is for you:
Hardware Hookup
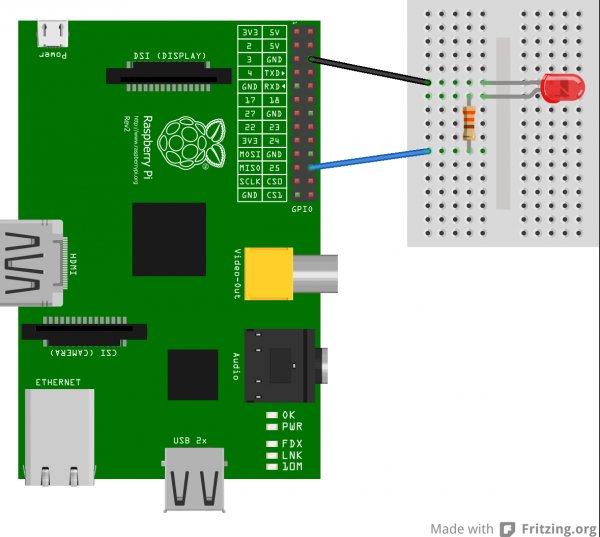
Connect an LED to your Raspberry Pi following this diagram:
Additionally, you will want to plug in the rest of your peripherals (keyboard, monitor, SD card, Ethernet/WiFi) to your Pi. If you are not using a keyboard and monitor, then you will need to find some way to access your Pi, such as SSH.
Register Your Twitter App
In order to interact with Twitter (including searching, monitoring, posting, etc.), you will need to register your application. This is accomplished by going to https://dev.twitter.com/.
Click the “Sign In” button at the top-right of the screen and enter your Twitter credentials (you can also sign up if you don’t have a Twitter account).
Once you have signed in, click on your user icon, and select “My Applications.”
Click the “Create a new application” button, and you will be presented with a form to fill out about your application. Fill out the name and description fields. For “Website,” you can put something random, like http://github.com or something else that looks legitimate. At the bottom of the page, click the checkbox to agree to the rules, fill out the Captcha, and click the “Create your Twitter application” button.
Once completed, you will be presented with a dashboard for your registered application. You need to create an access token, so click the “Create my access token” button at the bottom of the screen.
Wait a few seconds and then refresh the page. You should see a section titled “Your access token” at the bottom. Copy down the “Consumer key,” “Consumer secret,” “Access token,” and “Access token secret.” We will need these for our application. Note that we set up this Twitter application as an example. It will have been deleted by the time you read this, so don’t be trying to use our tokens!
Install Required Packages
If you are using a relatively new release of Raspbian, it should already contain Python and the necessary modules to talk to the Pi’s GPIO pins. We will still need to install modules to search Twitter with Python. Several exist, but I recommend Twython if you are following this tutorial. Boot up your Pi and connect to the Internet (Ethernet, WiFi, etc.). If you use the X Windows interface, open up a console window and install Twython:
For more detail: Raspberry Pi Twitter Monitor


