
Over the past few weeks, we worked on different projects around IoT. Today, we will continue on this track and we will build a web-based data logger using the Raspberry Pi 3 and the Pi Sense Hat.
For this project, we will designate the Raspberry Pi to measure temperature, humidity and barometric pressure using the Pi Sense Hat and send the data (at 10-minute intervals) via WiFi to an online webserver, which stores the data in a MySQL database and displays them using a simple table on a webpage. The data will be online on a live webpage which means, it can be viewed from anywhere around the world.
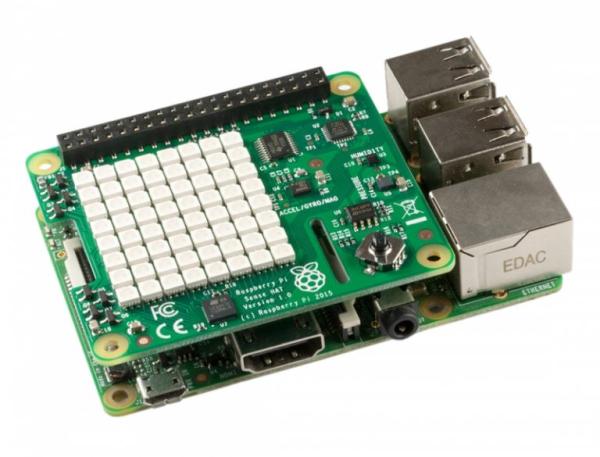
At the heart of today’s project is the Raspberry Pi 3 and raspberry Pi Sense Hat. The Sense Hat is an add-on board for the Raspberry Pi, which has many sensors, including a temperature sensor, a humidity sensor, a barometric pressure sensor (all of which will be used for today’s tutorial) among others. The Sense hat makes it easy to use all of these sensors without the stress and errors associated with wiring them. All of the sensors have been routed to pins which connect to the Raspberry Pi GPIO and by using the sense hat Python library, we can easily use simple commands to obtain data from the sensors on the board.
At the end of today’s tutorial, you would know all that is needed to upload data from the Raspberry Pi to a remote webserver.
REQUIRED COMPONENTS
The following components are required to build this project;
- Raspberry Pi 3 with Necessary accessories
- Sense Hat
- Power Bank
In addition to the components mentioned above, we will also need a hosting account to host the web server and database at which data will be stored. For this purpose, you can use any web hosting platform you desire but I will recommend Bluehost as I have been using them for a number of years.
As usual, the specific components used for this tutorial can be purchased via the attached links.
SCHEMATICS
As mentioned during the introduction, the main components for today’s tutorial include the Raspberry Pi and the Sensehat. The Sensehat comes as a shield and thus directly plugs on the Raspberry Pi. Thus, we do not need a schematic, just ensure you plug the Sensehat on the Pi as shown in the image below.
Read more: RASPBERRY PI WEB-BASED DATA LOGGER USING MYSQL AND PHP