
One of the ways you can use your PiZero is to transform it into a USB gadget.
There are the things you can turn the PiZero into:
- Serial (g_serial)
- Ethernet (g_ether)
- Mass storage (g_mass_storage)
- MIDI (g_midi)
- Audio (g_audio)
- Keyboard/Mouse (g_hid)
- Mass storage and Serial (g_acm_ms)
- Ethernet and Serial (g_cdc)
- Multi (g_multi) – Allows you to configure 2 from Ethernet, Mass storage and Serial
In addition to the above modules, a few other (less useful) modules are included.
- Webcam (g_webcam)
- Printer (g_printer)
- Gadget tester (g_zero)
and one of the ones I was mostly curious about was the Mass Storage.
So let’s quickly see how to transform your PiZero into a USB storage.
Andrew and Adafruit worked on this together over Christmas but have eventually taken two different approaches.
I have followed Andrew Mulholland’s github guidelines with some slight changes.
Get yourself a Rasbian Jessie full edition and resize the root partition via either the GUI or raspi-config.
Note the kernel version and the various details of Jessie with
uname -r
cat /etc/os-release
At this point we want to upgrade the kernel as the most updated one supports natively the USB gadgetry
sudo BRANCH=next rpi-update
And after this is done reboot (sudo reboot)
As you login you might want to run the two initial commands to see the differences.
Next we need to change the config.txt by appending the dwc2 USB driver at the end of it
echo “dtoverlay=dwc2” | sudo tee -a /boot/config.txt
and enable the general module
echo “dwc2” | sudo tee -a /etc/modules
lastly we need to enable the specific module which in our case is the g_mass_storage one
echo “g_mass_storage” | sudo tee -a /etc/modules
Configuration wise this is it! You should reboot now.
Next we need to create a backing storage used by the Pi to offer some space as USB key
depending on what you choose to do on the next command you will be either creating a floppy, a HDD or a CD-Rom. I went for the HDD 100MB in size.
sudo dd if=/dev/zero of=/piusb.bin bs=1024 count=102400
Andrew opted for a floppy with sudo dd if=/dev/zero of=/piusb.bin bs=512 count=2880
This creates a file at the root level which can be mounted by the module with the following command
sudo modprobe g_mass_storage file=/piusb.bin stall=0
If you now plug your Pi in your computer it should be seen as a RW USB storage device

To start the Pi automatically as USB storage I ended up adding sudo modprobe g_mass_storage file=/piusb.bin stall=0 to /etc/rc.local
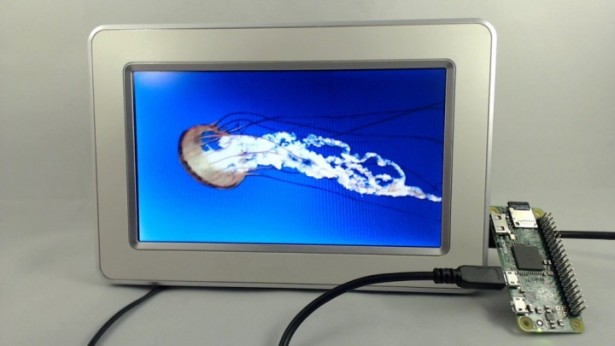
At this point my PiZero was ready to be plugged in my Digital Frame, boot up and serve some beautiful pictures. A bit useless if you ask me but fun!
Why did I get into this and why it did not quite work as I wanted
I had purchased two or three Digital Frames at my local charity shop for £3 each and have been looking at them sitting quietly in a corner for a while wondering what could I do with those screens. My first thoughts were about turning the screens into a monitor for the Pi. There are quite a few hardware drivers you can buy that promise to do just that. They are £20-30 and many screens aren’t supported. For as much as this seemed a good idea it was not to be.
Then I turned my attention to the USB port that these frames have thinking that if I was to be able to emulate a USB stick from a microcontroller of some type I should be able to change the pictures of the digital frame as it displayed it. Although the minimum cycle for the digital frame is every 5 seconds it might have still been enough to e.g. periodically
- Display a picture from a camera
- Update some information of the OS
- Game of life
You get the drift. All of course at the fantastic speed of 0.2 frames/s
You can try to mount piusb.bin by looking at its geometry with
fdisk -l /piusb.bin yields
Disk /piusb.bin: 100 MiB, 104857600 bytes, 204800 sectors
Units: sectors of 1 * 512 = 512 bytes
Sector size (logical/physical): 512 bytes / 512 bytes
I/O size (minimum/optimal): 512 bytes / 512 bytes
Disklabel type: dos
Disk identifier: 0xba95698c
Device Boot Start End Sectors Size Id Type
/piusb.bin1 128 198783 198656 97M 6 FAT16
I have a block-size of 512 bytes and the start-block is 128. The offset is 512 * 128 = 65536.
The mount command would be
sudo mount -t msdos -o loop,offset=65536 /piusb.bin usb-key/
It mounts as it should and you can see all there is in piusb.bin shame that nothing I would do had any effects on what was being seen on the USB storage device and in fact was corrupting the filesystem.
?
It sort of worked only when the digital frame would stop the slideshow as it would unmount the USB key and read it again when the slideshow would be restarted. So with imagemagick I could produce pictures out of some text like this

or the one below, in hope to get at least a rather complicated clock
![]()
but also this method would pretty much corrupt the filesystem.
It turns out that, as often happens, I get into trying things before giving a good read at the documentation and I fall short of my own predicament about RTFM. Had I read it I would have found:
For More Details: Raspberry Pi Zero digital frame