
If you ever find yourself running out of GPIO pins on a RaspberryPi you can put multiple pushbutton switches on a single pin using this method. It sets a variable by timing the charging of a capacitor through a series of resistors with the switches between them.
You will need a RaspberryPi, a breadboard, and a way to run wires from the RaspberryPi to the breadboard. You can use male/female jumper wires but one of the Pi Cobblers listed on this page from Adafruit will make it a lot easier: http://www.adafruit.com/search?q=cobbler
You will also need:
- 0.1uF ceramic capacitor http://www.adafruit.com/product/753
- 6 22K resistors *
- 22 gauge hookup wire
* This is a very handy assortment of resistors https://www.sparkfun.com/products/10969
.
This project uses the wiringPi libraries, written by Gordon Henderson, for programming the GPIO in C in a style similar to the Arduino IDE.
wiringPi must be installed.
Instructions for download, install and use are located at http://wiringpi.com
wiringPi uses it's own pin numbering scheme. All pin numbers mentioned in the program or in the text are wiringPi numbers unless otherwise specified.
After installing wiringPi you can obtain a list showing the pin numbering for your specific model of RaspberryPi by opening a command terminal and typing:
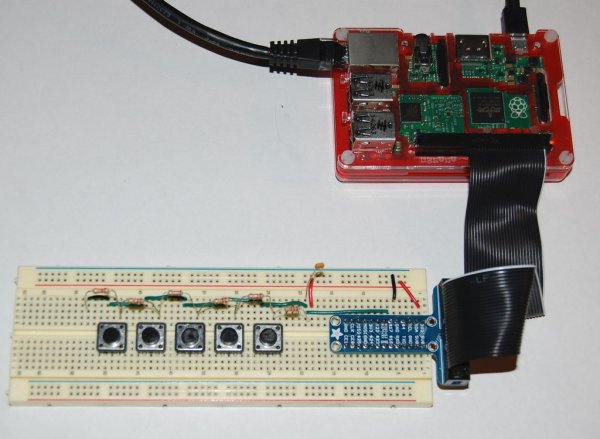
Step 1: Build The Circuit
Build the circuit as shown in the diagram.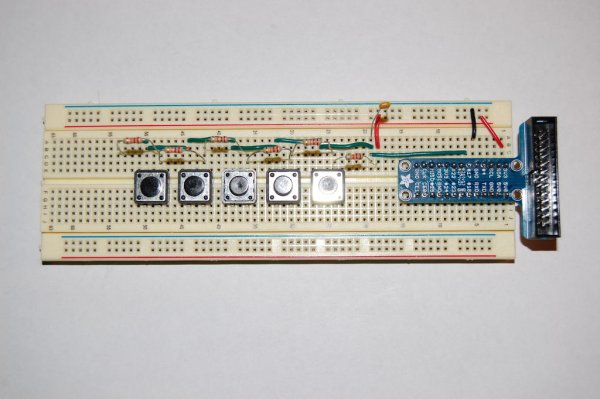
Step 2: The Program
I wrote this on a new Raspberry model 2. If you are using an older model some re-calibration will be necessary. The numbers in the case statements will need to be higher. Comment out the whole switch statement and temporarily replace it with
printf(“%ld\n”, ButtonReading);
This will make it easier to find the new numbers if you need to re-calibrate it for any reason.
And it should work if you add or subtract buttons.
If you try to press more than one button at a time only the higher numbered button will register.
For more detail: RaspberryPi: Multiple Buttons On One Digital Pin