
In this tutorial we will see how to use the serial port on Raspberry Pi. We will use the serial port available on Raspberry with a RS232/TTL 3-5,5V adapter and a USB-serial adapter. By default the Raspberry Pi’s serial port is configured to be used for console input/output. This can help to fix problems during boot, or to log in to the Pi if the video and network are not available.
To be able to use the serial port to connect and talk to other devices (e.g. a modem a printer.. ), the serial port console login needs to be disabled.
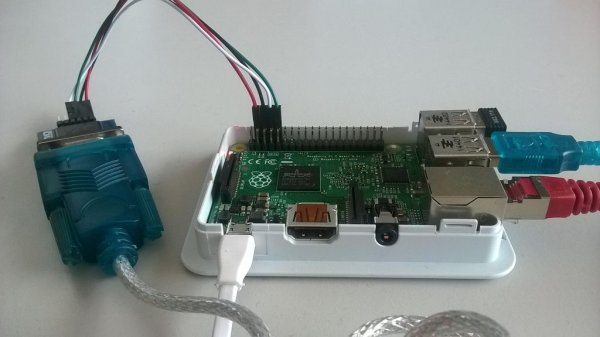
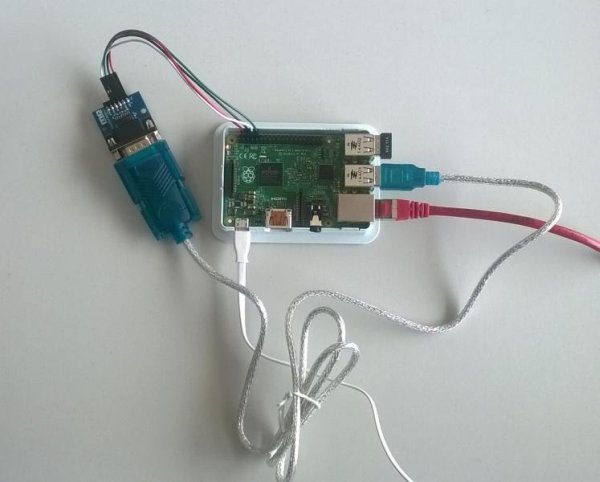
Here we use Raspberry Pi 2, and we connect a RS232/TTL 3-5,5V adapter to pins 4 (5V), 6 (GND) ,8 (TX),10 (RX) of Raspberry, obviously connect tx with rx and vice versa.
To search for available serial ports we use the command
dmesg | grep tty
The output is something like this
pi@raspberrypi ~ $ dmesg | grep tty
  [    0.000000] Kernel command line: dma.dmachans=0x7f35 bcm2708_fb.fbwidth=656 bcm2708_fb.fbheight=416 bcm2709.boardrev=0xa01041 bcm2709.serial=0x93f9c7f9 smsc95xx.macaddr=B8:27:EB:F9:C7:F9 bcm2708_fb.fbswap=1 bcm2709.disk_led_gpio=47 bcm2709.disk_led_active_low=0 sdhci-bcm2708.emmc_clock_freq=250000000 vc_mem.mem_base=0x3dc00000 vc_mem.mem_size=0x3f000000  dwc_otg.lpm_enable=0 console=tty1 console=ttyAMA0,115200 root=/dev/mmcblk0p2 rootfstype=ext4 elevator=deadline rootwait
  [    0.001774] console [tty1] enabled
  [    0.749509] dev:f1: ttyAMA0 at MMIO 0x3f201000 (irq = 83, base_baud = 0) is a PL011 rev3
  [    1.268971] console [ttyAMA0] enabled
  pi@raspberrypi ~ $
Last line indicates that the console is enabled on the serial port ttyAMA0, so we disable it
Run the configuration command and follow the instructions below
sudo raspi-config
Reboot and try with
dmesg | grep tty
output now is
pi@raspberrypi ~ $ dmesg | grep tty
  [    0.000000] Kernel command line: dma.dmachans=0x7f35 bcm2708_fb.fbwidth=656 bcm2708_fb.fbheight=416 bcm2709.boardrev=0xa01041 bcm2709.serial=0x93f9c7f9 smsc95xx.macaddr=B8:27:EB:F9:C7:F9 bcm2708_fb.fbswap=1 bcm2709.disk_led_gpio=47 bcm2709.disk_led_active_low=0 sdhci-bcm2708.emmc_clock_freq=250000000 vc_mem.mem_base=0x3dc00000 vc_mem.mem_size=0x3f000000  dwc_otg.lpm_enable=0 console=tty1 root=/dev/mmcblk0p2 rootfstype=ext4 elevator=deadline rootwait
  [    0.001769] console [tty1] enabled
  [    0.749438] dev:f1: ttyAMA0 at MMIO 0x3f201000 (irq = 83, base_baud = 0) is a PL011 rev3
  pi@raspberrypi ~ $
Now we can use the serial ttyAMA0. We connect an adapter usb / serial, then we will try to establish a communication between the two serial ports; obviously in a practical application to every serial we could connect a device, for example a modem, a printer a RFID reader etc.
For more detail: Read and write from serial port with Raspberry Pi