
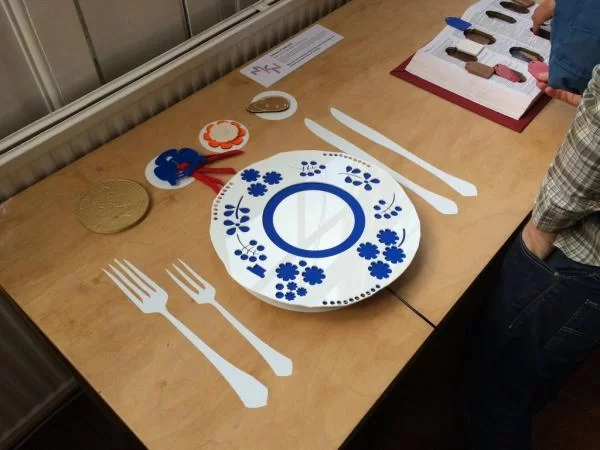
During the two day ‘hackathon' style workshop at Makernow last week, part of the All Makers Now conference, I helped one of the groups realise their project that involved triggering sound samples when symbolic items were placed into the centre of the piece. Due to the timescale, we had to use components and materials that we had available in the lab. As the project would be taken up to Trelissick House for the pop-up gallery exhibition, we needed small and unobtrusive hardware. We have a bunch of old PCs lying around, but they're big and noisy and heavy – not ideal. An Arduino would be nice, but sound playback requires additional hardware and the tiny microprocessors aren't really tasks like this.
Enter the Raspberry Pi – a nice linux development environement we can begin hacking away on immediately in high level languages like Python or Node.js. It has a built-in soundcard that will be perfectly adequate for the job. And it fits in the palm of your hand. Perfect.
Step 1: Hardware
This is the RFID reader we'll be using, a Phidget RFID module we had left over from another project. Phidget hardware isn't the cheapest (a far cry from the £2 MF522 readers I've been playing around with recently using Arduino) but they do have a phenomenal amount of cross-platform support, libraries and example code in a variety of different languages. The reader interfaces with USB, and we'll be using these tiny self-adhesive 125khz RFID tags pictured on the right.
Power-wise, we needed a powered USB hub as the Pi can only supply a measly 100mA, and our Phidget needs a full 500mA. This comes in handy for using a USB memory stick to transfer files whilst also having a k
eyboard and mouse connected. We can also plug the Pi itself into this hub to power it with a Micro USB cable. The recently launched Raspberry Pi Model B+ should make projects like this much easier, with 4x USB ports that can supple up to 1200mA of current each!
Step 2: Setting Up
I figured Python would be the best language to work with, with its abundance of third party packages and great support from Phidget, it would lead to a super quick development process – we needed results fast! It also comes pre-installed with the Raspbian operating system on the Pi, so less time spent getting set up.
First, we need to set up our Phidget development environment. After you've booted into Raspbian (NOOBS makes this process very easy), ensure you're connected to the internet and open up a Terminal. First we need to install the libusb package, a prerequisite for the Phidget library:
sudo apt-get update
sudo apt-get install libusb-1.0.0-dev
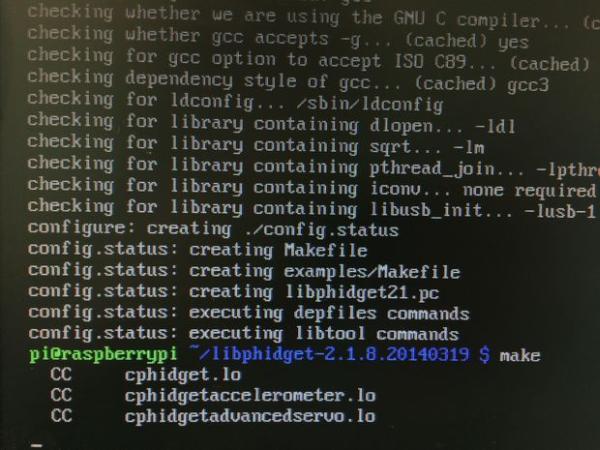
We can then download the source code for libphidget and compile it. Beware, this part took over an hour on our Pi! After this we'll also install Phidget's udev rules so that non-root processes can access Phidget hardware.
wget http://www.phidgets.com/downloads/libraries/libphidget.tar.gz
tar zxvf libphidget.tar.gz
cd libphidget*
./configure
sudo make install
sudo cp udev/99-phidgets.rules /etc/udev/rules.d/
Now we need to Phidget Python library. This comes in a ZIP file, and the Pi doesn't ship with an unzip programme (some parts of the ZIP standard are covered by patents) but we can easily install one: sudo apt-get install unzip.
Now we can download and install the Python library:
cd ~
wget http://www.phidgets.com/downloads/libraries/PhidgetsPython.zip
unzip PhidgetsPython.zip
cd PhidgetsPython
sudo python setup.py install
cd ..
Finally, as we'll be dealing with sound, we need to select the right output device (we're using the 3.5mm jack and the Pi will default to sending audio over the HDMI output) and turn up the volume to max (+4dB) as we can control this using our speakers.
sudo amixer cset numid=3 1
sudo amixer set PCM — 400
Step 3: Get Coding
I downloaded the Phidget Python examples from their website (available here), opened up the RFID example code and started hacking away. I was glad to see the Phidget working straight away after running the example code, reading the serial numbers of the tags I scanned and printing them to the console.
The example code is structured around a set of event listening functions that get triggered when things happen, such as the introduction of a new tag, and the subsequent removal of the tag. This should be a familiar concept for anyone who has used languages like JavaScript before, which rely heavily on event listeners.
When a tag is placed on the reader, the rfidTagGained function is called, and we can access the serial number of this tag through the e.tag variable. We'll use this to look in a folder and check that a file called .wav exists, and if it does, we'll play it on a loop until the tag is removed. We also want some background sound playing whenever there is no tag present, and we'll need to pause this when a tag is read.