
Ever find yourself turning off your alarm clock without realizing it only to wake up an hour later and have to race out the door?
In this build we are going to build a robot alarm clock that makes you work to turn it off! Not only that, but the robot will be able to sync to your Google Calender allowing for the alarm time to be adjusted using almost any device.
Step 1: Introduction
Today almost everyone uses their phone as an alarm clock which has a range of benefits. Phones are easy to set, easy to adjust, play custom songs, and can even sense when is the best time to wake you up.
The problem is, unless your phone is across the room, we use our phones so much we can literally use them in our sleep. Why not build a robot that is able to do all these things, but wont stop till you get up and start moving!
Our robot will be able to easily move randomly around the room over any surface with ease playing a custom alarm tone. In order to set the alarm simple link the program on the BrickPi to your Google account and it will search events with the title “wake1″ and automatically start the alarm at the events time.
This means the alarm time can very easily be adjusted using any device that can access your Google Calender.
Step 2: Parts Required
- RaspberryPi (Preferably Model B or B+)
- BrickPi
- BrickPi Power Pack
- SD Card with Raspbian Wheezy installed
- Wifi Dongle
- 1 Small Speaker (Such as the X-Mini 2)
- 2 LEGO® Mindstorm® Motors
- 2 LEGO® Mindstorm® Touch Sensors
- 2LEGO® Wheel
- LEGO beams and pins to construct the robot platform

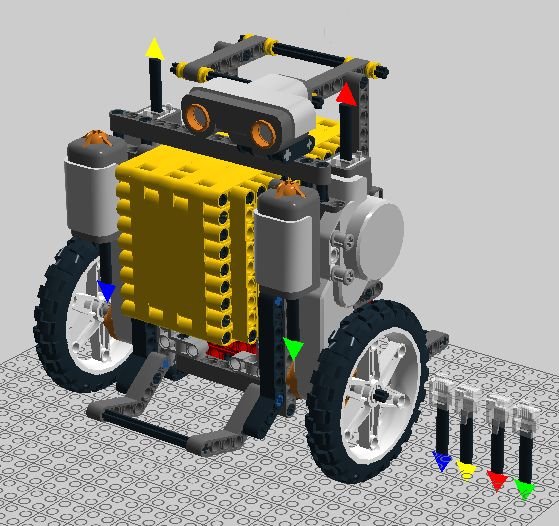
Step 3: The Build
In order to begin we will need to collect the components from the bill of materials. These will be the components needed in order to build our robot. It is possible to use either LEGO® Mindstorm® NXT or EV3 motors and sensors for this project.
Upon completion of collecting all of the necessary part it will simply be a matter of assembling the robot. This can be done by following the step by step instructions found here in PDF format. Instruction Manual
Once the robot has been assembled it is important to remember which sensors and motors are plugged into each port.
- Right motor = PORT_A
- Left motor = PORT_D
- Touch sensor one = PORT_1
- Touch sensor two = PORT_2
- Ultrasonic sensor = Port_4
- Speaker = audio jack and USB port
For more detail: Rolling Alarm Robot