This tutorial explains how to connect a analog temperature sensor to the Pi and use a small python script to upload that data for storage and graphing on COSM.
To follow this tutorial you will need
- MCP3008 DIP-package ADC converter chip
- Analog Temperature Sensor TMP-36
- Adafruit Pi Cobbler – follow the tutorial to assemble it
- Half or Full-size breadboard
- Breadboarding wires
- Raspberry Pi with a internet connection
Connecting the Cobbler to the MCP3008 and TMP36
Why we need an ADC
The Raspberry Pi computer does not have a way to read analog inputs. It's a digital-only computer. Compare this to the Arduino, AVR or PIC microcontrollers that often have 6 or more analog inputs! Analog inputs are handy because many sensors are analog outputs, so we need a way to make the Pi analog-friendly.
We'll do that by wiring up an MCP3008 chip to it. The MCP3008 acts like a ‘bridge' between digital and analog. It has 8 analog inputs and the Pi can query it using 4 digital pins. That makes it a perfect addition to the Pi for integrating simple sensors like photocells, FSRs or potentiometers, thermistors, etc.!
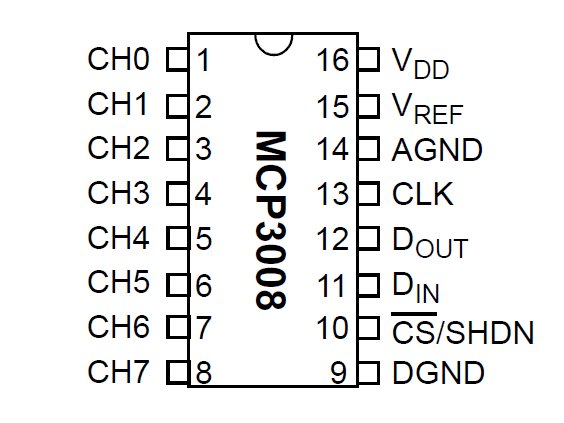
Lets check the datasheet of the MCP3008 chip. On the first page in the lower right corner there's a pinout diagram showing the names of the pins.
Wiring Diagram
In order to read analog data we need to use the following pins: VDD (power), DGND (digital ground) to power the MCP3008 chip. We also need four ‘SPI' data pins: DOUT (Data Out from MCP3008), CLK (Clock pin), DIN (Data In from Raspberry Pi), and /CS (Chip Select). Finally of course, a source of analog data, we'll be using the TMP36 temperature sensor
The MCP3008 has a few more pins we need to connect: AGND (analog ground, used sometimes in precision circuitry, which this is not) connects to GND, and VREF (analog voltage reference, used for changing the ‘scale' – we want the full scale so tie it to 3.3V)
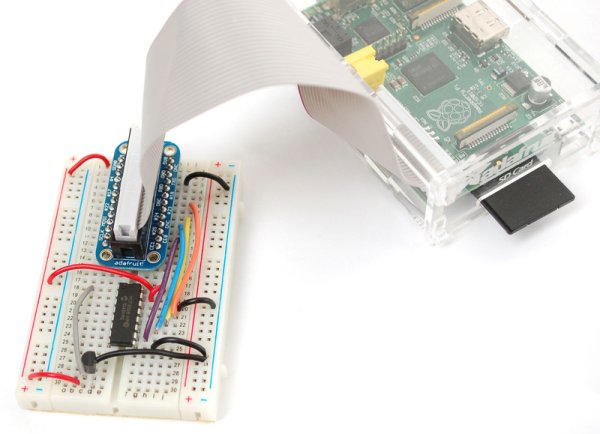
Below is a wiring diagram. Connect the 3.3V cobbler pin to the left + rail and the GND pin to the right – rail. Connect the following pins for the MCP chip
- MCP3008 VDD -> 3.3V (red)
- MCP3008 VREF -> 3.3V (red)
- MCP3008 AGND -> GND (green)
- MCP3008 CLK -> #18
- MCP3008 DOUT -> #23
- MCP3008 DIN -> #24
- MCP3008 CS -> #25
- MCP3008 DGND -> GND (green)
Advanced users may note that the Raspberry Pi does have a hardware SPI interface (the cobbler pins are labeled MISO/MOSI/SCLK/CE0/CE1). The hardware SPI interface is super fast but not included in all distributions. For that reason we are using a bit banged SPI implementation so the SPI pins can be any of the raspberry pi's GPIOs (assuming you update the script). Once you get this project working with the above pinout, feel free to edit the python code to change the pins as you'd like to have them!

TMP36
Finally the TMP36 has three pins that need to be connected. They are numbered from left to right in ascending order when the text of the sensor is facing you.
- pin1: 3.3v
- pin2: analog out –> channel0 on mcp3008 (pin1)
- pin3: gnd
Necessary Packages
For more detail: Send Raspberry Pi Data to COSM


