
How to setup a Raspberry Pi FTP Server – Webserver Installation
For uploading files on a Raspberry Pi you should install a FTP server. Such a server is very useful if you use your Pi as a web server or even if you want to have a network storage, which can also be accessed outside of your network if an DNS server is installed.
However this tutorial is not only for web server but can also be used for easy file transfer between Raspberry Pi and your PC.
Components
You will be able to access the whole sd card. If you want to use the Pi as a network mass storage you should have enough empty space. Alternatively you can also use an external hdd. All B/B+ models (including the Raspberry Pi Model 2B) have a 100 Mbit ethernet port, which allows fast data transfer rates.
Installation
First of all you need to install the server package. You can use SSH or opening the terminal.
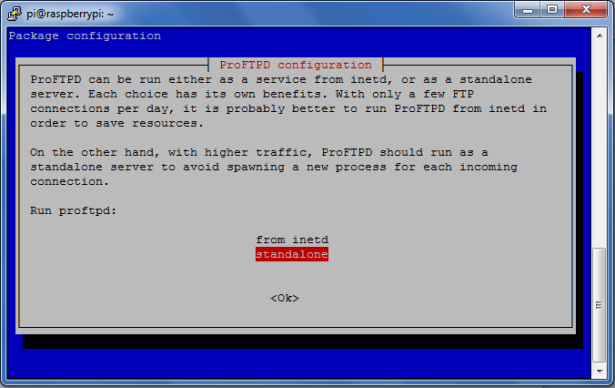
sudo apt-get install proftpdWhile installing it will ask how ProFTP should be started. We choose “standalone” (see image).
Basically, here it would be already done, but with this configuration each user has access to his own home directory (for example /home/pi). Therefore we create a new virtual user with access to a specified path. For this purpose we first change once the directory.
cd /etc/proftpd/Here, the virtual user will be created. In the following example I create the user “tutorials“ with home directory /var/www/. You can specify whatever directory you want (also the absolute root directory or a directory on a mounted external hdd).
sudo ftpasswd --passwd --name tutorials --gid 33--uid 33--home /var/www/ --shell /bin/false
Now just enter the password and confirm. If the user’s password should be changed at a later date, simply switch back to this directory ( /etc/proftpd/ ) and run the same command again.
To further unlock the virtual users, we have to edit the configuration file:
sudo nano /etc/proftpd/proftpd.confFollowing code has to be inserted at the end of that file:
DefaultRoot ~
AuthOrder mod_auth_file.c  mod_auth_unix.c
AuthUserFile /etc/proftpd/ftpd.passwd
AuthPAM off
RequireValidShell off
By pressing CTRL + O and CTRL + X and we save and exit the editor.
Last but not least, we restart the server and try it out.
For More Details: How to Set Up a Raspberry Pi FTP Server