
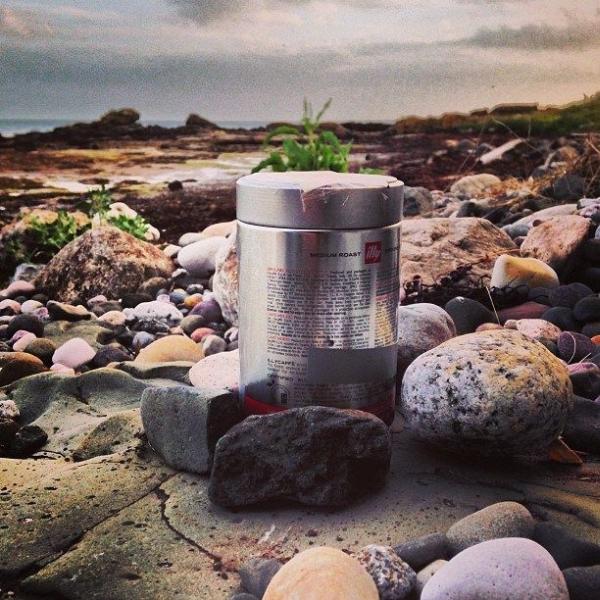
Whilst developing BerryCam I thought it would be pretty cool to create a timelapse camera that could be left outdoors over a period of time, to capture a sequence of images that could be later joined together into a video clip. From the outset thoughts turned to housing everything in an ‘Illy’ coffee tin as it was pretty robust, watertight and could easily contain the Raspberry Pi and battery pack.
Step 1: What you need
- Raspberry Pi – Model A or B (A has better battery life)
- Raspberry Pi camera module installed and set up
- Illy coffee tin or similar sized container. Watertight and metal is best.
- Some clear plastic, taped onto outer tin over hole
- Plastic holder for camera. I used the lid from the case of these batteries
- Elastic bands to hold the camera and cable in position
- Battery pack – a 4xAA unit is best for size to power rating – I used this one
- The raspiLapseCam.py Python script. Download from the FotosynLabs repo here
Step 2: Setting up the camera
A small hole drilled into the side of the tin allows the camera module to peer out of the tin. Living in Scotland rain is always a factor, as is the sea spray where I have been testing the device out. Using some clear plastic – the sort you get on moulded packaging, was ideal to keep everything enclosed and safe from water. But make sure you use an area that is flat and free from scratches or blemishes and that it is of good quality plastic (ie almost perfectly clear).
The camera module was mounted onto a plastic holder to easily allow for handling, adjustment and repositioning using Velcro tabs to mount this to the inside of the tin. Everything is held together with elastic bands, so changes in temperature and moisture won’t have as an immediate effect on adhesives. I had originally used electrical tape but the adhesive became soft, slightly gloopy and the pull of the ribbon between the Raspberry Pi and camera module had caused things to move about too easily.
Filling in behind this, is the power supply which keeps everything snug when in use. The particular unit has a handy power switch on top so you can easily switch the device on and off.
Using velcro on the plastic mount means you can easily remove the whole unit whenever you need access. When installing, make sure the camera is level in the tin (the edges of the plastic mount helps when aligned with the inner lip) and ensure the lens has an unobstructed view through the hole by looking through from the outside. If the lens appears centrally in this hole then it should ‘see’ everything without the edges of the hole creeping into the captured image. Testing is the best option to make sure everything is straight. Grabbing previews quickly with BerryCam is and ideal solution to do this.

With the camera installed – the Raspberry Pi and battery pack can easily be lifted out of the tin to allow of access to the various ports. I find it rests easily on the top of the tin when connecting to a display and keyboard if you need to use the device with a display. SSH works without the need to remove if you have a network connection available.
Step 3: Using the Python script and setting up Raspbian
ssh [email protected](where XX.XX.XX.XX is the IP address of your Raspberry Pi)First of all, we’ll need to get the Python script to control the camera. We’ll copy this into the /home directory as it’s easy to find and a good starting point, but copy to the place the suits you and your build.
cd /home
sudo wget <a href="https://bitbucket.org/fotosyn/fotosynlabs/raw/0a5f212958637ce20f502fc579fc28338b33d87e/RaspiLapseCam/raspiLapseCam.py"> https://bitbucket.org/fotosyn/fotosynlabs/raw/0a5...</a>
To check everything is installed, simply type
l
For more detail: Simple timelapse camera using Raspberry Pi and a coffee tin