
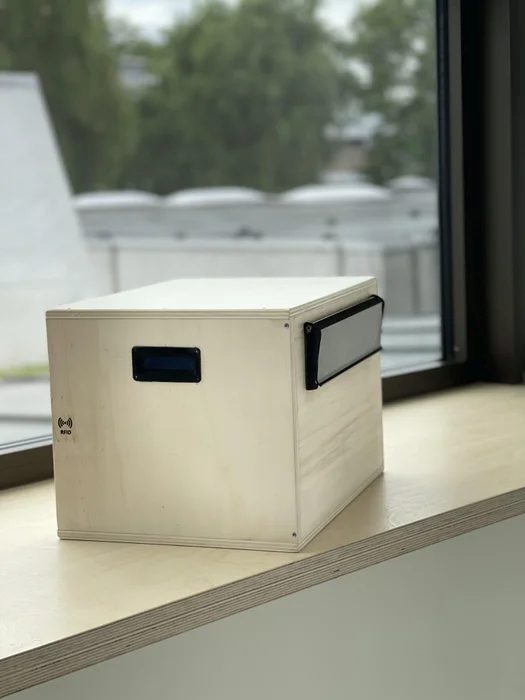
The Smart Letterbox is a device that serves the same purpose as a traditional mailbox, only here it is done in a user-friendly way. And all of this with just a few sensors and an LCD display!
First of all, you don't have to check your mailbox every day yourself, the Letterbox does it for you! Should there be mail, you will see a notification on the LCD-display.
Another feature is that you no longer need keys to access your mailbox. Scan your registered badge and the door opens.
You can see and perform the same actions on the website app. In addition, you can add new users or delete existing ones to give or deny them access to your mailbox.
Now have fun to build your own Smart Letterbox! If you have any questions or tips, feel free to contact me.
Supplies
Electronics
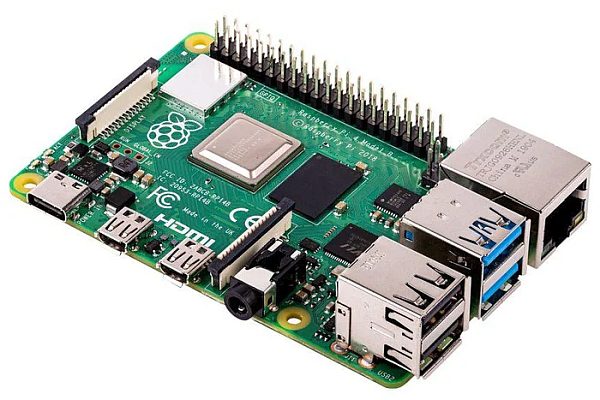
- Raspberry Pi (3B+/4B 4GB)
- MicroSD Card (at least 8GB)
- Powerbank 10.000mAh (with USB-cable included)
- LCD-display
- Magnetic door sensor
- Load Cell Amplifier (HX711)
- Load Cell itself (5kg or less)
- Raspberry Pi T-cobbler
- Servo-motor
- RFID-reader
- Push-button
- Breadbord
- Resitors
Connecting components and other supplies
- Breakaway pin headers
- Servo-motor holder (3D-printing)
- Servo-motor lock system (3D-printing)
- 12mm wood plates (dimensions are covered below)
For more information, check the attached file below
Step 1: Preparing the Electronics
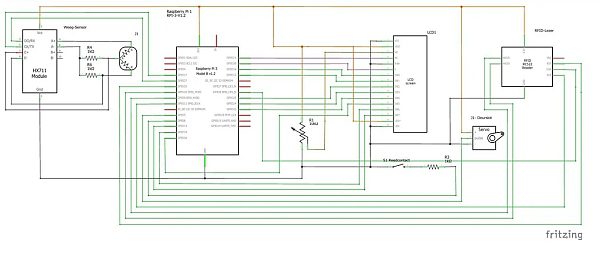
Once you have all the required components,you can already start connecting these to your breadboard.
Look closely at the schematic and make sure you connect the components to the correct GPIO-pin of the Pi. This way you will avoid problems when you will run the code to start the application.
Note: Make sure all components get the 3.3V power supply from the Pi and not the 5V. This way you avoid damaging components
Step 2: Database Model
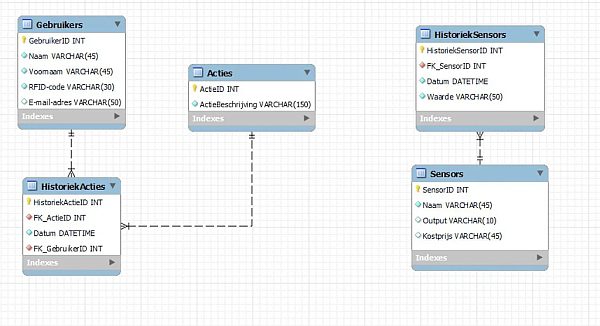
We store all the data from the sensors in order to use it in our application afterwards. Storing the users is also important here to avoid unwanted access to your mailbox.
The history of the users and of the sensors is stored here separately. This makes it easier to retrieve the data separately and is more manageable.
Step 3: Creating and Assembling the Case
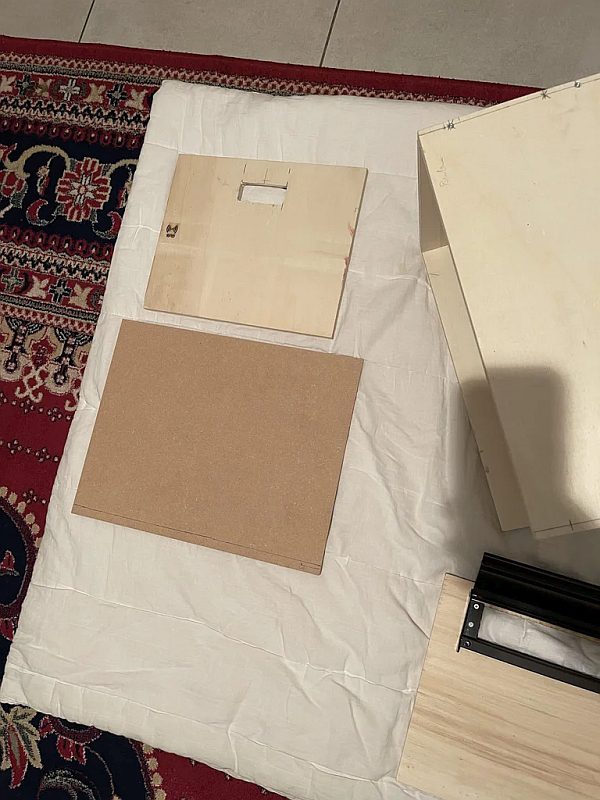
In this section, we'll leave the electrical part aside for a moment and start on the creation and assemblation of the case.
The housing is made of wooden planks that will be cut to size.
In total you will cut 7 boards to size:
- 2x 40cm x 30cm (12mm)
- 2x 25cm x 30cm (12mm)
- 1x 25cm x 37,5cm (12mm)
- 1x 25cm x 35cm (12mm)
- 1x 35cm x 27,5cm (3mm)
Once the boards are cut, there are 2 boards that will be incised:
- For the mailbox flap (board 25cm x 37,5cm)
- For the LCD-display (board 25cm x 30cm)
Step 4: Connecting Components to the Case
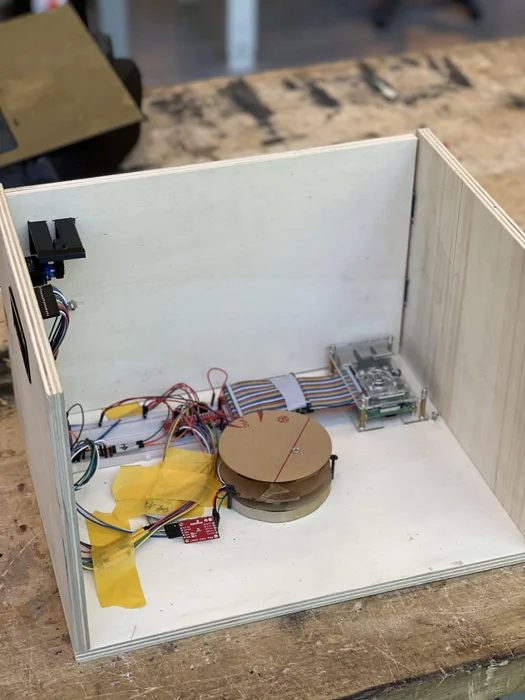
Once you have assembled the case. you can start adding the components to it.
Here you will need a few screws to fix the components.
In this part you can also 3D-print the two items mentioned before.
Step 5: Programming Part
Once all the previous steps are done, you can now start the configuration and startup of the Raspberry Pi.
1) Downloading Raspberry Pi OS.
- Go to Raspberry Pi OS and download the image –> (Raspberry Pi OS with desktop). This may take a while.
2) Writing image to your SD Card:
- When it is finished downloading, you can write the image to your sd card with (recommend 8 or 16GB) Win32 Disk Imager. How to do this? Tutorial Video
3) Once the image is written to the SD card, you can insert it into your Pi
- Make in Putty a first SSH connection with the PI to get access to it
4) Some basic configuration
- Enable I2C and SPI:
sudo raspi-config
5) Adding WiFi.
- Adding your own home wifi.
sudo wpa_passphrase 'Networkname' 'Password' >> /etc/wpa_supplicant wpa_supplicant.conf
- Reload your wireless network card in the PI.
wpa_cli -i wlan0 reconfigure
Source: Smart Letterbox