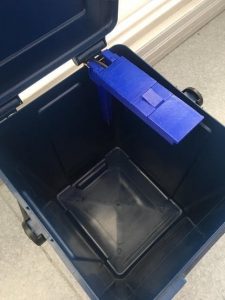
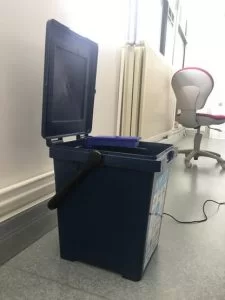
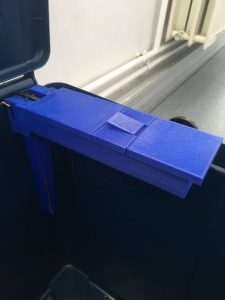
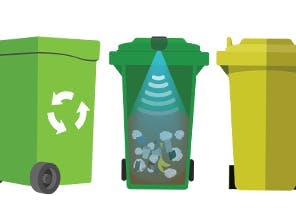
Device for intelligent waste bin. This device integrates several sensors to supervise the state of the trash.
Story
Content guidelines
Context
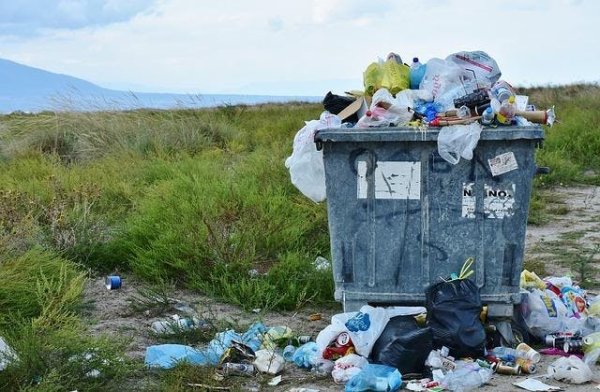
Good waste management has become an essential issue for our planet. In public and natural spaces, many do not pay attention to the waste they leave behind. When there is no garbage collector available, it is easier to leave waste on site than bring them back. Even the so called preserved spaces are polluted by waste.
To preserve natural areas, it is important to provide well-managed waste collection points :
- To prevent them from overflowing, the bins must be raised regularly. It is hard to get through the right time : too soon, and the trash can be empty, too late and the trash can overflow. This problem is all the more critical when the bin is difficult to access (such as on hiking trails in the mountains)
- In this rational waste management, sorting can be a major challenge. Organics waste can be directly processed by nature, in composting. Non organics waste must be collected to be treated by specific processes.
Purpose of the Project
The purpose of our project is to provide a supervision device for intelligent waste bin. This device integrates several sensors to supervise the state of the trash.
- Level sensor: based on ultrasonic system, used to prevent overflows by alerting the garbage collection team.
- Temperature and humidity sensor: used to monitor the trash environment. This can be useful to manage the condition of organic compost, and to prevent contamination in some specific case (very wet or hot conditions, risk of fire in very dry conditions)
- Flame sensor: some may deposit incandescent waste (like cigarette butts) or may intentionally set fire to the bin. A garbage fire can have dramatic effects on the environment (for example it can cause a forest fire). The flame sensor can alert supervision team about the problem.
- Moisture sensor : for the compost process, it is important to maintain a certain humidity level in the compost material. The moisture sensor, included in our project, will measure the humidity level on the compost.
- Opening sensor : a opening detector will be installed on the trash lid to get statistics on garbage use and detect bad closure.
- Location system : garbage must be identified and localized to help garbage collection team on their management. It will offer more agility on the garbage location management, with the possibility to deploy temporary garbage bins (eg. In summer on beach and hiking tracks, in winter on ski slope, on special events such as sports competition of music festivals)
The project takes on its full meaning with a waste bin with two compartments:
- One for non organics waste.
- One for organic waste with composting process.
Sigfox Usage
The trash will be install in isolated areas. The power will be provide by battery, possibly connected to a solar panel. For us, Sigfox seams to be a very good solution :
- Sigfox communication system has a wide area coverage : its allows to deploy the project on a large scale.
- Sigfox system provides sufficient communication capabilities for our use case.
- Sigfox can provide a 100m localization solution : not necessary to add a GPS shield on the bin.
- Sigfox is a low power solution, which allows the device to operate a long time autonomously.
II. Project Details
Hardware Design Method
Project Steps
Step 1: Understand Sigfox
Sigfox is a solution to connect the device in scope of Internet of Things. It’s currently operated in 45+ countries and 3 millions + devices. The message can be up to 12 bytes which maximum of 140 uplink and 4 downlink per day.
Step 2: Hardware Lookup
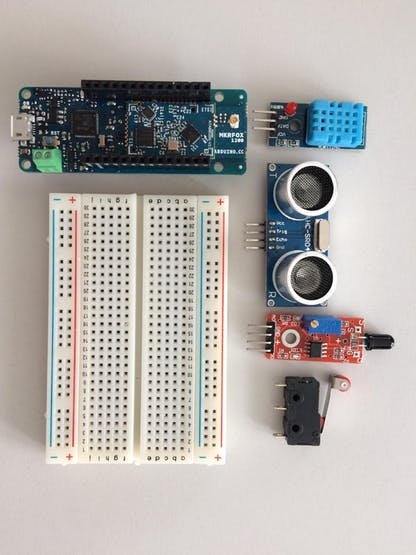
The Hardware Used:
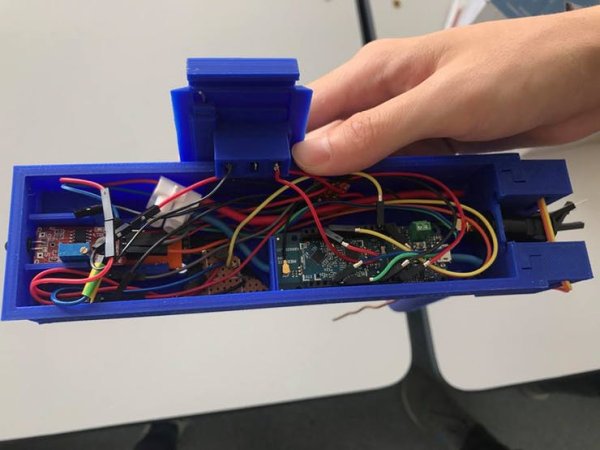
- Arduino MKR Fox 1200
- Mini Microswitch
- HC-SR04 – Ultrasonic Sensor
- DHT11 – Temperature and Humidity sensor
- KY-026 – Flame Sensor Module
- Moisture Sensor (Custom Made) – The normal moisture sensor can be use but, after a few months of use the two two legs of the probe will be corrosion and the thin layer of copper on its legs will be completely eat away. So, we use custom made moisture sensor that made from copper to make it last longer before corrosion. http://carrefour-numerique.cite-sciences.fr/fablab/wiki/doku.php?id=projets:moisture_sensor
- Raspberry Pi 3 Model B
In this project we use custom made moisture sensor to make it last-long before corrosion.
Step 3: Hardware Connection and Layout
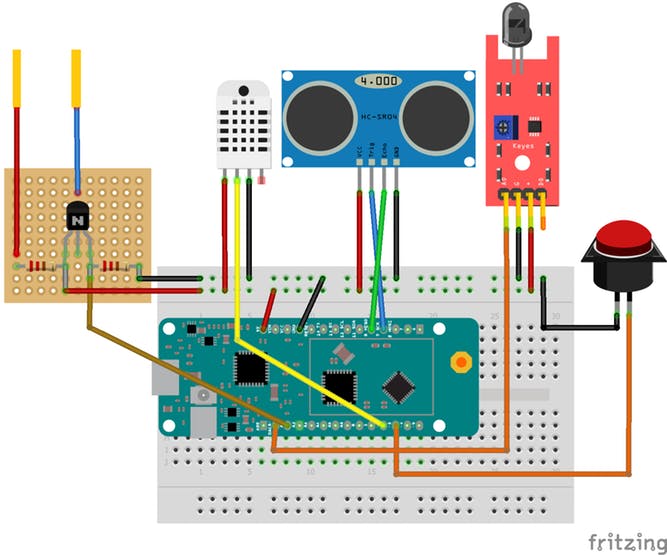
Connection to Arduino MKR Fox 1200
Micro Switch -> Arduino MKR Fox 1200
- C -> GND
- NC -> Pin 3
DHT11 -> Arduino MKR Fox 1200
- VCC -> 5V
- GND -> GND
- DATA -> Pin 2
HC-SR04 -> Arduino MKR Fox 1200
- VCC -> 5V
- GND -> GND
- Trigger -> Pin 9
- Echo -> Pin 10
KY-026 -> Arduino MKR Fox 1200
- VCC -> 5V
- GND -> GND
- DATA -> Pin A0
Moisture Sensor (Custom Made) -> Arduino MKR Fox 1200
- VCC -> 5V
- GND -> GND
- SIG -> A1
Step 4: Arduino Code
Install Arduino IDE:
Install arduino IDE from this link : https://www.arduino.cc/en/Main/Software
Get the Code:
https://github.com/honhon01/Smart-Waste-Bin
Board and Library:
Before understanding the code, You need to install the board and library.
Board:
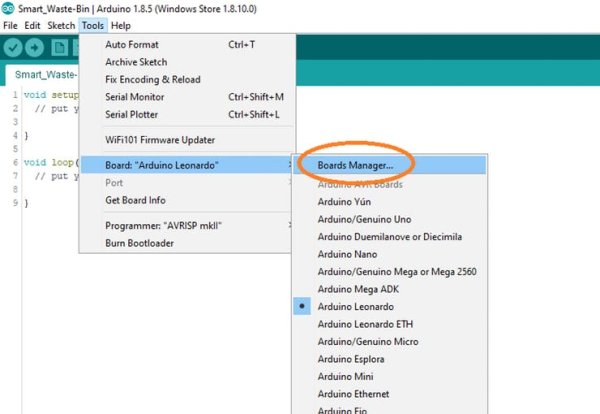
To install the board, go to “Tools > Board > Board Manager.”
Board Need:
- Arduino SAMD Boards (32-bits ARM Cortex-M0+)
Library :
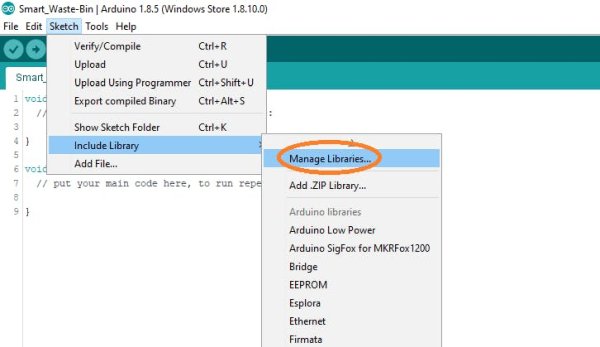
To install the libraries, go to “Sketch > Include Library > Manage Libraries.”
Libraries Need:
- Arduino Low Power
- Arduino Sigfox for MKR Fox 1200
- DHT sensor library
- Adafruit Unified Sensor Driver https://github.com/adafruit/Adafruit_Sensor
- RTCZero
Look into the Code:
- #include <Sigfox.h> : Use to manage the Sigfox module and send or recieve the value from device.
- #include <ArduinoLowPower.h> : Use for put the Module to sleep and save the battery life.
- #include <DHT.h> : Normally, use for DHT11 to work.
Functions:
- setup() : In this function, we check if the Sigfox has begin. Also, setup the DHT11 and Ultrasonic sensor pins.
- loop() : In this function, we check if the button is pressed which mean the bin is closed or not. If the button is not pressed the Sigfox will not send the value but, If it pressed it will get the value from all sensors and send it to sendPayload() function.
- sendPayload() : This function will begin the Sigfox module and send all values as byte to SigFox. Then it will end the Sigfox module
Run the Code:
After you understand how the code work. Try to compile and upload the code.
Don’t forget to select the board to Arduino MKR Fox 1200 and the port to your device port.
Step 5: Activate Your Device
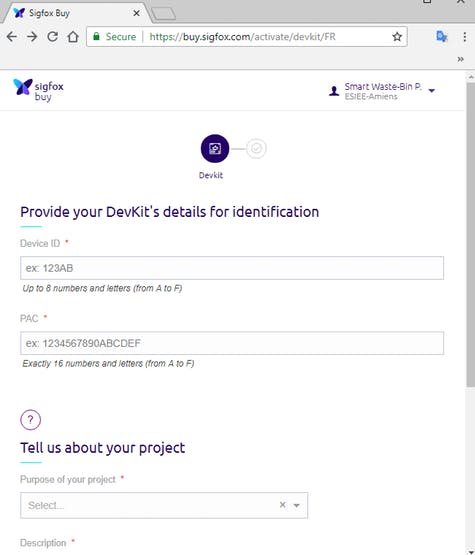
After you got your device, go to this link to activate the devicehttps://buy.sigfox.com/activate. Then, fill in the informations and you’ll got the device install.
Step 6: Sending the Data
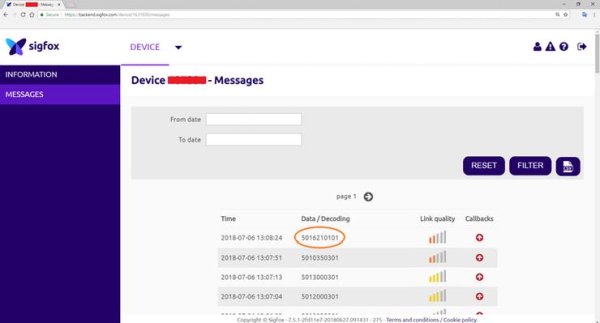
Try to run the Arduino IDE again and this time the device will be able to send the data to SigFox. You can check if you received data in the SigFox backend. https://backend.sigfox.com/device/list
Step 7: Application Server
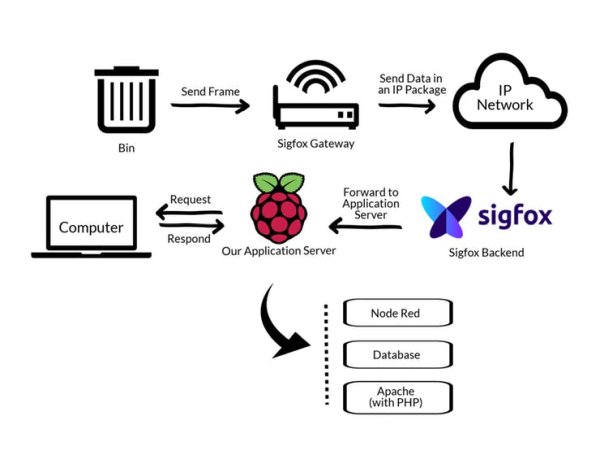
Raspberry Pi 3 Model B is used as Application server. Which contain Node-RED, MariaDB and the Web Application.
Step 8: Backend Using Node-RED
Install Node-RED:
Follow the instructions from this link : https://nodered.org/docs/getting-started/installation
Npm Need:
- node-red-node-mysql
To get the data from SigFox, we need to create our own server to receive the data. We use Node-RED as the tool to get the data from SigFox.
Step 9: Database – MariaDB
Install MariaDB:
Raspbian Raspberry Pi: https://howtoraspberrypi.com/mariadb-raspbian-raspberry-pi/
Others OS: https://mariadb.com/downloads
Step 10: Frontend Application (Website)
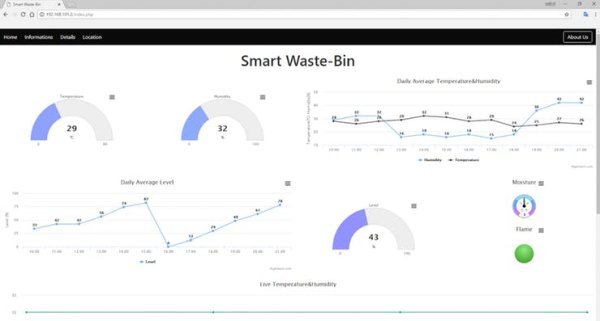
This is the frontend of our project. The website show the information and data send from devices.
3D Printing
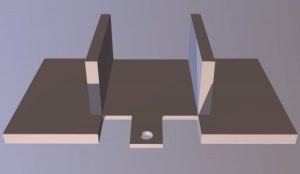
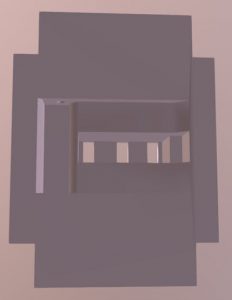
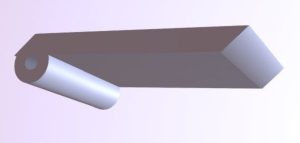
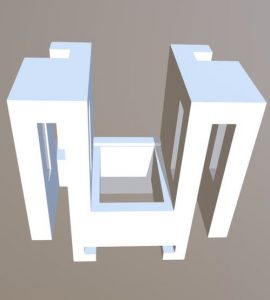
Install the Object in 3D-Printed Box
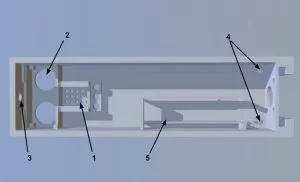
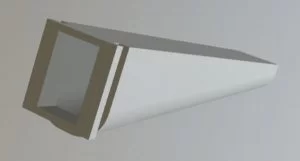
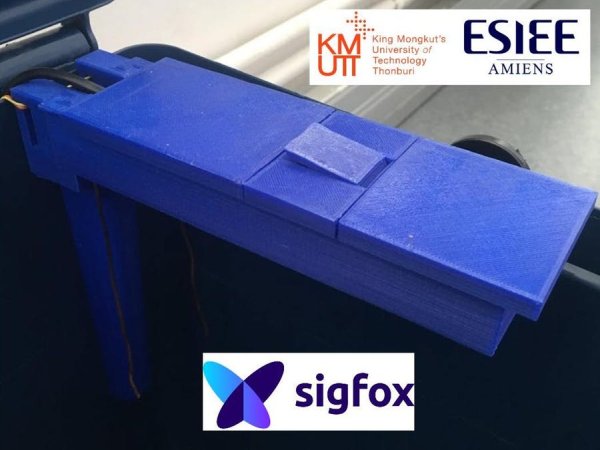
1. Place DHT11 in point 1 and cover with “DHT11 maintain” part.
2. Place HC-SR04 in point 2 and cover with “interior” part.
3. Place KY-026 in point 3 on the top of “interior” part.
4. Place moisture sensor in point 4.
5. Place Arduino MKR Fox 1200 on point 5.
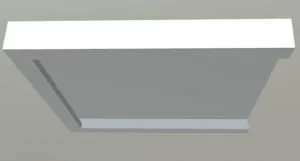
6. Place Mini Microswitch in the “middle top” part and close with “opening detector” part.
7. Connect “support” part with “base” part and place the antenna inside the “base”.
8. Connect “support” part to main box and close the box with “Middle top”, “Front top” and “Back top”.
III. Some Possible Extra Features
- Be able to set the total height of the bin on the display monitor (not only modify on Arduino). –> Every type of bin have different height so, if the high of bin can be set by the user, the device will be able to install on every type of the bin.
- Be able to separate the type of waste. –> It will be easier for waste management on organic and non-organic waste.
- Display the level of garbage in the bin in a monitor installed over the bin. –> Known the level of the garbage in the bin make the user more comfortable and can skip the bin if its full.
- Provide an autonomous battery with solar panel. –> for an autonomous system
- Manage temperature and moisture inside the bin by controlling a water supply system and a ventilation system (shutters that can be opened or closed). –> Supervise and control the composting process.
IV. Conclusion
Our idea of “Smart Waste-bin”, providing a smart technology for waste system, reducing human time and effort, and which results in healthy and waste ridden environment.
The proposed idea to preserve natural areas and reduce waste pollution by smart waste bin for well waste management, we can know which areas empty or overflow. So, this project can help garbage collector on their management, good waste management, and cleaner. Know the environment and level of bin. So, we can management pick up schedule.
The goal of this project is to make the hardware that matches the devices to sense the environment by sensors of Smart Waste-bin to detect the level, temperature, humidity, moisture, and flame of the garbage inside the bin periodically for each node of bins. And we connected each node with sigfox network, node send data to sigfox and shown the values on the website.
Final result is accessible on the following website : http://grit.esiee-amiens.fr:8069/smartbin/
V. Acknowledgements
King Mongkut’s University of Technology Thonburi, for gave an opportunity to us. In view of importance of this activity, for the time of 7 weeks training period to following students of 3rd year (Electronics and Telecommunication Engineering and Computer Engineering).
ESIEE-Amiens, for your continued co-operation in providing place to develop the project, lab training opportunity to engineering students at your facility, and provided equipment for this project. This is evident training is an essential part of academic activity which helps students learn engineering activities being carried out in commercial organization.
We would like to express our deep gratitude to Nicolas DAILLY, our supervisor and Thérèse ABY, co-supervisor for their patient guidance, enthusiastic encouragement and useful critiques of our work. We would like to thank to Stéphane POMPORTES for his advice and assistance. My grateful thanks are also extended to Nicolas HENOCQ who provides us materials to make the moisture sensor and Moustapha KEBE for his suggestion in web development.
Source: Smart Waste Bin


