
However you feel about GMOs, organics, etc – it is a pretty universal desire to have fresh food that doesn't have anything harmful contained within. We had a strip of gravel/dirt that wasn't being used for anything except collecting weeds when it rained. 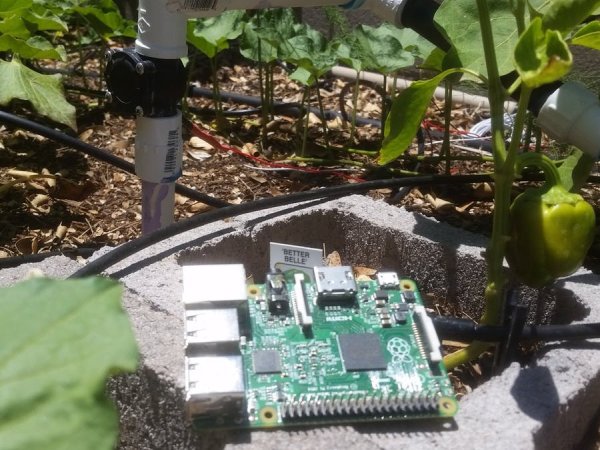
We decided to fix that and use some cool technology along the way to help us manage our new mini-farm while we were away!
A few of our goals were:
- We wanted to run our garden with no grid power so that it could manage itself indefinitely (even when the power goes out).
- We wanted to be able to water the garden either using a timer or by pushing a button.
- We wanted a raised bed since this garden was going to be in a desert with terrible ‘soil'.
We got started by clearing the existing rock in preparation of the raised bed.
We put in some pipe for two trees on either side of what was going to be the raised bed. You can see the pipe sticking up in the middle. This is the primary means of watering the raised bed.
Those pipes are fed from a single inlet pipe with the 12v valves controlling the flow to each. (The third, middle, pipe just goes to an unrelated faucet)
(Note: the blue shut-off valve had to be replaced a few months after.. get a metal valve!)
Once the pipe was in, we covered everything up and took a little break to figure out how to lay out the cinder-blocks for the bed.
We tried a few different layouts. We wanted to maximize the available bed but also wanted to make it easy to plant and pick food from.
We ended up removing the back row of blocks and staggered the width so that we were able to reach all parts without having to step up.
Once we had the blocks in and level, we had some soil delivered. We made sure to get enough to fill the pockets of the blocks. They require more than you would initially think but also grow a lot more than you would imagine!
Next, we added a water valve to help us monitor the amount of water we put into the bed vs. plat growth.
We ran the wire back to the box holding the Raspberry Pi.
Now that we have the water and electron pipes installed, let's go to the ‘smart' part.
Warning: The box is not meant to look pretty. We are constantly trying new things. One day we will settle!
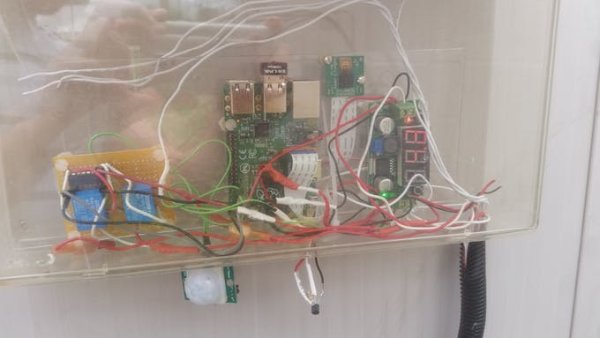
From right to left:
- Voltage regulator stepping down the 12v power from solar charged battery to 5V for the Pi. Battery is in the shed and panels are on the roof.
- RPi camera. Used for capturing time lapses and making sure everything is green when we are away.
For more detail: Solar Powered, Remote Controlled, Smart Garden