The Best way to Connect Raspberry Pi to Laptop display

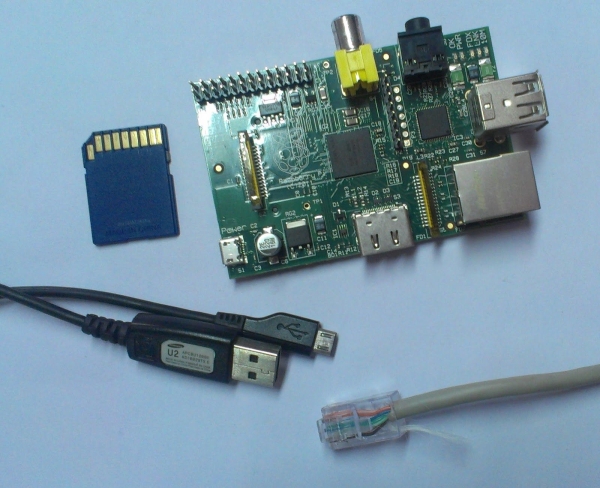
What are the stuff required to do this?

  1. Raspberry Pi.
  2. Ethernet Cable.
  3. Laptop.
  4. SD Card with Raspbian.
  5. Micro USB Cable.

(Optional) Components required for setting it up the first time:

  1. HDMI/ AV Display.
  2. Keyboard and Mouse.

The Best way to Connect Raspberry Pi to Laptop display

How does it work?

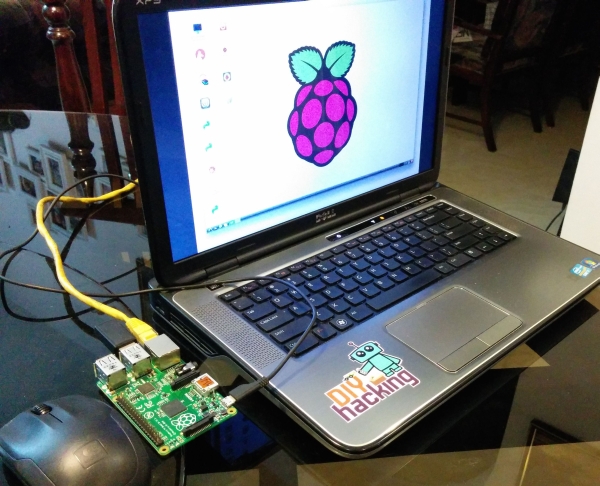
 To connect raspberry pi to laptop display, you can simply use an ethernet cable. The desktop GUI (Graphical User Interface) of the raspberry pi can be viewed through the laptop display using a 100Mbps ethernet connection between the two. There are many softwares available that could establish connection between the raspberry pi and your laptop. We would be using the VNC server software to connect the pi to your laptop.
Installing the VNC server on your pi allows you to see the raspberry pi’s desktop remotely, using the mouse and keyboard as if you were sitting right in front of your pi. It also means that you can put your pi anywhere else in your home, but still control it. Also, internet can be shared from laptop’s WiFi over Ethernet. This also lets you access internet on the pi and connect raspberry pi to laptop display.
Before moving to connect raspberry pi to laptop display, you need an SD card having the OS preinstalled. You will find lots of blogs and tutorials about preparing an SD card for the Raspberry Pi. But if you are a beginner, you can simply download this free beginner’s guide eBook on pi: Raspberry Pi guide. This will show how to install the OS for the raspberry pi.
After setting up your SD Card, insert it into the raspberry pi. Next, for powering the pi connect your micro USB cable to it. Also connect your raspberry pi to the laptop via an ethernet cable. And connect the keyboard & mouse to it. Now, connect the HDMI display (the HDMI is only required for running the pi for the first time). Now power on your Pi. And follow the next steps to connect raspberry pi to laptop display.

Step 2 : Sharing internet over ethernet

This step explains how you can share your laptop internet with the raspberry pi via Ethernet cable.
In Windows : For sharing internet to multiple users over Ethernet, go to Network and Sharing Center.
The Best way to Connect Raspberry Pi to Laptop display Board
Click on Properties (shown below), then go to Sharing and click on “Allow other network users to connect”.
Note : Doing this will provide a dynamic IP to the Ethernet port of your laptop and other Devices connected to your laptop. Now, for checking the IP assigned to your laptop, click on the new local area connection link created:
As shown above, the IP assigned to my laptop is 192.168.137.1. For checking the IP assigned to the connected ethernet device, do the following. Considering that IP assigned to your Laptop is 192.168.137.1 and subnet mask is 255.255.255.0 :
  • Open command prompt.
  • Ping on broadcast address of your IP. (Type) Eg: ping 192.168.137.255
  • Stop the ping after 5 seconds.
  • Check the reply from device: arp –a

Step 3: Setting Up the VNC Server to Connect Raspberry Pi to Laptop Display

If you have an HDMI display: Using the connected HDMI display on your pi, you should install VNC server in raspberry pi. Open the LX-Terminal and type the following commands to install VNC:

$ sudo apt-get update

$ sudo apt-get install tightvncserver

If you don’t have an HDMI display: If you do not have a display even for one time setup, then no need to worry. Install Putty as per your windows configuration and via SSH you can connect with your raspberry pi. And, as you get access of your pi terminal, run the same commands as above to install VNC. Starting VNC Server on Pi : For starting VNC, enter the following command in SSH terminal:

$ vncserver :1

You will be prompted to enter and confirm a password. This will be asked only once, during first time setup. Enter an 8 digit password. Note that this is the password you will need to use, to connect to the Raspberry Pi remotely. You will also be asked if you want to create a separate “read-only” password – say no (n). Yippeee :)….The VNC server is now running on your Pi and so we can attempt to connect to it. But first we must switch to the laptop, from which we want to control the pi. Then setup a VNC client to connect to the pi.


For more detail: The Best way to Connect Raspberry Pi to Laptop displayThe Best way to Connect Raspberry Pi t


About The Author

Ibrar Ayyub

I am an experienced technical writer holding a Master's degree in computer science from BZU Multan, Pakistan University. With a background spanning various industries, particularly in home automation and engineering, I have honed my skills in crafting clear and concise content. Proficient in leveraging infographics and diagrams, I strive to simplify complex concepts for readers. My strength lies in thorough research and presenting information in a structured and logical format.

Follow Us:
LinkedinTwitter

Leave a Comment

Your email address will not be published. Required fields are marked *

Scroll to Top