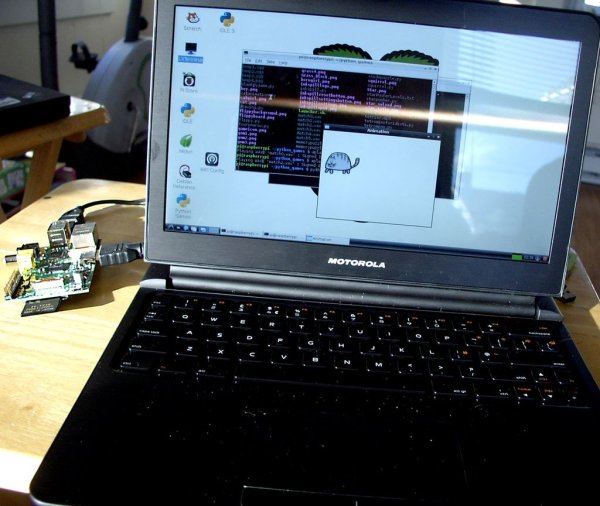
Now that you have your nifty new Raspberry Pi, you'll need a display for
it. Teensy analog monitors are pretty cheap, but what you really want is a
decent HDMI display. Unfortunately, they're expensive, running from
$150 on up into the thousands for the huge ones. But, for about $75
(or even as low as $40, used, on eBay) you can get a discontinued
model of the notorious Motorola Atrix Lapdock, the one that sold for
$500 a couple of years back, and it was a bargain at that price. The
lapdock incorporates a razor-sharp 11″ HDMI display, an almost-adequate
keyboard-with-trackpad, twin speakers, and a high-capacity battery —
all in a thin two-pound package.
The Atrix Lapdock was manufactured to mechanically connect with the
now-discontinued Motorola Atrix smartphone, in effect turning it into a
laptop computer. The lapdock has two plugs on a foldout hinge — a male
micro-HDMI plug and a male micro-USB-A plug. These neatly mate with
an Atrix phone, slipping right into appropriately positioned jacks on the side of the phone.
Fortunately for us, the lapdock's USB and HDMI ports are electrically
standard, even if the physical connectors aren't. If we could just find the
correct cables and adapters, we might be able to hook up our Raspberry Pi.
Maybe. Hopefully. . . .
Yes, it can indeed be done!
See
http://rasathus.blogspot.com/2012/10/a-raspberry-pi-laptop-easy-way.html
for example.
In this Instructable I will break down the process in detail, with
appropriate explanation and close-up pictures.
Step 1: Parts Required
We need cables and/or adapters to hook up from:
- The Raspberry Pi's standard HDMI jack
- to the lapdock's micro-male HDMI plug.
- One of the Raspberry Pi's standard USB jacks
- to the lapdock's micro-male USB plug.
HDMI
HDMI Micro Female/Female Adapter
(Such as this, for example.)
HDMI cable, micro-male to (full-size) male
(for example,
6ft Micro HDMI to HDMI Male M/M Cable for Droid Razr Atrix 2)
or, substitute for the above adapter and cable,
an HDMI micro-female to (full-size) male dongle.
USB
USB micro-female to (full-size) female cable
(Such as this one, for example.)
USB A-male to A-male adapter (each end full-size)
(Such as this one, for example.)
Total cost for adapters and cables:
somewhere in the range of $10 – $20,
and closer to $10 if you're a shrewd and lucky shopper.
Getting your hands on the cables and/or adapters is the hard part.
After that, it's just a matter of actually making the connections.
Step 2: Hooking Up
Open up the the narrow panel on the back of the lapdock and take a good
look at the two jacks protruding from it.
The micro-HDMI adapter (or the dongle, if you're using that instead) slips
over the end of the micro-HDMI jack on the lapdock. The micro-female end
of the USB cable slips over the end of the micro-USB jack on the lapdock.
Note that it may be necessary to shave a bit off the micro-female end
of the USB cable if it doesn't go down far enough over the male jack on
the lapdock (refer to pictures).
Now, we'll hook up to the Raspberry Pi.
The USB cable connects to one of the USB jacks on the Raspberry Pi.
Since the cable terminates in a female jack, we'll need either an A-male
to A-male USB adapter or an A-male to A-male USB cable. The A-male
end plugs into one of the Pi's full-size USB jacks.
Our HDMI cable has a micro-male plug on one end, and this goes into the
micro-female HDMI adapter on the lapdock. The full-size male end of the
cable plugs into the HDMI jack on the Raspberry Pi.
Finally, there's the issue of powering the Raspberry Pi.
The latest revision of the Model B, rev. 2.0, omits the fuses on the
USB bus, so the Pi can be powered from one or the other of the USB ports.
This mean that the Pi can get its power from the lapdock, through the
same USB cable previously discussed. Owners of earlier model Pis have a
couple of options for power. The simplest is to just plug a power cable
into the micro-USB power port on the Pi, as usual.
Step 3: An alternative HDMI adapter
Rather than a set of micro HDMI adapter cables, as shown in the previous step,
you can substitute a micro-female to male HDMI dongle. This has the advantage
of holding in place the Pi at the back of the lapdock.
You will need to whittle down the dongle on its side and back,
so it will fit all the way down onto the lapdock HDMI male plug,
and to allow room for the USB cable to fit alongside. See pics.
Caution: Take care when plugging or unplugging the dongle.
There's quite a bit of leverage there, and a wrong move could
conceivably break off the lapdock's micro-HDMI connector.
Update: Yet another alternative is the newly available HDMI micro-female-to-standard-male cable
(see last pic). These critters are rather pricey, about $7 each, including shipping.
Step 4: Another Way to Hook UP
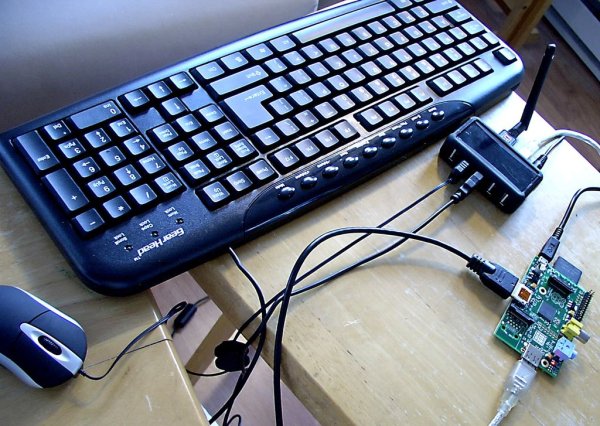
Would it work if we connect the Pi only to the HDMI connector on the Lapdock?
This would use the Lapdock only as a display, with the keyboard and trackpad
disabled. Yes, it works!
Advantages:
- More flexibility in the setup.
- You can use a better keyboard and an optical mouse that is more responsive than the trackpad on the Lapdock.
- Since the Pi is not powered from the Lapdock, there is no issue with power off when the Lapdock lid is closed.
Disadvantages:
- There's a mess of cables spread out all over the place, and the setup is much less portable.
- You need to add a powered USB hub.
- You need to connect a power supply to the Pi power jack.
- The two USB jacks on the Lapdock are no longer available.
- Not all keyboards work with this setup.
Step 5: Powering Up
Power up the lapdock by plugging in its supplied AC adapter. If the
battery has been charged, then this is optional.
Open the lid of the lapdock. The display will be dark, since there is
no signal coming in yet. Now, hook up the USB cable, with appropriate
adapter if necessary, as previously discussed. The Pi will not yet power
up from the lapdock because . . . the lapdock needs to sense a signal
source attached to its HDMI jack in order to supply power through its
USB bus. So, we will at this point attach the micro-female-to-micro-female
HDMI adapter (with micro-male end of the HDMI cable inserted) to the
lapdock's micro-male HDMI jack. At this point, you may get a no-signal
message on the lapdock screen. Now . . .
Let's carefully plug the full-sized male end of the HDMI cable into the Pi's HDMI jack.
What's happening? The power and activity LEDs on the Pi board have lit up.
And, look! We're getting the bootup messages scrolling on the screen.
We're up and running.
Note that on your first boot you may have to type startx on the console
command line. After that, you'll be able to set an automatic boot
to X Windows.
Step 6: The Wi-Fi Connection
We can always use an ethernet cable to connect the Pi to a router to get
on-line, but wireless is so much more convenient. Many of the mini wifi
dongles work out of the box, though you may need to get drivers or do some
configuration.
The Tenda W311MI Pico Adapter and the Edimax EW-7811 work with the Pi.
They cost about $10 apiece. (There's a fairly complete list of working hardware for the
Pi on the eLinux page.)
You can plug the wifi dongle into a USB jack on the back of the lapdock,
near where the power cable plugs in. The first time you boot up with the
dongle in place the Pi may not recognize it or you may have to configure
it by clicking on the Wifi icon. After that, you'll get on-line automatically,
if you've done everything correctly (and the moon phase is right …).
Step 7: Tips and Troubleshooting
What if you don't get a display on the lapdock or if the display is
intermittent or flaky?
The HDMI cable may be bad. This is especially true of cheap cables,
where the metal shell is improperly grounded. Try a different HDMI cable.
Closing the lid on the lapdock causes the Pi to turn off and/or reboot.
This is normal behavior for the lapdock. It was designed as a power-saving
feature. Hooking up an external power supply to the micro-USB power
connector on the Pi fixes this.
Using the lapdock's trackpad and mouse buttons is so darned frustrating.
If the cursor freezes, then this means the trackpad has turned off.
Turn it back on by tapping in the upper left-hand corner of the trackpad,
so the light comes back on. Or, you can always get a cheap optical USB
mouse and hook it up to a USB slot on the Pi.
Highly recommended is hooking up a powered USB hub to one of the Pi's
on-board USB slots.
The standard Linux distro for the Pi is Raspbian, but try some of the other ones
as well.
The HDMI and USB plugs in the back of the Droid lapdock are rotated 180 degrees from the
ones on Atrix lapdock, but that makes no difference when hooking up a Raspberry Pi.
On balance, though, it's quite usable, especially considering that this baby is available (used)
on eBay for $35 – $40, with shipping included. See
http://www.ebay.com/itm/Motorola-Droid-Bionic-Lapdock-11-6-Screen-w-QWERTY-Keyboard-/221249196919,
for example. Note that because the HDMI plug on this model is at a different angle from the Atrix
lapdock, an micro-HDMI cable with protruding metal jack gives the best connection (see picture).


